
Project Settings
All about the Project Settings tab.
Title, Description, Name, Image
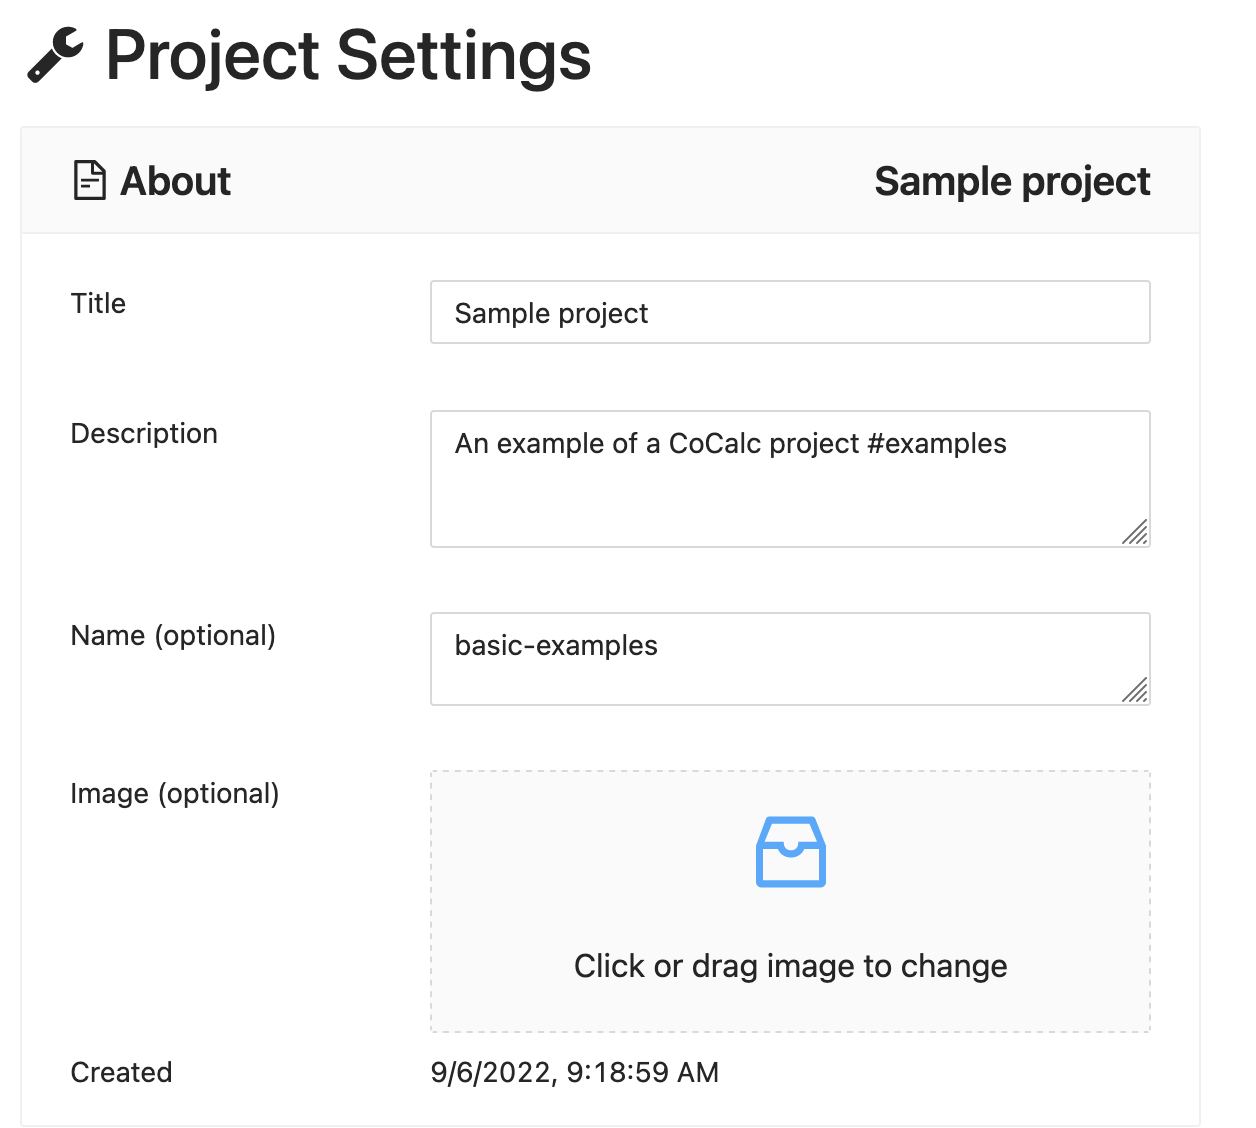
The Title, Description, Name, and Image for a project can be changed at any time.
Title and Description
Title and Description fields are both used when searching for matching text under Projects. You can include hashtags in either field, to simplify your searches.
Project Name
You may specify a project name. Setting a project name provides much nicer URL’s for shared public documents. See Vanity URLs to learn more.
Project Image
You may upload an image for any project. It appears in many places. Both a hi-res and tiny version are stored. The tiny version is used in most places where the project title appears across CoCalc, e.g., tabs at the top, share server listing.
The bigger version appears in your project list, in shared projects when you click on a project in the share server listing, and project settings. You can click the image in the project list to open the project. The bigger version is also visible if you hover over the tab for the project after opening the project.
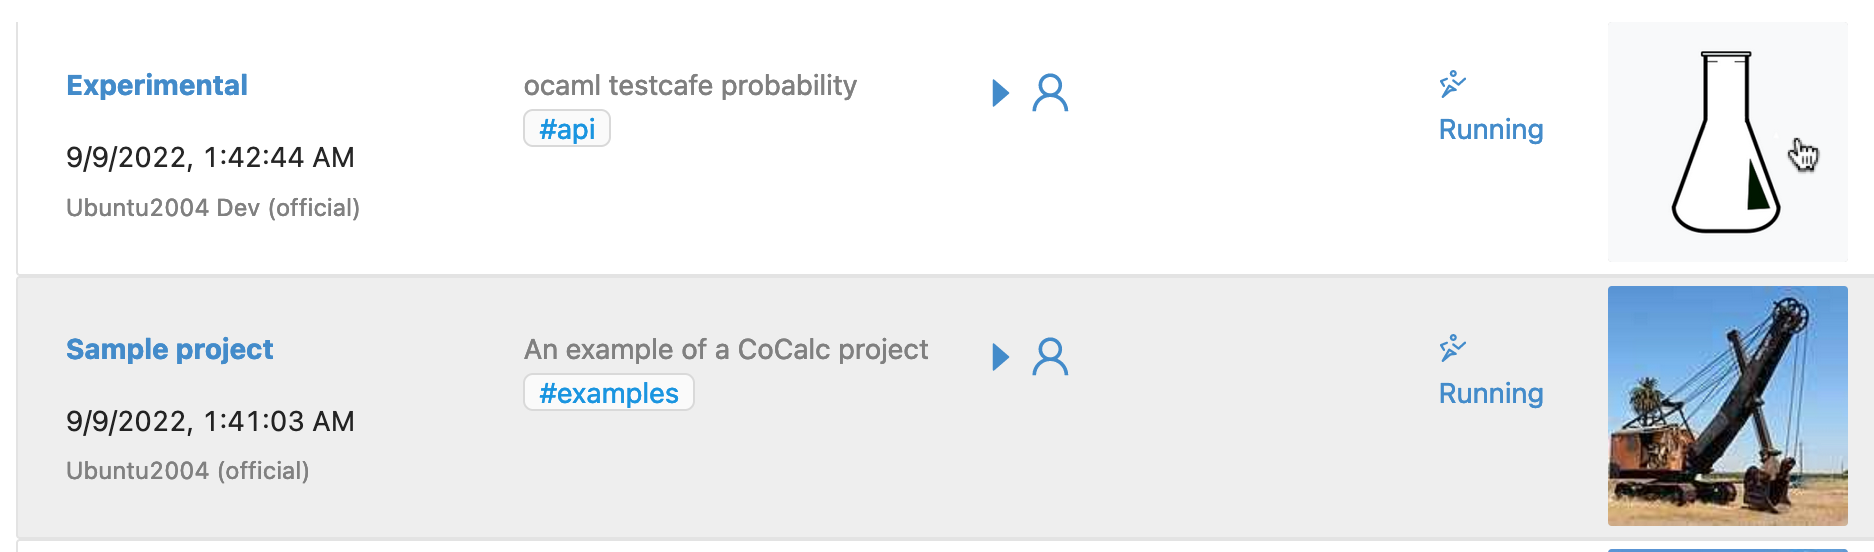
project image appears at right in project list; click to open the project
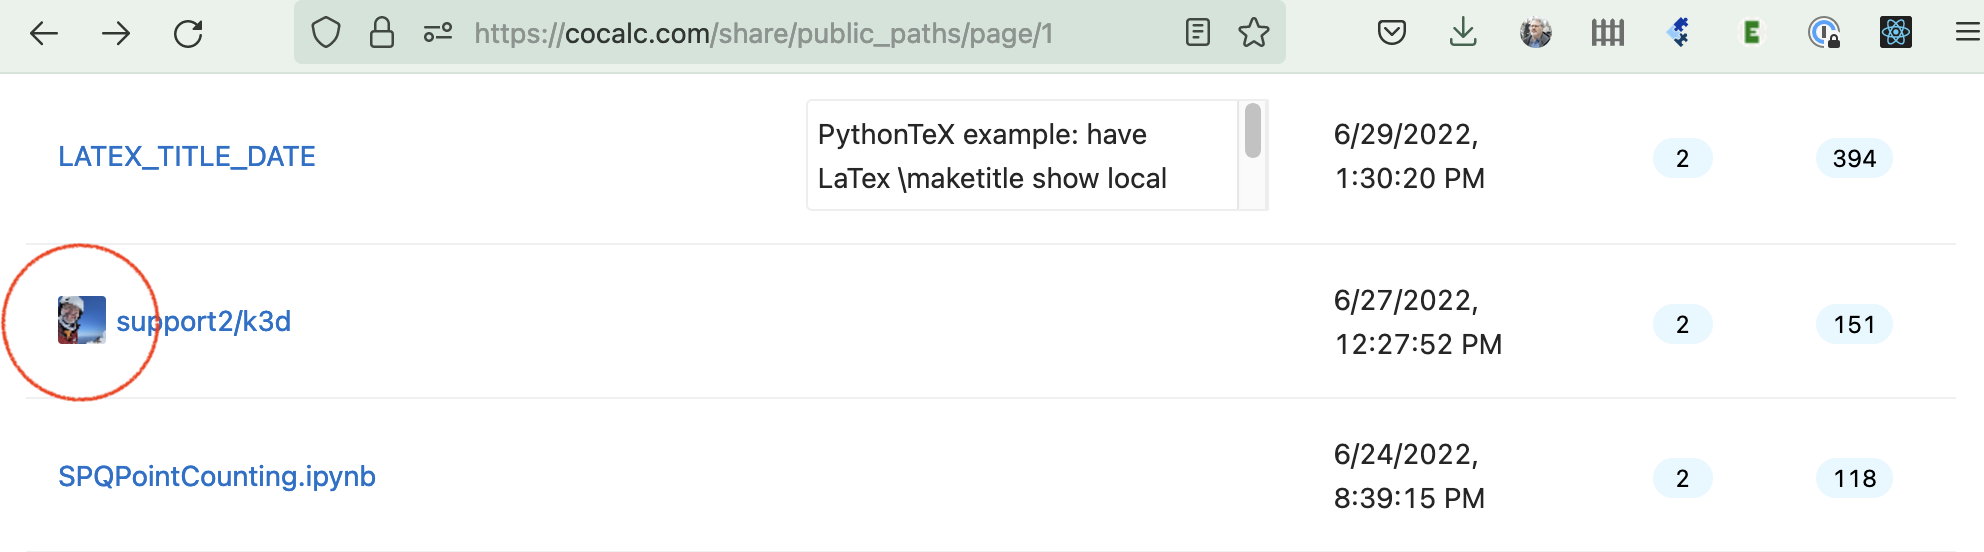
tiny project image appears at left in shared projects list

large project image appears when you open a shared project
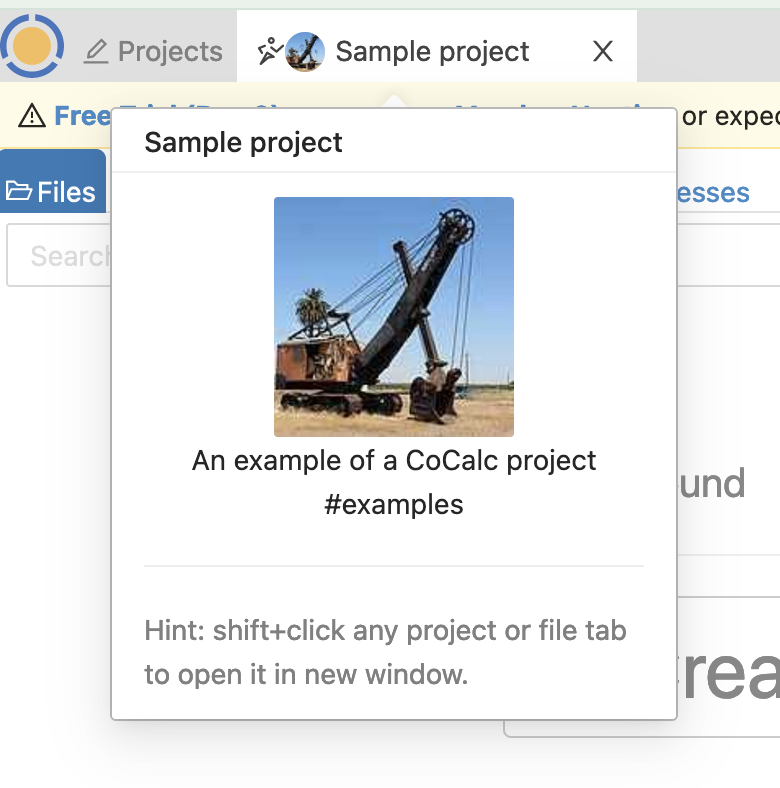
large project image appears when pointer hovers over project tab
Why Add Upgrades?
There are many reasons that you might want to have an upgraded project.
- To give your project access to the internet. For example,
To download a software package from the internet.
To use Github/Bitbucket/Gitlab with your project.
To download datasets into your project.
To connect to your project with SSH.
To get extra storage space (both RAM and disk space).
To get more compute resources.
You can share upgrades with any project that you are a collaborator on. You must be a collaborator (or owner) to update a project.
Note
For details on paid subscriptions, see Subscription and Pricing Information. Subscriptions start at $3 per month.
 Project usage and quotas
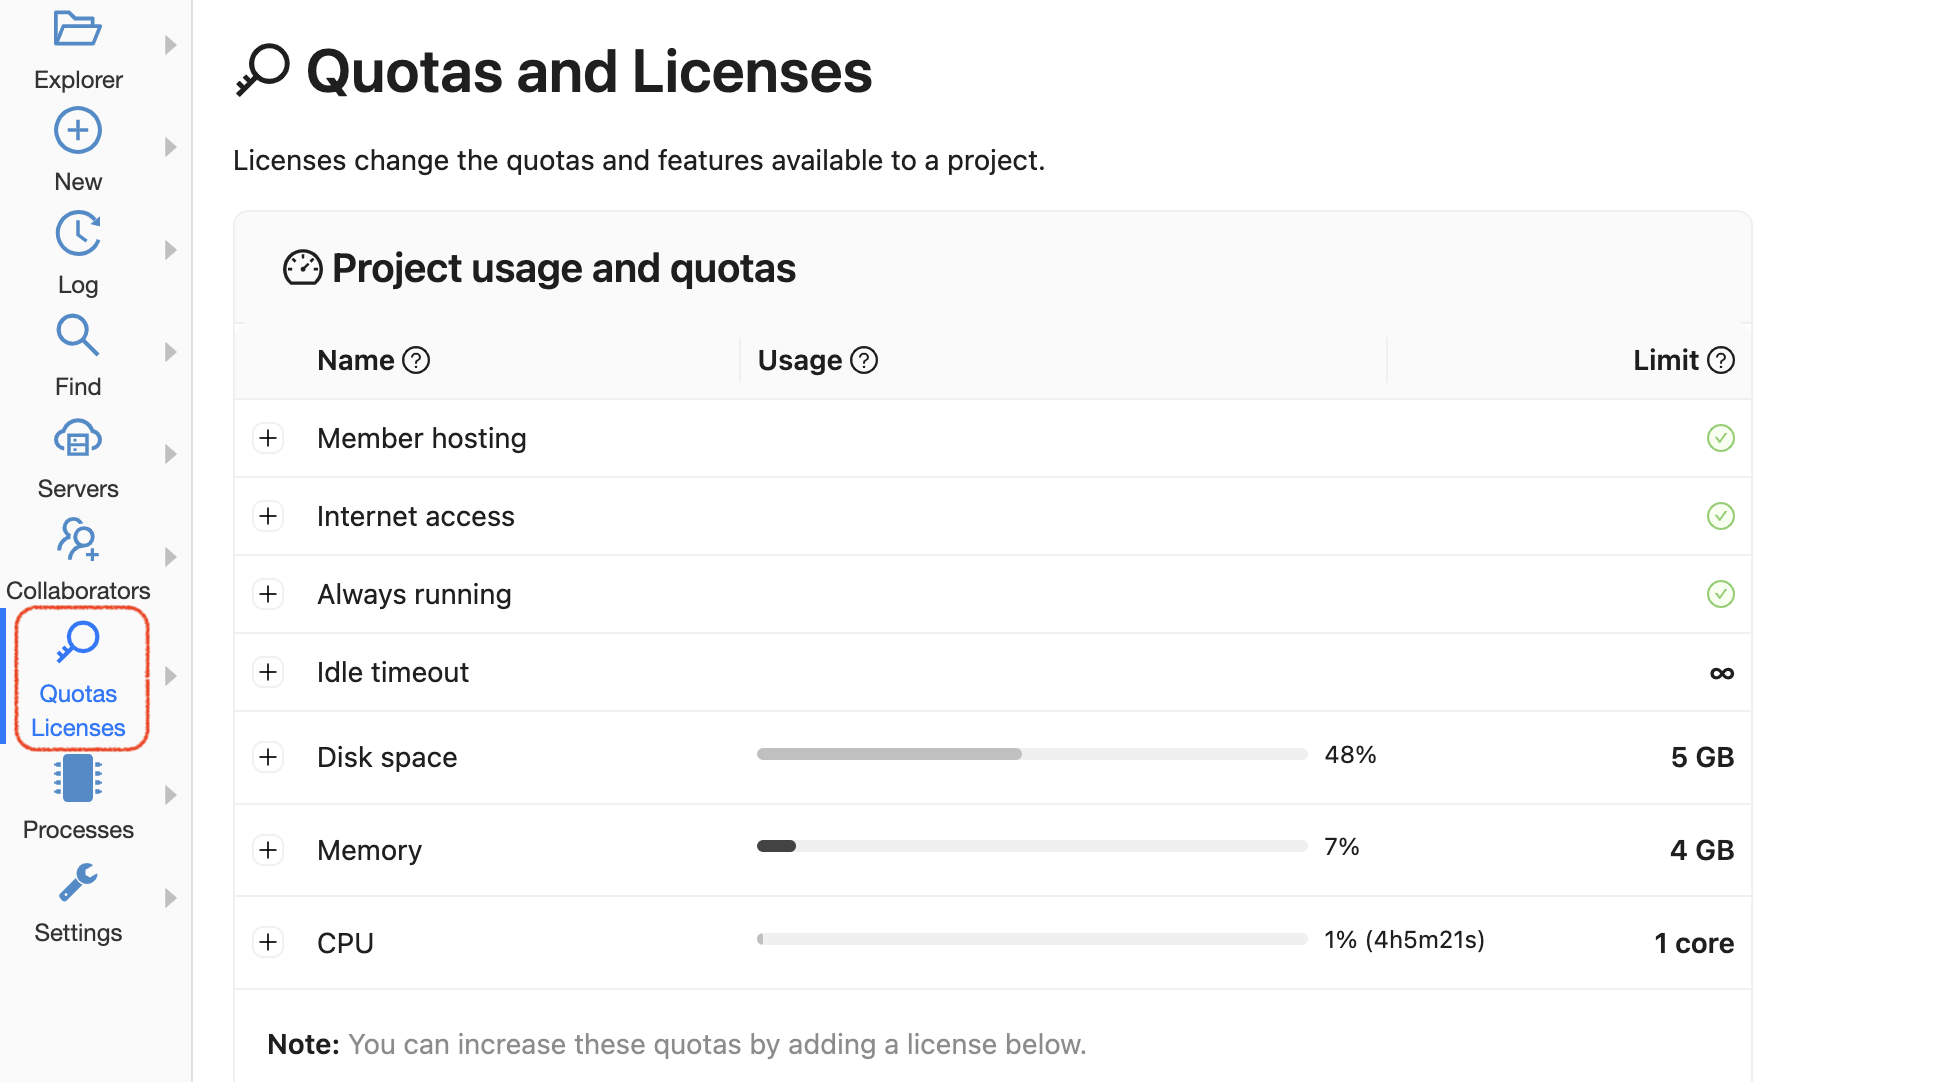
You can view upgrades applied to the current project under “Project usage and quotas”. The project must be running for values to be displayed. Here’s an example:
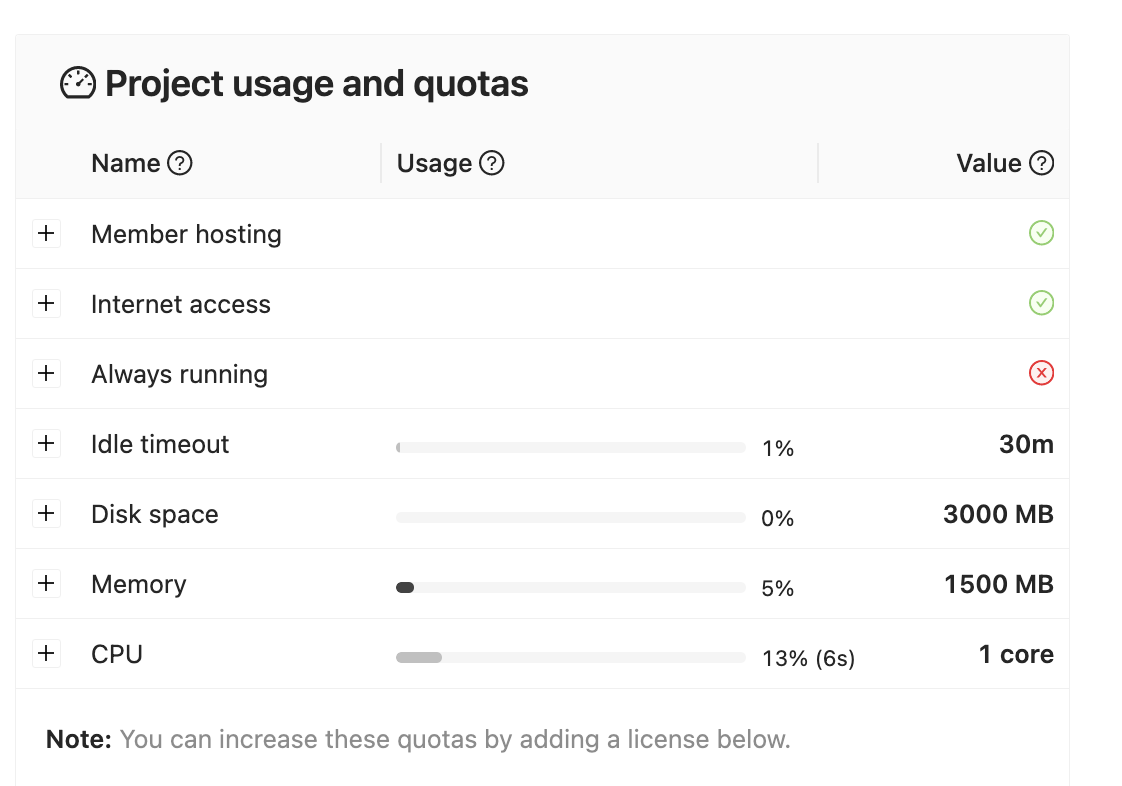
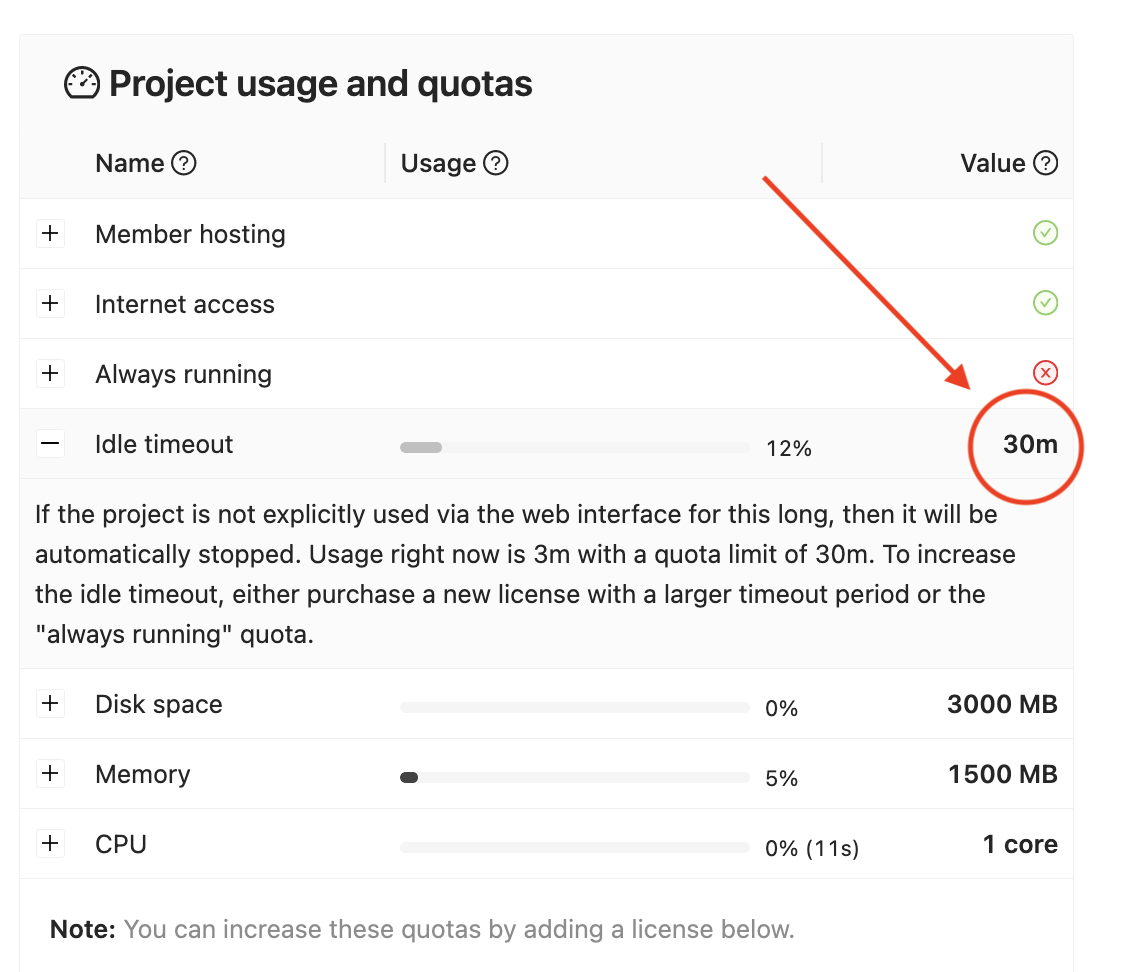
If you click on the value at the right for any setting, you will see a brief explanation of that setting. In the example, the text for Idle timeout is displayed:
Your upgrade contributions
Note
Dialogues to view and modify upgrade contributions are only displayed if you own an older updgrade package. They do not display if your purchases consist exclusively of the newer license product.
If you have any of the older non-license products, an option to view and modify resources from these will appear:
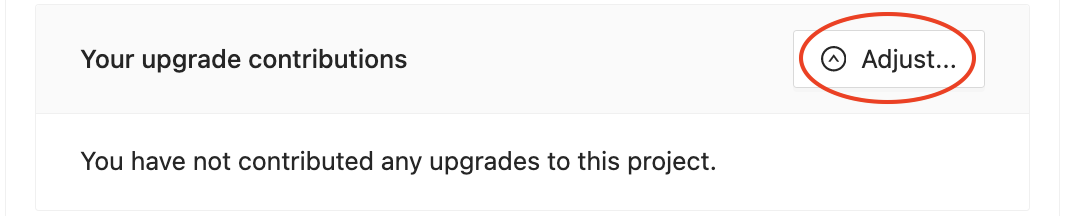
Click “Adjust” to open the dialogue. You can add and remove upgrades. Values entered must not exceed your available upgrades.
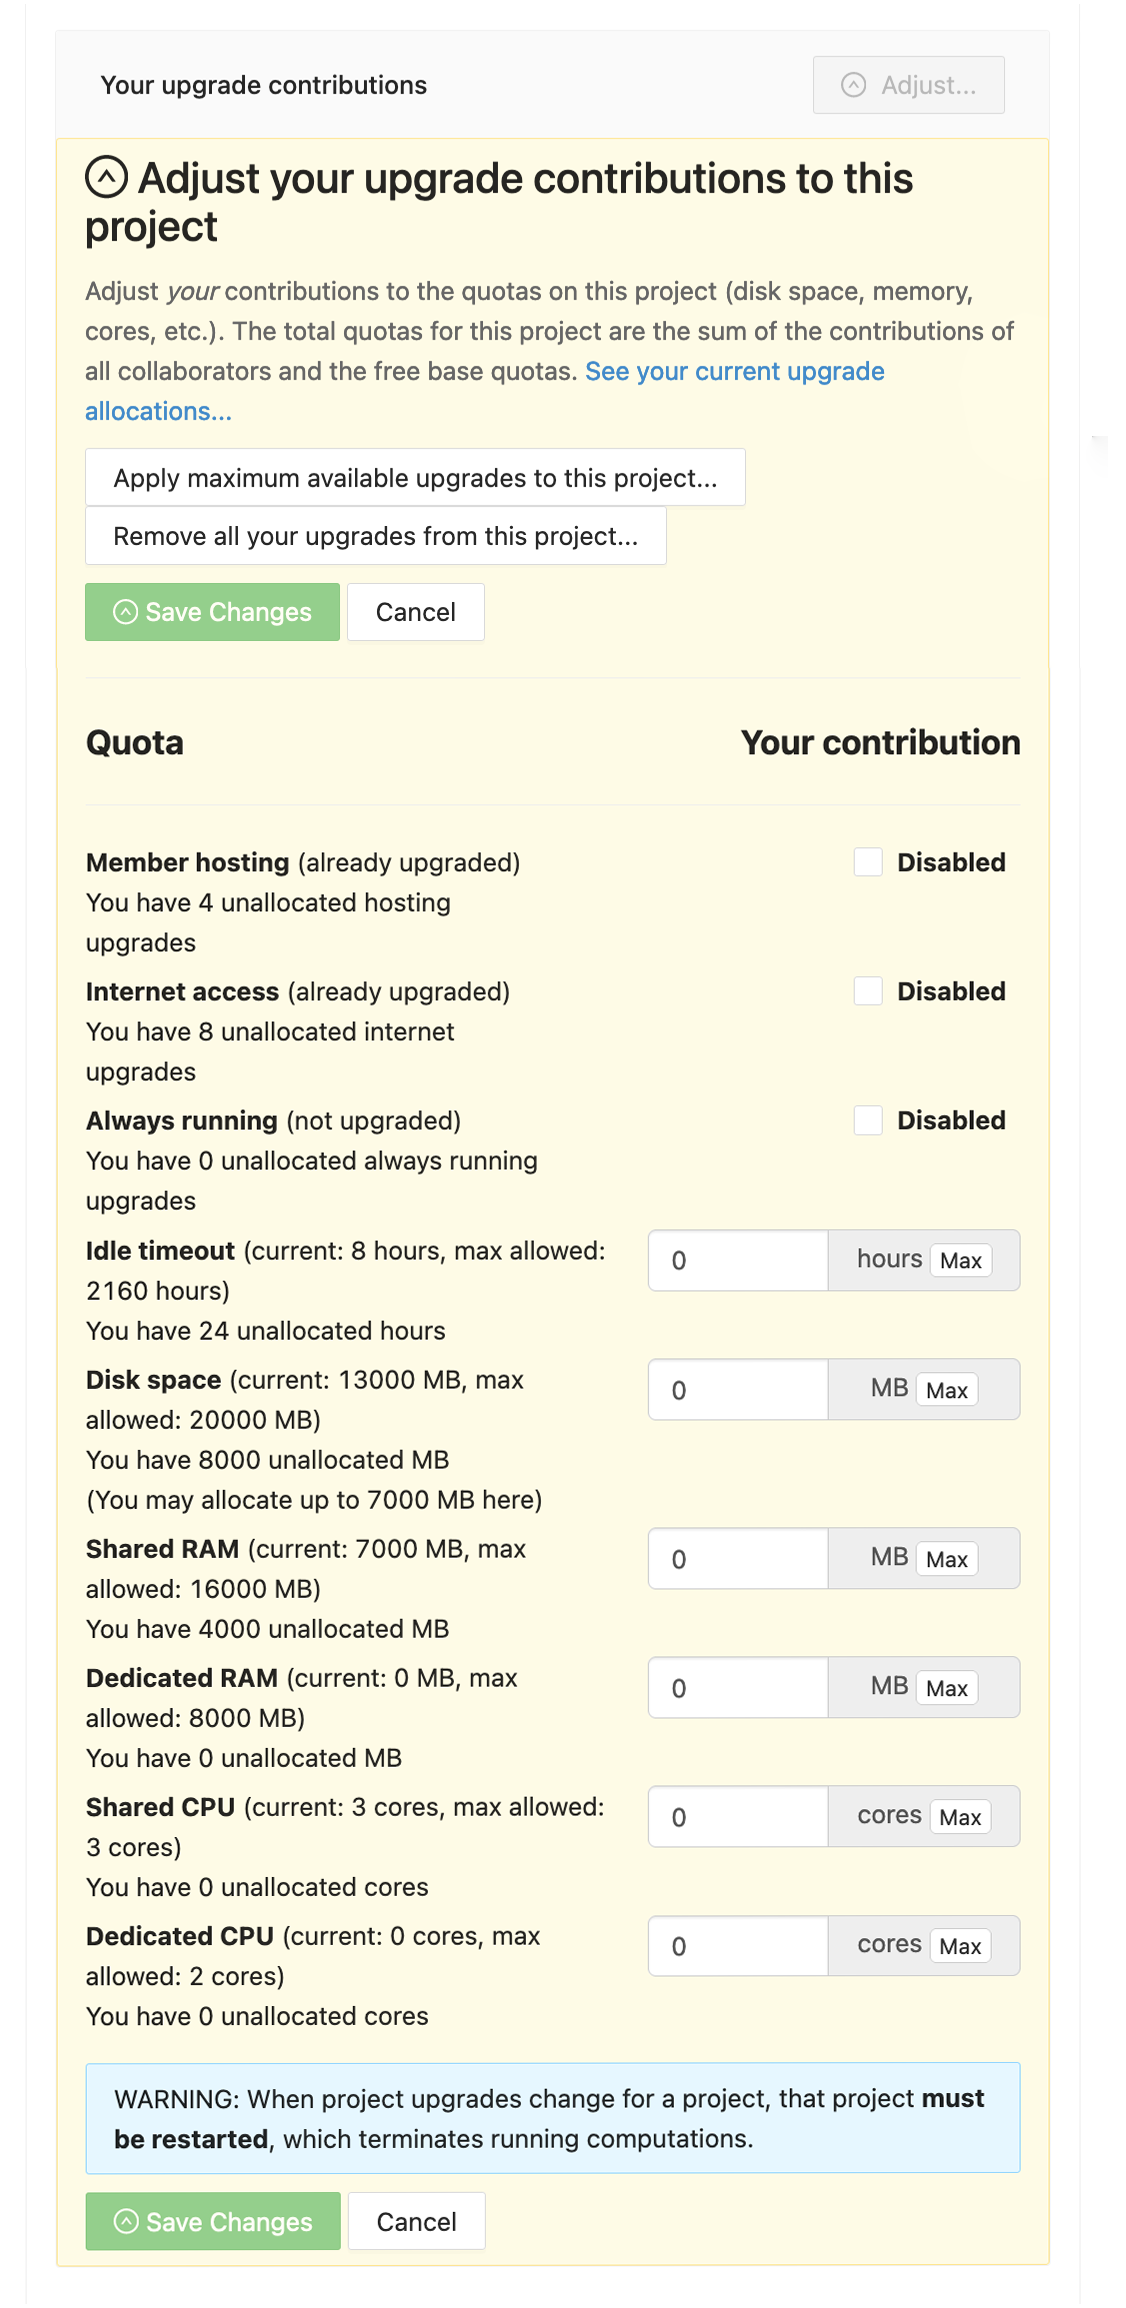
Clicking Save Changes will apply the upgrade changes and restart the project if settings have changed.
Add a License to a Project
Note
If you just bought a license and want to apply your license to a project that is showing a warning banner at the top that upgrades are needed, then this section is for you.
To apply a license to a project:
Open the project.
In the left Activity Bar, click Upgrades to open the Upgrades panel.
project settings, quotas and licenses
Scroll down to the Licenses section. You will see the following:
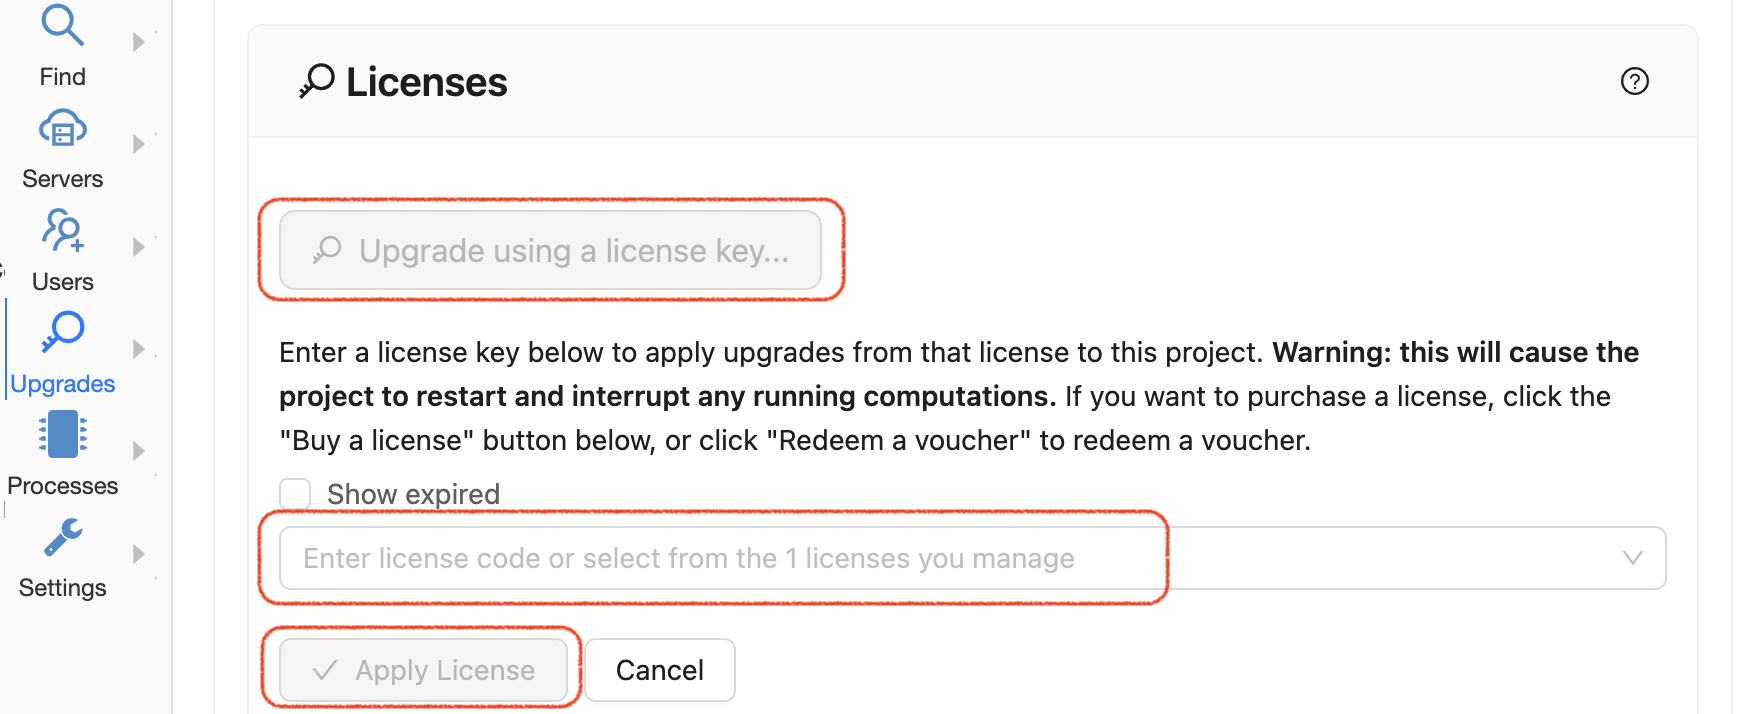
dialog to add a license key
Click the button for Upgrade using a license key….
Click in the empty area that says Enter license code or select from the <n> licenses that you manage. If you have any licenses, you will see a list of available licenses that you can apply.
Click to select the license you want to apply to the current project. Doing this will enable the blue Apply license button.
Click Apply license.
Restart the project.
You can repeat the above steps to add more licenses to the current project. Or you can remove a license!
If the license is not successfully applied, see License Error Messages.
Project URL
Each CoCalc project has a unique URL. You can find the URL for the current project under the “Licenses” section of the project settings tab, as shown above. This URL can useful when contacting support and in some configuration tasks.
Hide or delete project
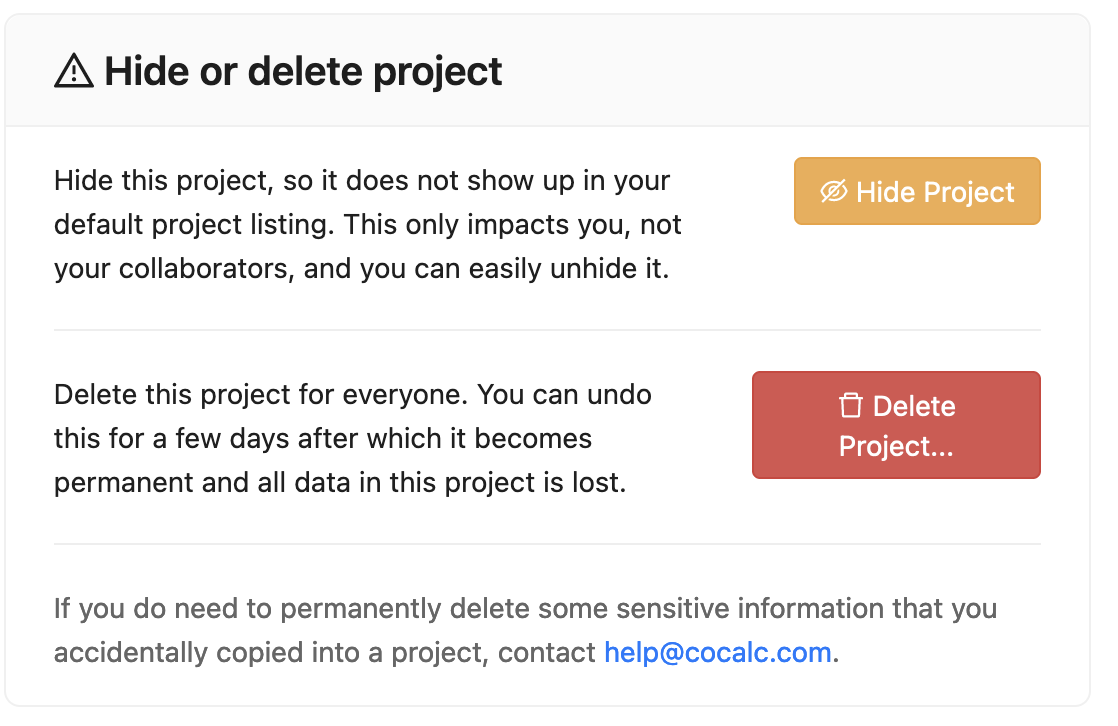
Next in the Project Settings window is the section for hidden and deleted projects:
Hiding a project
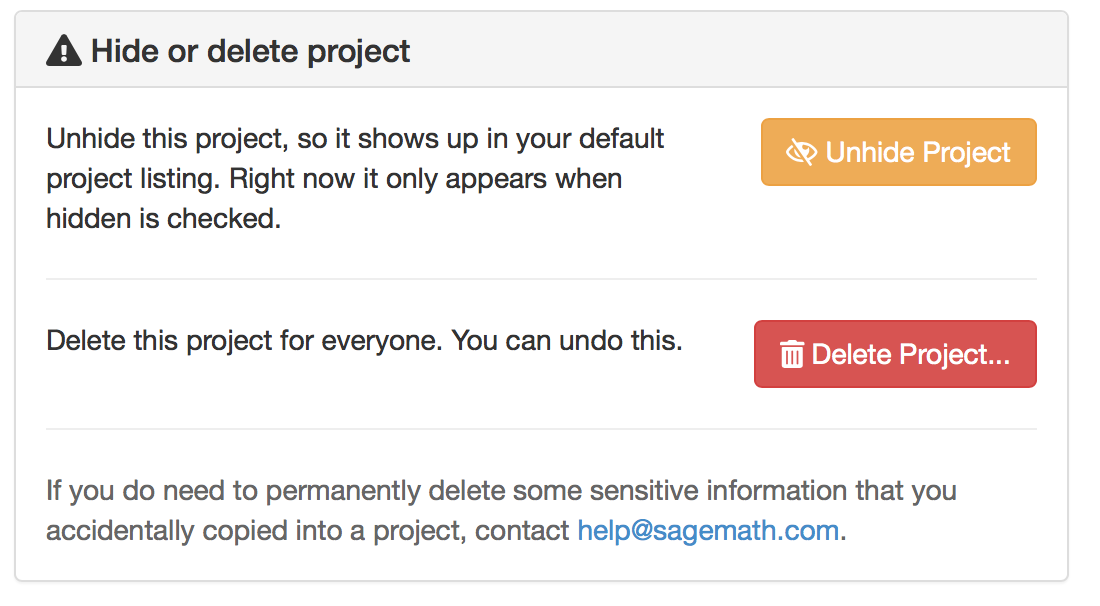
If you click Hide Project, the button changes:
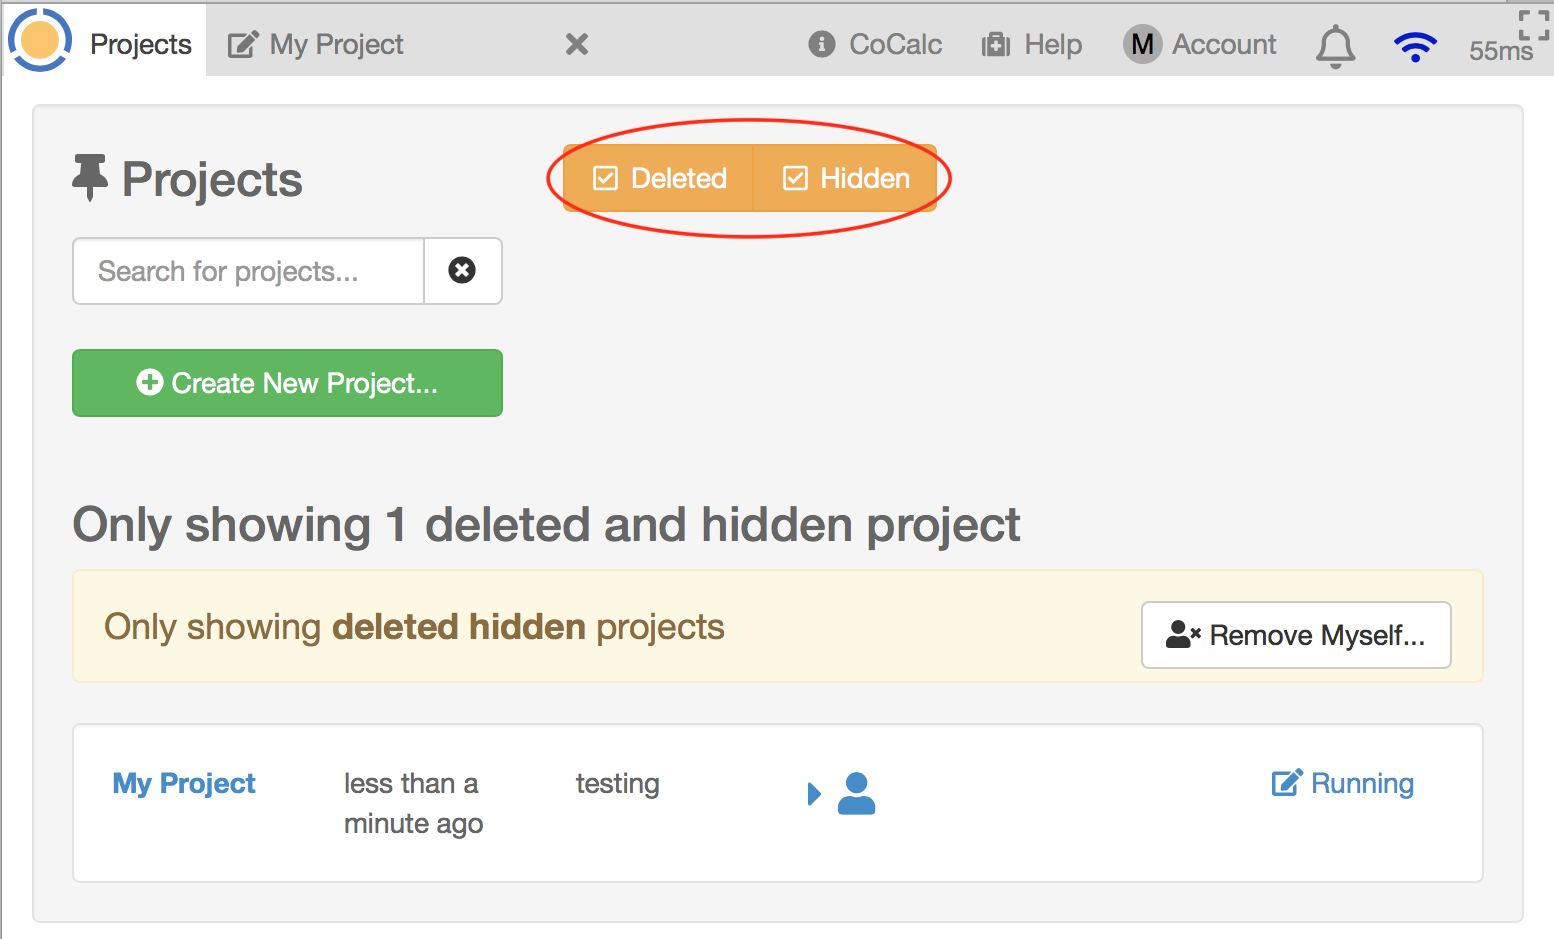
And now if you click the Projects button at upper left, you will have a checkbox that lets you view hidden projects. The checkbox only appears if there are hidden projects.

Clicking Unhide Project instantly makes the project visible in the normal project list again.
Deleting a project
When you delete a project, initially only the visibility of the project in the project list is changed. You fully lose access to the project after 30 days. We completely remove all users from the project, and there’s no way for them to get their work back.
If you urgently need to permanently delete information that you accidentally copied into a project, contact help@cocalc.com
If you click Delete Project, the button changes:
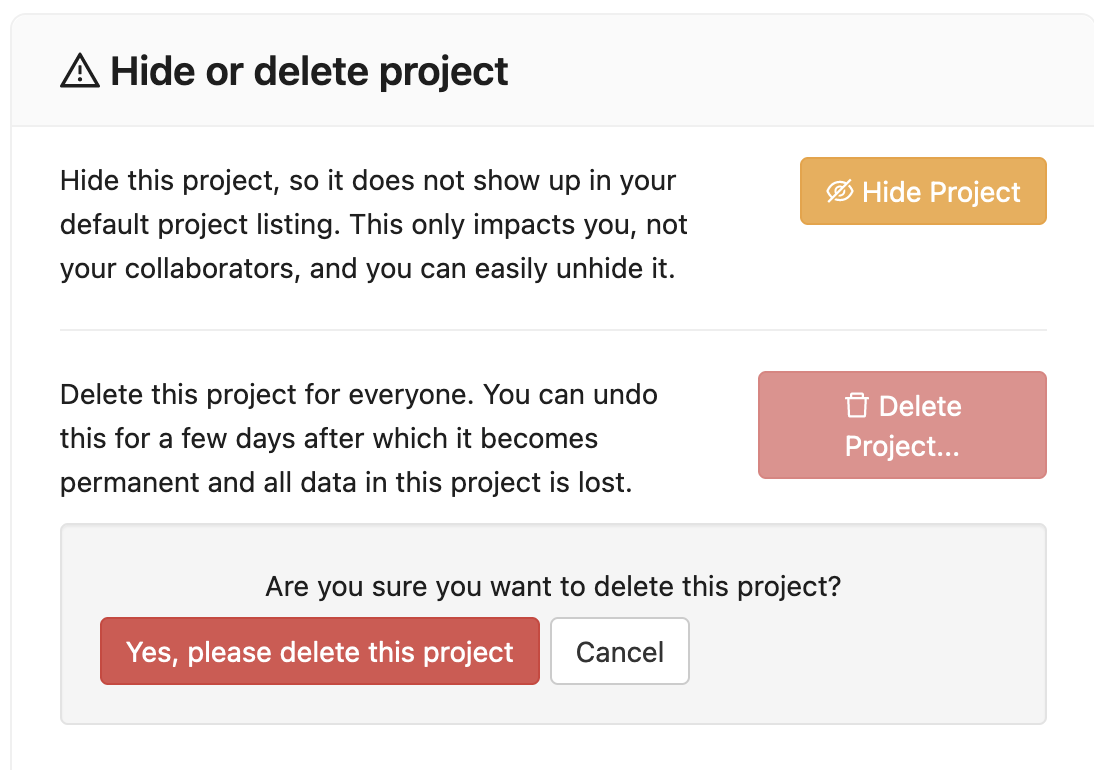
Click Yes, please delete this project to confirm, and the screen changes again:
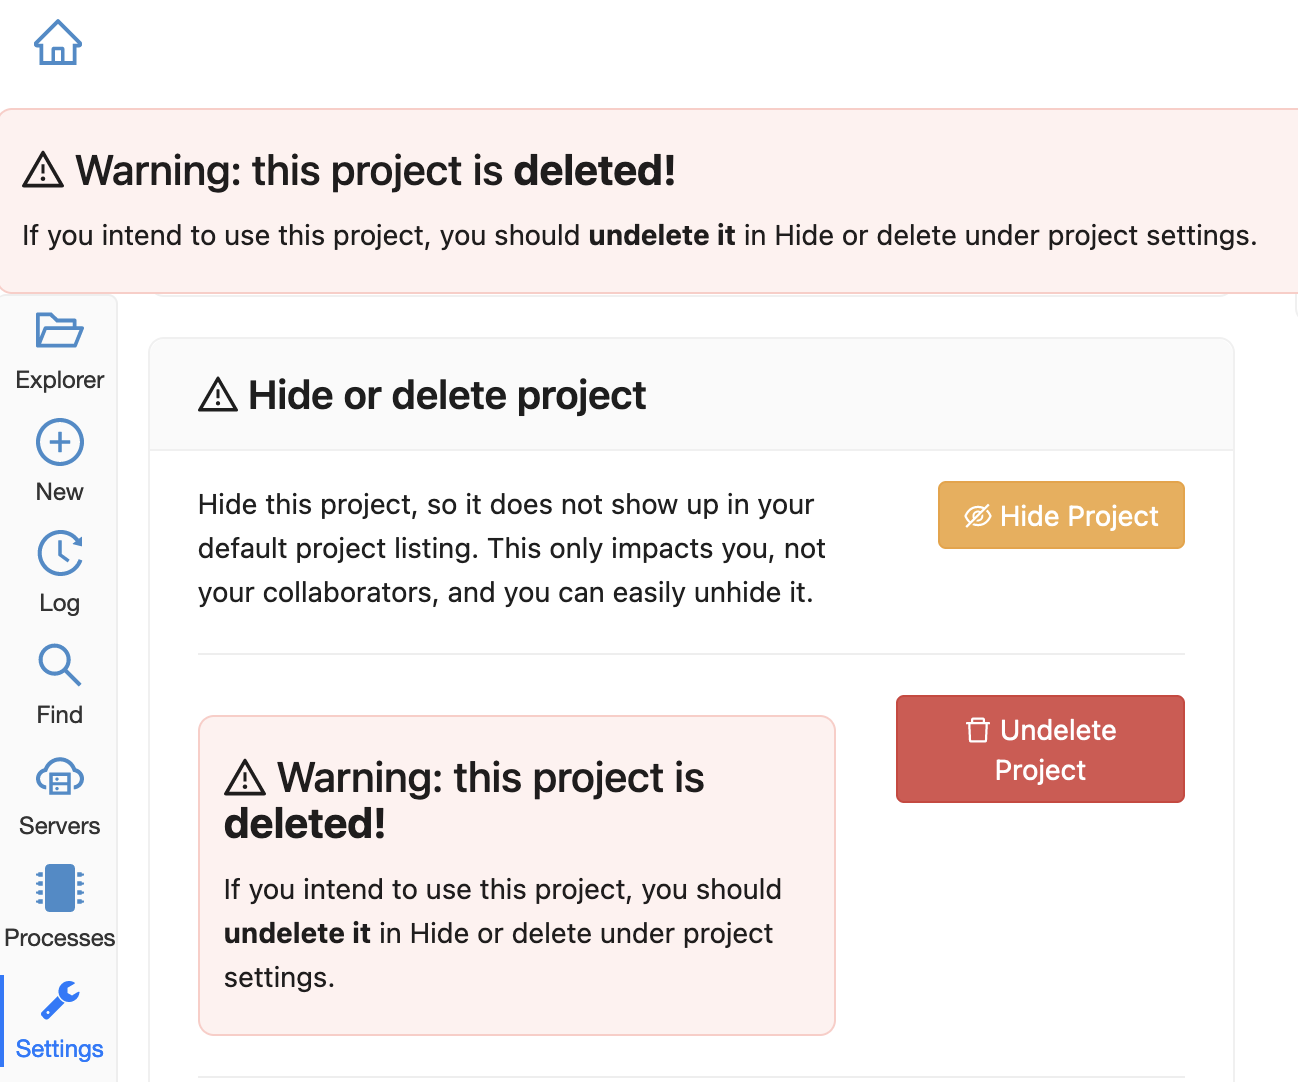
Note the warning banner that appears at the top.
The project will not appear in the normal project list for you and all collaborators on the project.
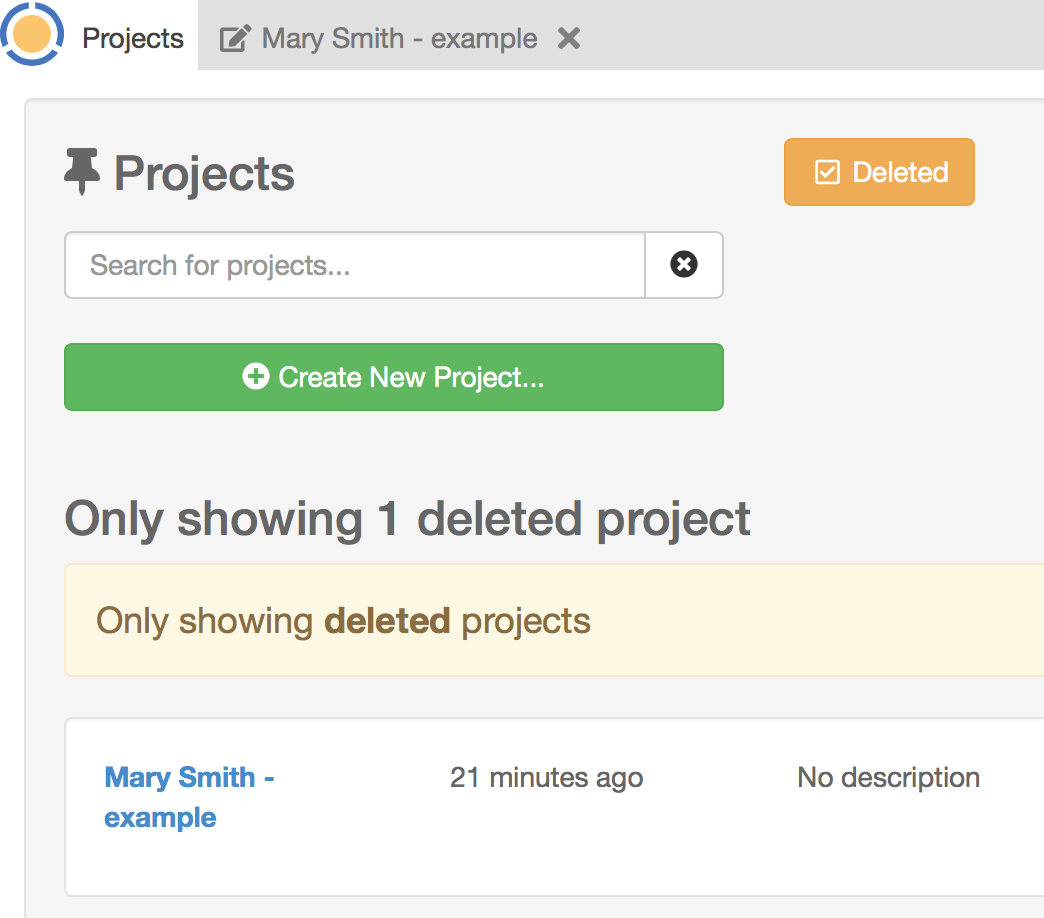
And now if you click the Projects button at upper left, you will have a checkbox that lets you view deleted projects. The checkbox only appears if there are hidden projects.
Clicking Undelete Project instantly makes the project visible in the normal project list again for you and all collaborators on the project.
Setup SSH Keys
Using SSH
For addtional detail, see the blog posting Using SSH with CoCalc.
You can connect to a CoCalc project from your local desktop using SSH (Secure Shell) and you can upload/download files between your computer and CoCalc using the SSH protocol, with scp and rsync command line tools. You must have owner or collaborator status on a project for SSH access to be permitted.
Note
When logging into a project with ssh, make sure the project is running. If the project is stopped, or is in the process of starting up, you may get a message of ‘Permission denied’ or be prompted for a password.
SSH authentication uses a pair of keys, a private key and a public key. Each key is stored in a separate file. For example, a private key might be in the file id_ed25519 and the matching public key in id_ed25519.pub. In general, private keys are not distributed, while public keys are uploaded to remote systems.
On OS X, and Linux, key pairs are stored in ~/.ssh, where ~ indicates your user’s home directory. Use the ssh-keygen command to generate a key pair. (You can do man ssh-keygen from a terminal for details on the command.)
Note
CoCalc does not support manual editing of the authorized_keys file for SSH authentication.*
To make sure you really connect to CoCalc, you can check the fingerprint of the SSH Host Key.
Configuring SSH Keys for a Single Project
This section assumes you have created an SSH key pair as described above.
Open the project Settings tab (wrench icon) for the project you want to access.
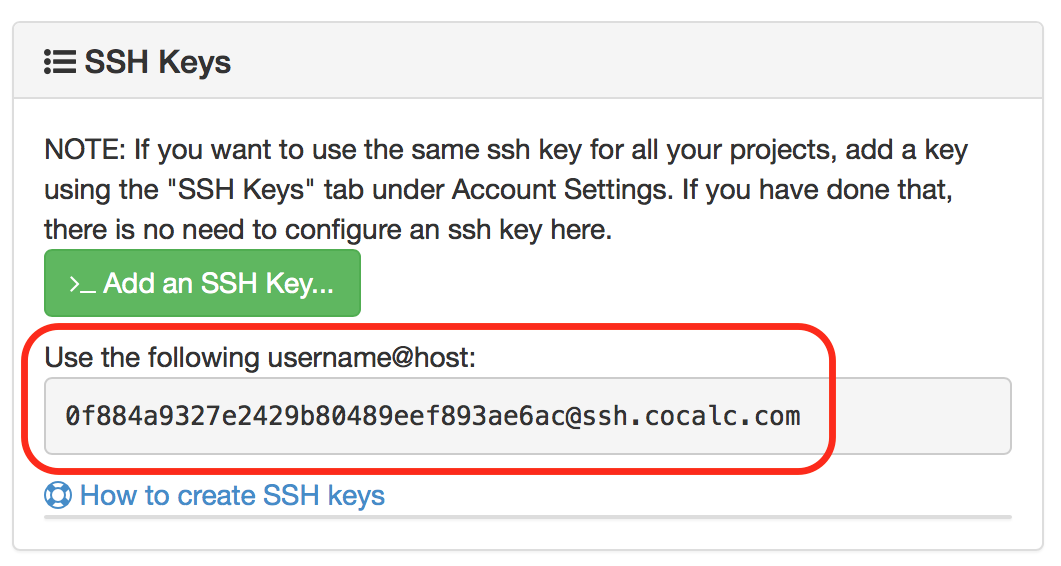
Look for the section “SSH Keys” at lower left.
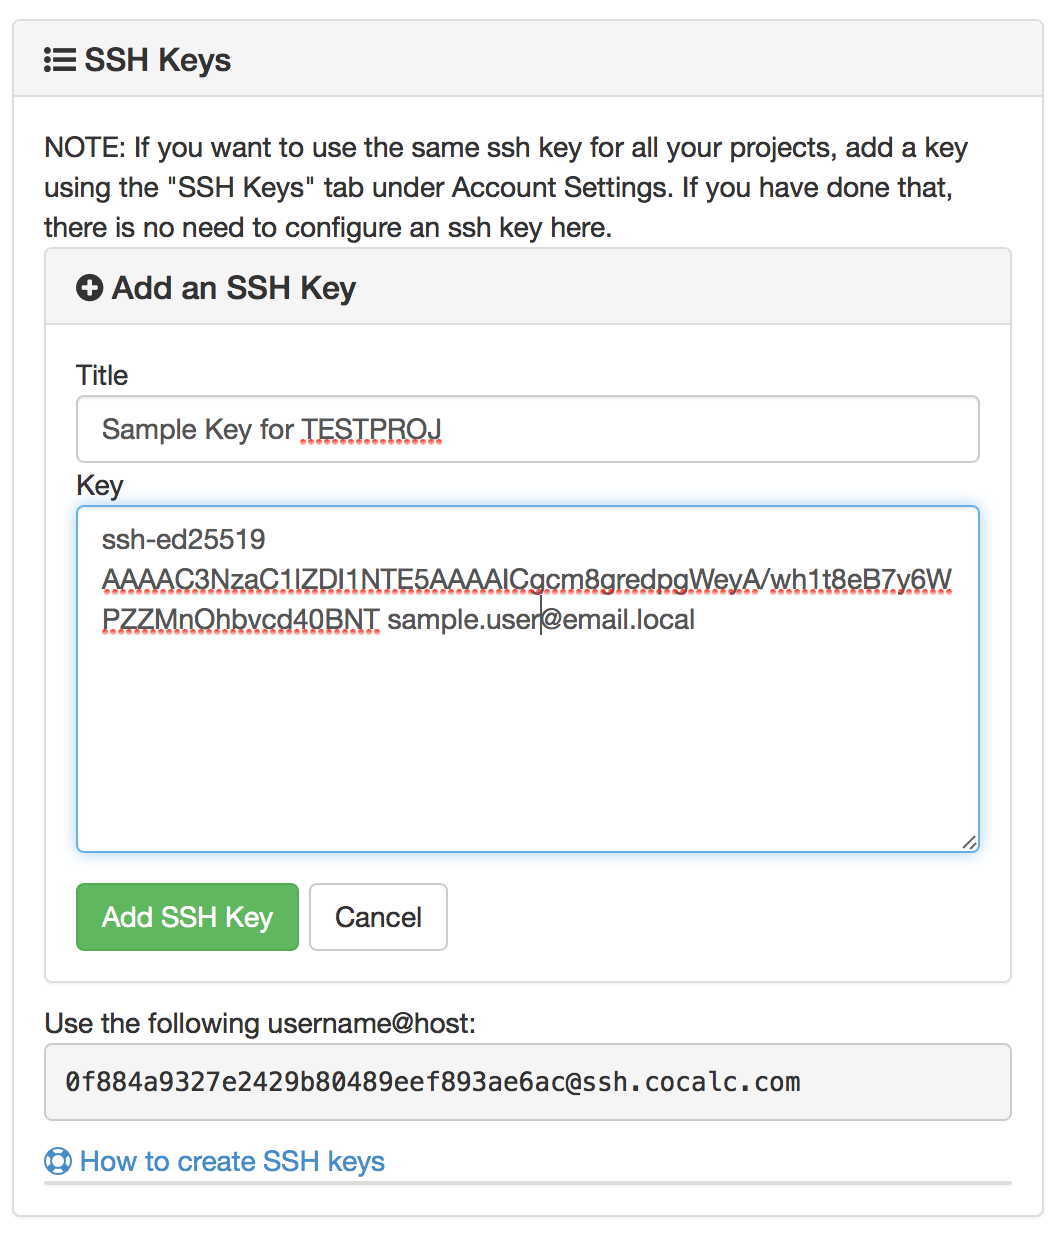
Click “Add an SSH Key”.
Enter a title for the key in the Title field. Specify a title that is meaningful to you for the key pair you are using, for example “Sample Key for TESTPROJ”.
Copy the public key into the Key field. To do this, open the file for your public key on your local computer. For example, if you are using macOS or Ubuntu, you could open a terminal and type something like the following, depending on the name of your public key file:
cat ~/.ssh/id_ed25519.pub
Use your mouse to select the contents of the key file, then copy and paste it into the Key area.
Click “Add SSH Key”. Your key is now saved for that project.
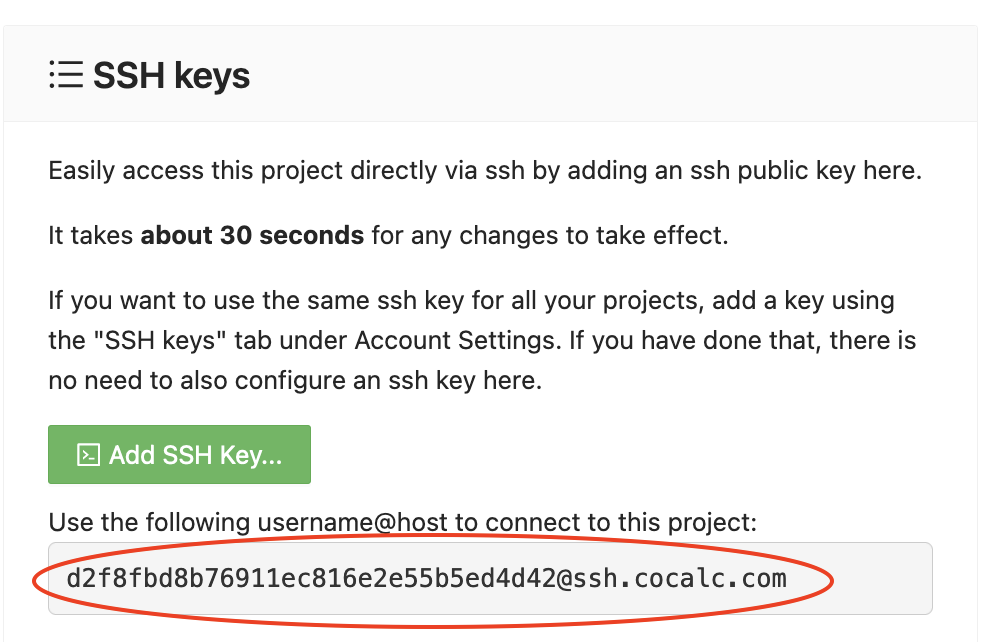
The user for the SSH connection is the project id without the hyphens. (Why? Because the project id is not a valid Linux username.) The hostname is
ssh.cocalc.com. Look for “Use the following username@host:” in the “SSH Keys” section of project status for a string you can copy and paste. For example, if the Project id is:2507078b-6e5b-43da-809a-0073f1196181
then the SSH username@host will be:
To login from your local computer, use a command equivalent to the following:
On macOS or Linux, you can specify a host alias in
~/.ssh/configto avoid having to explicitly pass the project id as above. For example, the following lines in~/.ssh/config:Host CCPROJ Hostname ssh.cocalc.com User 2507078b6e5b43da809a0073f1196181 IdentityFile ~/.ssh/id_ed25519will allow you to log into the your project from your local computer with the command:
ssh CCPROJ
You can also specify a single SSH key pair under SSH keys to use with all your projects.
Custom environment variables
Here you can set environment variables for the entire project. This feature allows you to add custom configuration for applications that are launched by the CoCalc graphical user interface, such as Jupyter notebooks and the JupyterLab server.
Enter custom environment variables as a JSON map from string to string, e.g., {“foo”:”bar”,”x”:”y”}. Unlike environment variables in .bashrc, these will be available to anything that runs in your project (e.g., Jupyter kernels). Delete a variable by setting it to the empty string. Restart your project for these changes to take effect.
The text above will appear as a reminder when you click inside the textarea for Custom environment variables.
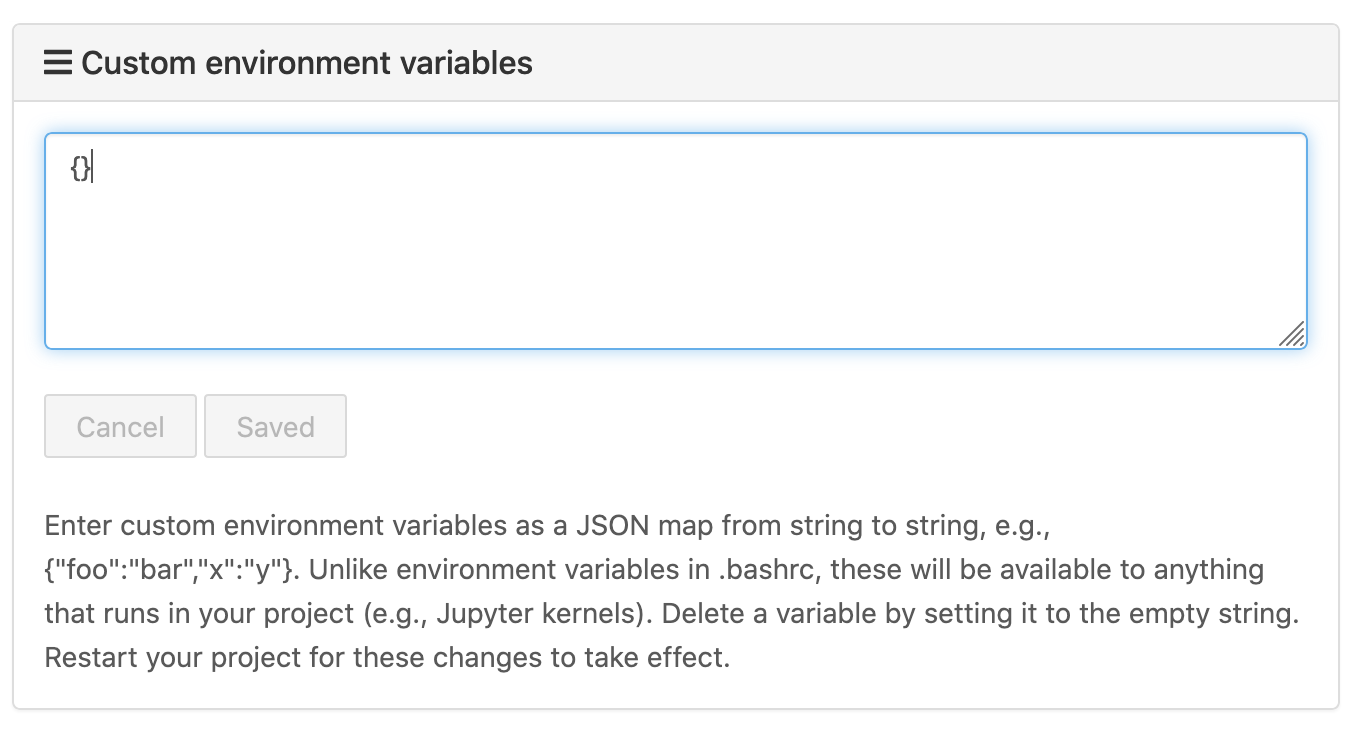
Help text appears when you click in the textarea.
For a complete example using a custom envoronment variable, see JupyterLab Extensions.
Features and Configuration
This section displays the configuration of specific functionality for the compute image for the project. These settings are read-only. They cannot be altered for the present project.
If a feature or formatter is disabled, that means the compute image does not support them. It may be that you are using a custom or outdated image (see Software Environment below), or that you are using an CoCalc OnPrem version that was built without that feature or formatter.
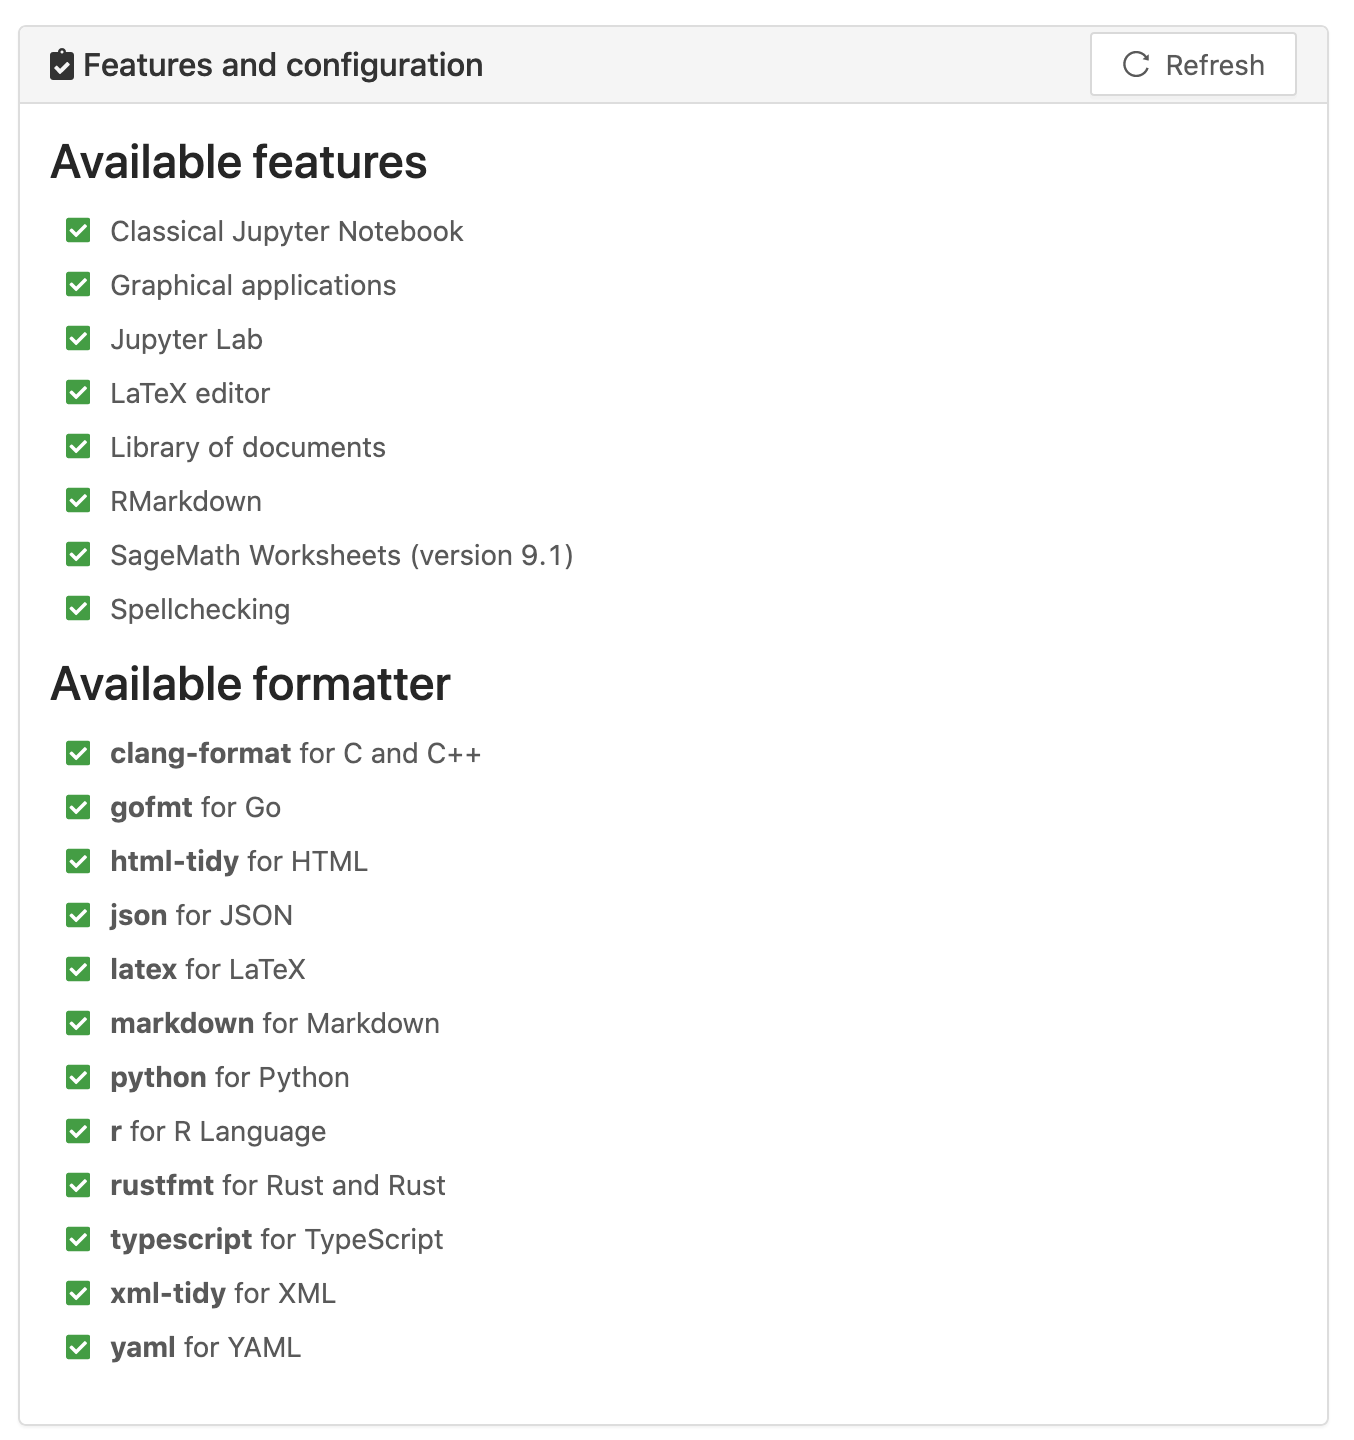
Available features
This section displays the enabled/disabled state for various general project features.
Available formatter
This section displays the enabled/disabled state for formatters for specific file types in the CoCalc frame editor.
About collaborators
Each CoCalc project has an owner and zero or more collaborators.
Owner and collaborators all appear in a project under the identity of “user” and home directory of /home/user.
There is no difference in the Linux identity,
regardless of the CoCalc account that is signed in.
Owner and collaborators can read anything in the project, and write, delete, and modify anything except backups. They can add and remove other collaborators, but cannot remove the owner.
Although the owner and all collaborators appear in a project with the same Linux user id, there are two ways to see which CoCalc account was used for certain actions in a project:
The project activity log.
Time travel for files edited using the CoCalc frame editor.
Current collaborators
The “Current collaborators” section of the Project Settings page shows the names of the owner and all collaborators. Here you can remove collaborators, including yourself. It does not allow you to remove the owner:
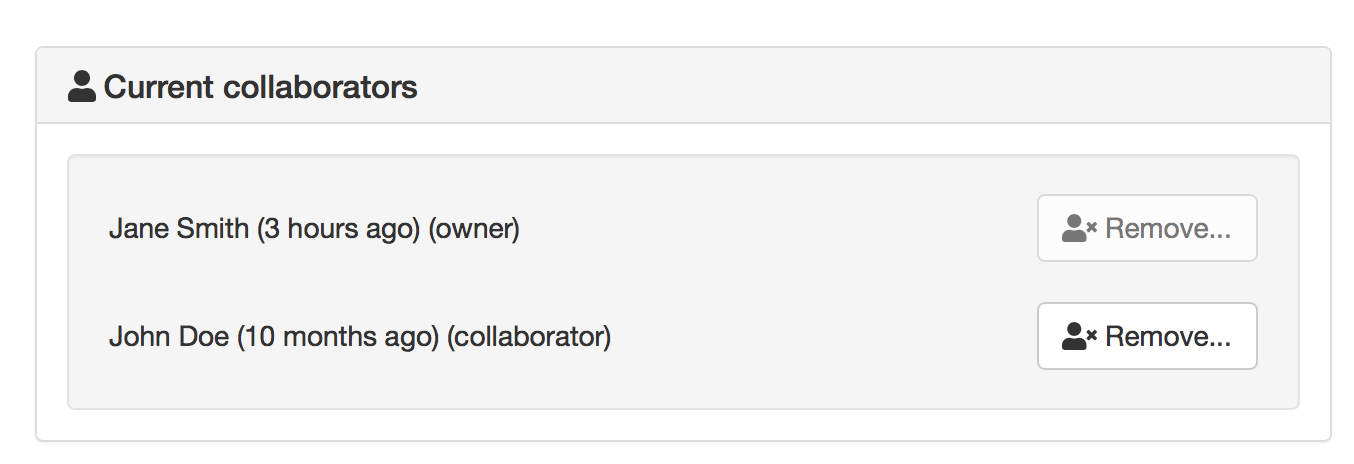
Current collaborators are also shown in the Projects list. You can use the latter to remove yourself as collaborator from several projects at once.
Add new collaborators
New: You can use invitation tokens to invite an entire audience to join you as collaborators in a project. See: Invite via Links for more information.
At the Add new collaborators dialog, you can type in a person’s name or email address. CoCalc will search its database of known users and show you possible matches.
After you select a name, don’t forget to click “Invite User.”
The user must accept the invitation to be added as a collaborator.
It is generally better to use an email address. The reason is that some CoCalc users have multiple accounts.
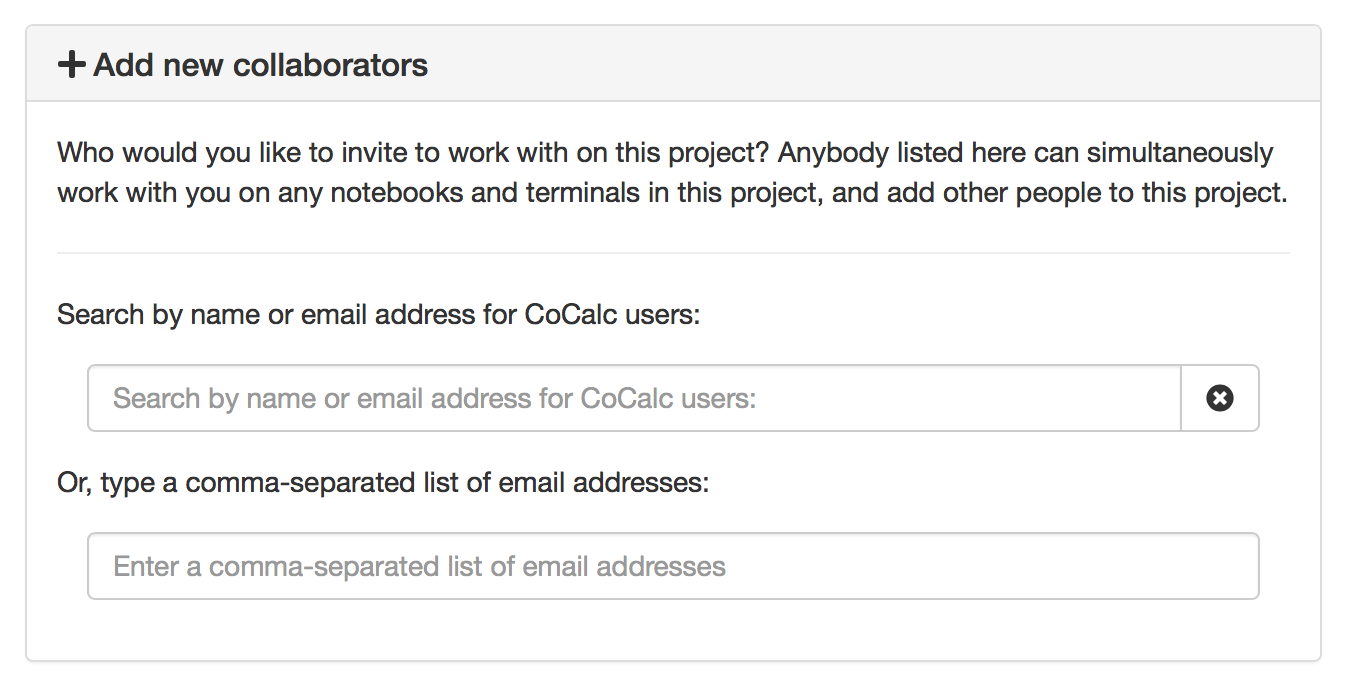
If there are no matches for an email address, then you can send an invitation for the user to start using CoCalc. You can modify the standard email. The default invitation has useful links to make it easier for the other person to start using CoCalc.
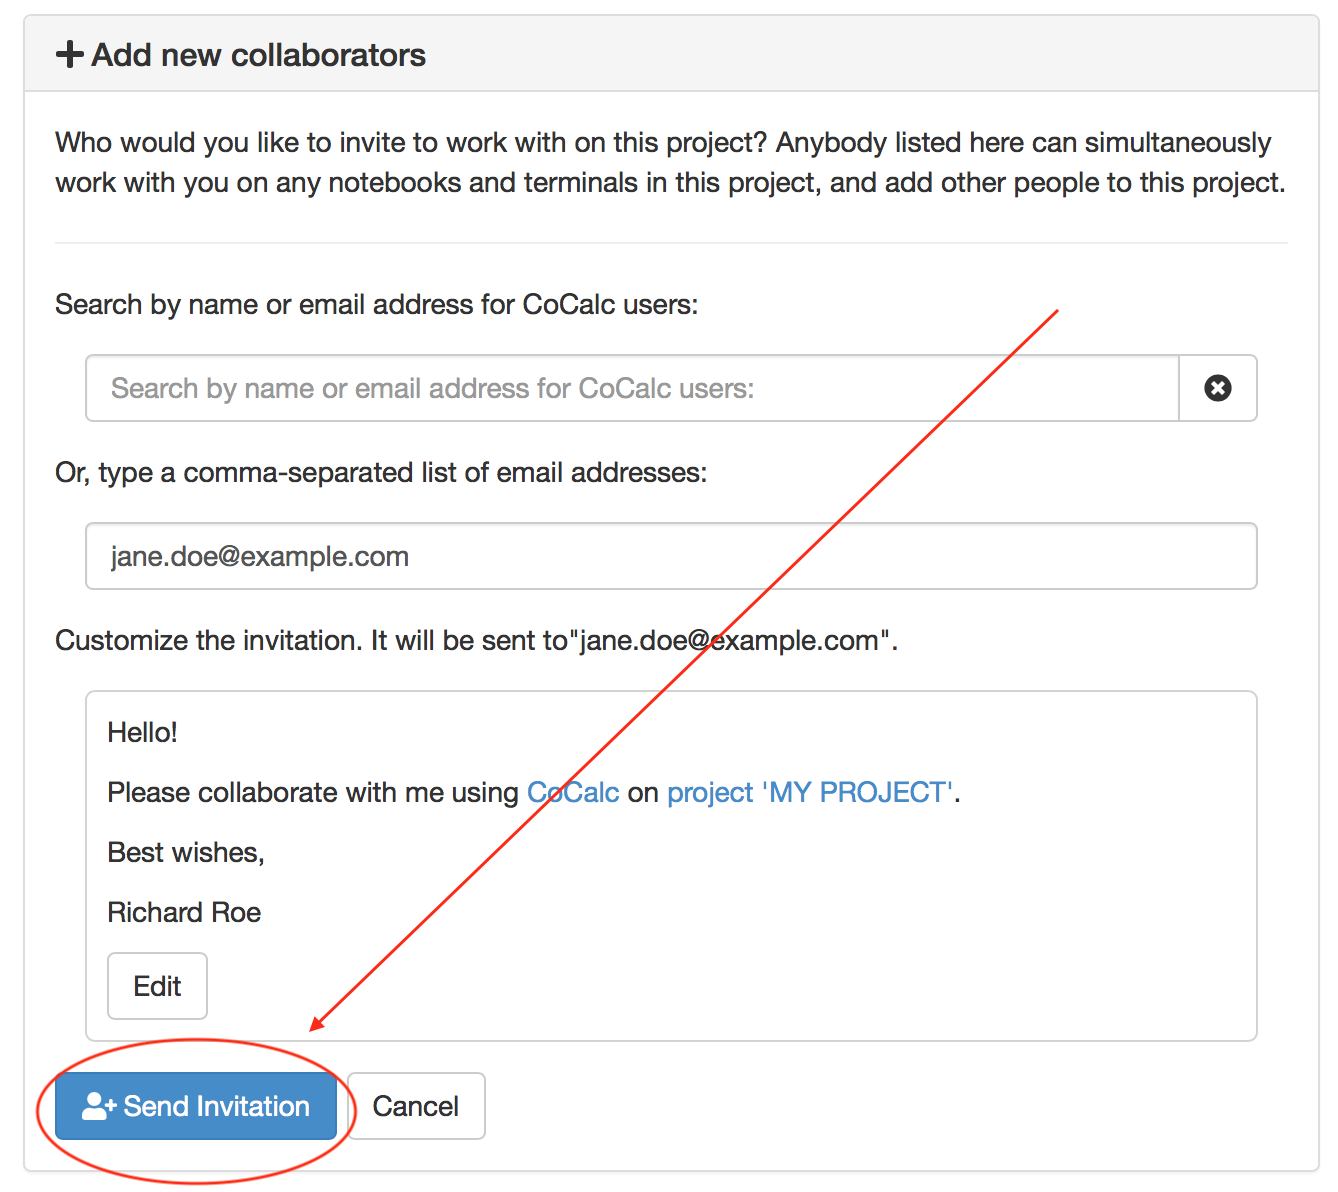
form to customize (optional) and send an email invitation
Sometimes, you’d rather give someone read-only access. In CoCalc, this is called “sharing” with non-collaborators. See Collaborate. Share! Publish!!! for how to share a file.
Caution: if you are using CoCalc for course management with a .course file, add students under the Students tab of the .course file, and NOT as collaborators. That way, they get their own projects, separate from the instructor project. On the other hand, it is common practice to add teaching assistants as collaborators in the instructor project.
Project control
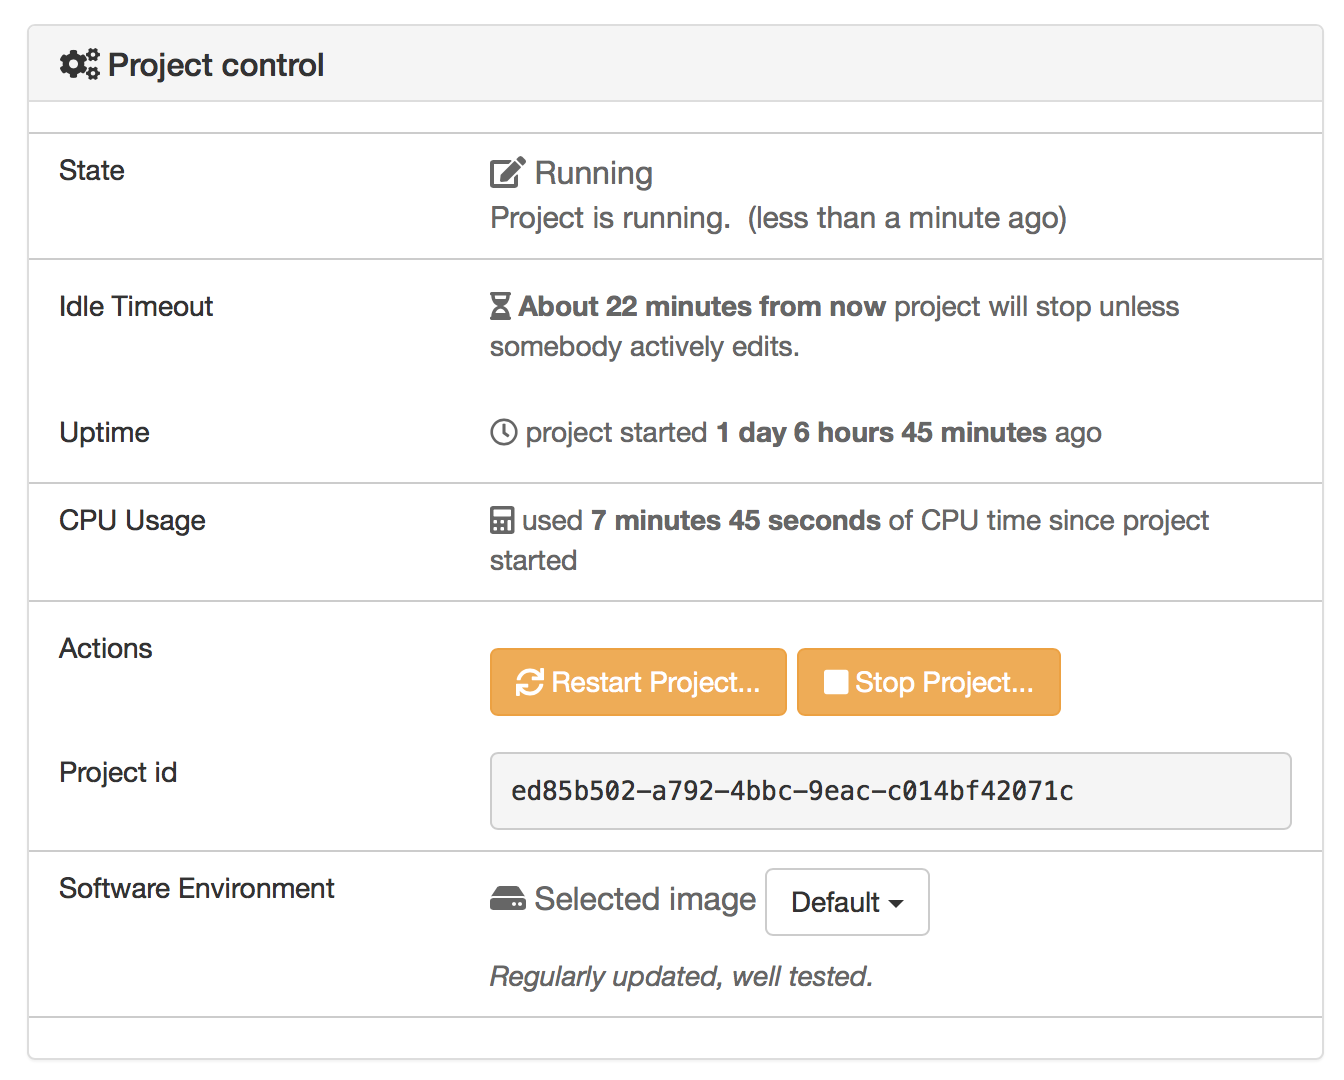
Here is a screen capture of the Project control section. Along with project statistics, it has two buttons and a menu, discussed below.
Restart Project and Stop Project
What happens when a project restarts?
All computations will be stopped.
Good News: You don’t lose unsaved files.
You do lose any information (state of variables/processes) in RAM.
However, anything in files, as long as it’s moved from the browser to the web servers (in most cases, at most a few seconds of information), is permanently saved to disk already in the database, and will not be lost.
When the project starts back up, even if the files on disk are in an older state, the files you see yourself editing in your browser are new with nothing lost. Those files will then be updated on disc very shortly.
On the other hand, project code, i.e. the CoCalc software environment, is updated.
To make all this happen, click “Restart Project…”. Another button appears, to confirm the choice.
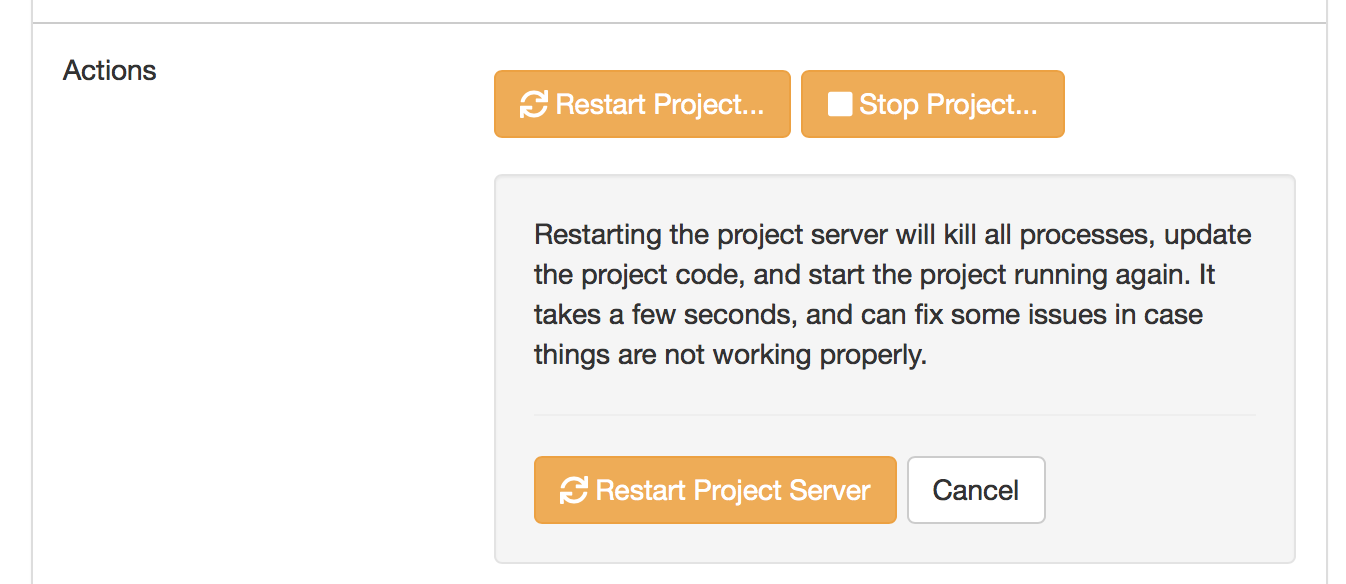
Click “Restart Project Server”, and restart initiates.
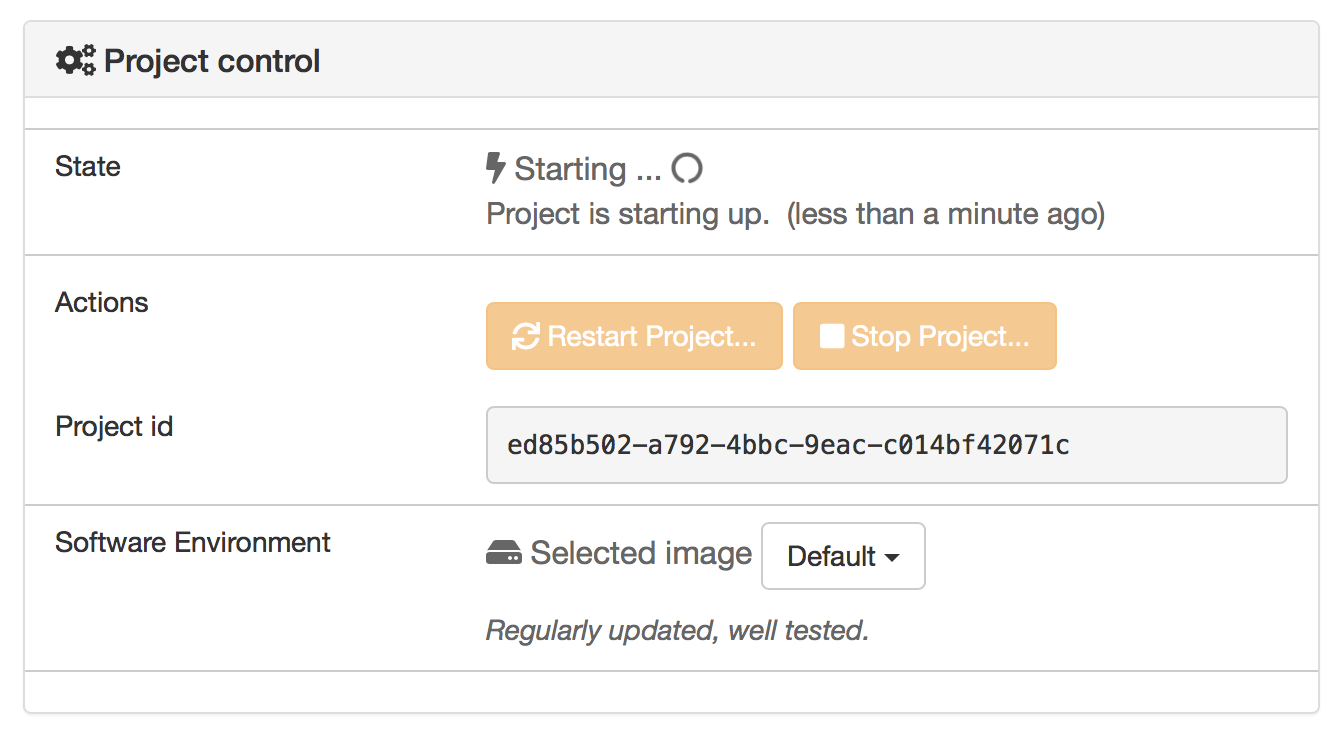
It normally takes about 30 seconds to restart a project. It may take another 10 seconds or so after the Files list is visible for terminal processes, etc. to be available.
You can also stop and restart a project in two separate steps. Why would you stop a project and then restart it, rather than simply restarting it in a single step?
If you want CoCalc to move the project to another server, stopping it first and then restarting it allows CoCalc to select a different, possibly less-loaded server.
If you don’t want any of your project’s processes to run until you explicitly restart the project, you have to stop the project.
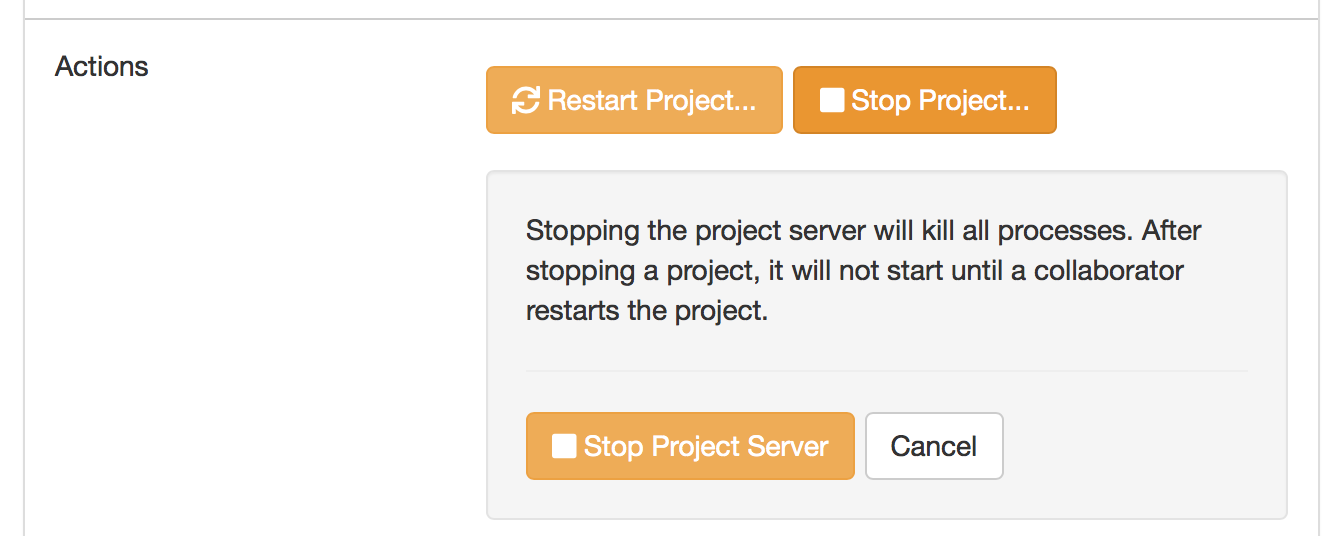
Clicking “Stop Project…” causes the “Stop Project Server” button to appear, to confirm your choice:
Software Environment
The CoCalc software environment is updated frequently. The collection of installed utilities, compilers, libraries, packages, etc. is called the compute image.
You can see a recent list of installed software at Available Software and in our Help page under “Software and Programming Libraries Details”.
A running log of regular updates to the environment is the default software updates list.
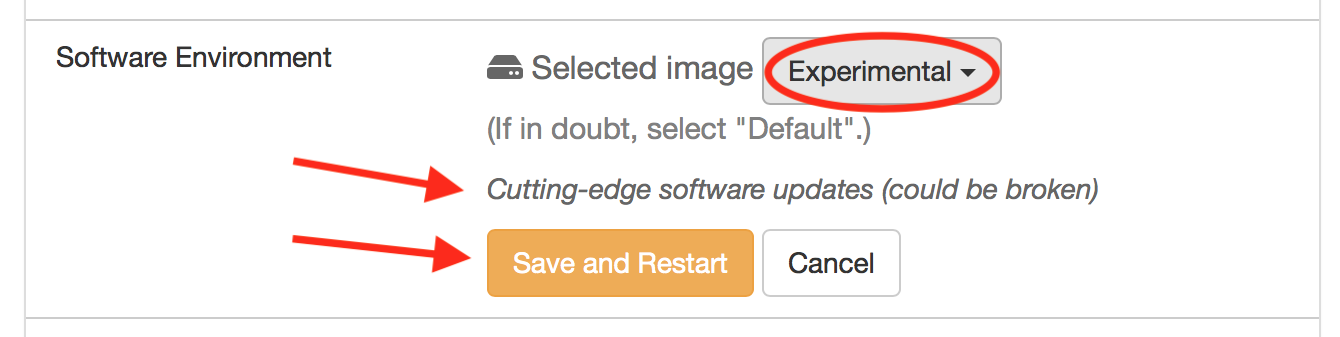
You may want to revert to an older environment, or try a new environment that is about to be released. To change the software environment to a different compute image, use the “Selected Image” menu. The exact list of available images will change from time to time.
Once you have selected an image, click “Save and Restart”.
Note
Don’t forget to reset your image to “Default” after you are finished working with an alternate image.*
Sage worksheet server
Any time you run a Sage worksheet (.sagews file) there are two processes involved in your project:
the Sage worksheet server process - one of these is enough to serve any number of running worksheets
the Sage worksheet client process - there will be one of these for each worksheet that is running in the project
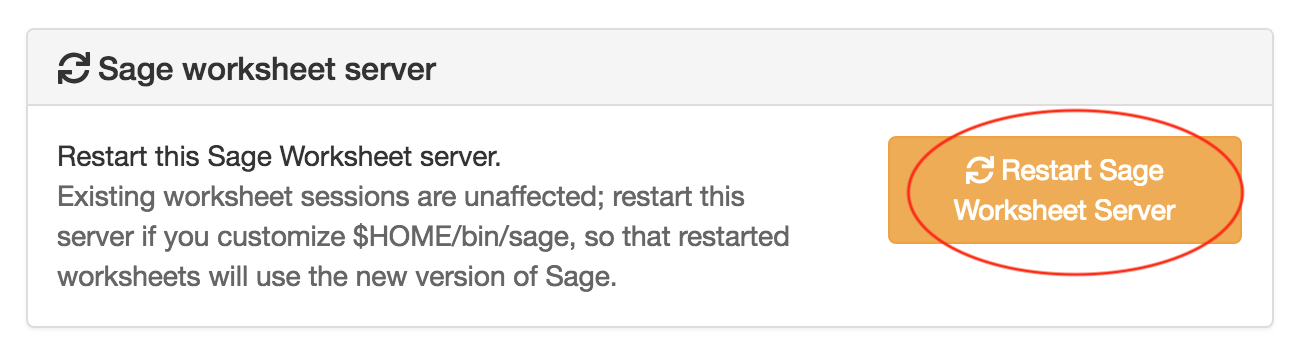
It can be helpful to restart the Sage worksheet server if you have changed the default version of Sage, for example with sage_select.
Note that restarting the Sage worksheet server will not affect worksheets that are already running.
Occasionally, it may be useful to restart the Sage worksheet server if worksheets are not executing properly, followed by restarting individual Sage worksheet(s). You might do this as a less drastic step than restarting the entire project.
Alternate Jupyter Servers in CoCalc
CoCalc by default provides an interface to Jupyter notebooks that has been rewritten to support multiple users, TimeTravel, and other enhancements. For more information, see the CoCalc blog article on the Jupyter rewrite. There may be occasions when you may want to run the Classical Jupyter server. The most common reason is to use interactive widgets, which are not supported in the CoCalc Jupyter notebook.
The “Project Settings” page offers two ways to run the Classical Jupyter server code, shown below. For more information and some important caveats, see Classical versus CoCalc.
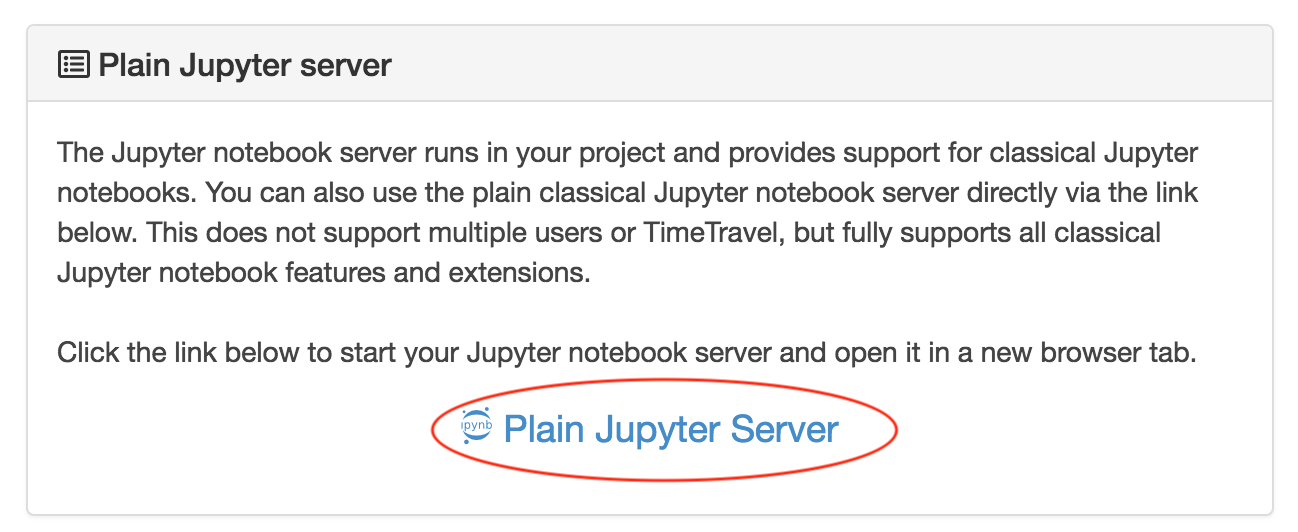
Plain Jupyter server
Starting the Plain Jupyter server opens a new browser tab with usual files listing. Opening a notebook from the Jupyter server tab opens another browser tab.
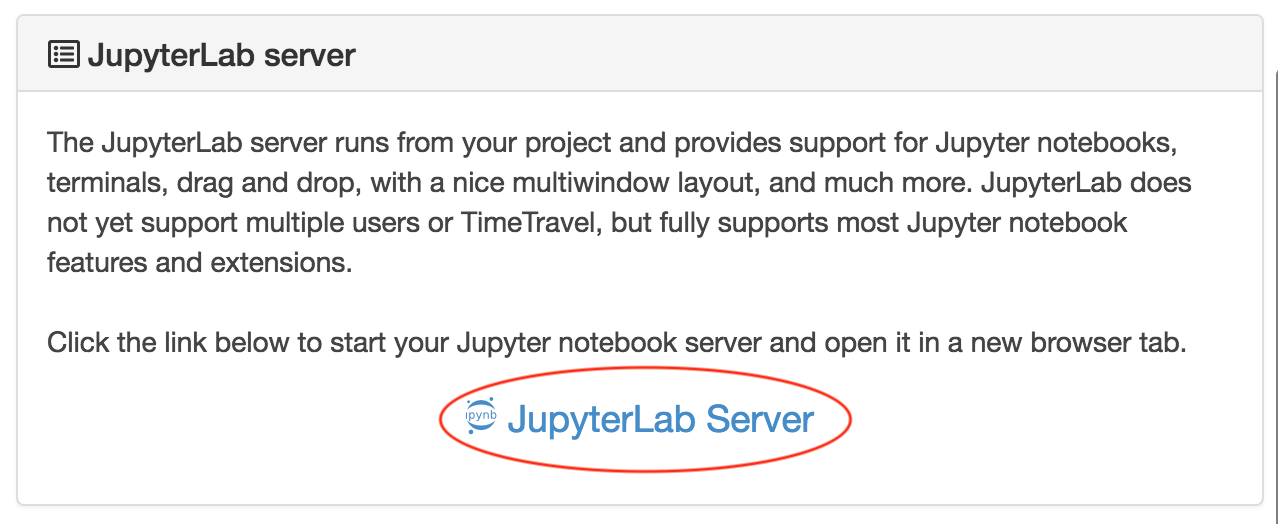
JupyterLab server
Note
As of May, 2022, CoCalc’s JupyterLab server supports real-time collaboration. Although CoCalc’s “Timetravel” feature is not available with JupyterLab, filesystem snapshots are still available if you need to recover a file.
Starting the JupyterLab server opens a new browser tab with the JupyterLab GUI.
Cloud storage & remote file systems
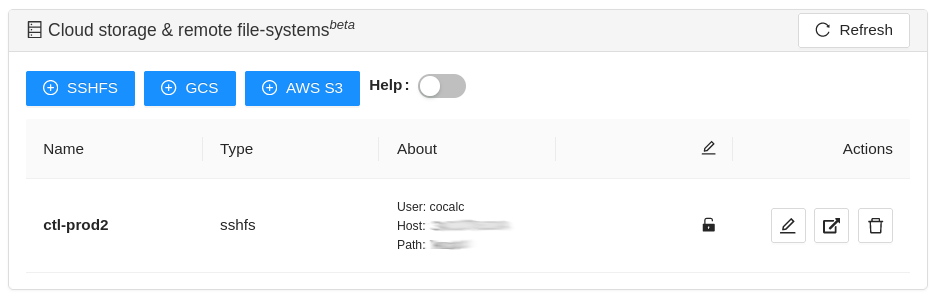
It is possible to access “cloud store” (a repository of file-like objects)
or a remote file system in a CoCalc project.
It will be mounted in the filesystem at /data/[name],
where the [name] is the name you entered in the cloud storage & remote file systems configuration.
For easy access, it’s possible to create a symlink to that global directory.
If there is no ~/data → /data in your home directory,
just run ln -s /data ~/data in the Mini-terminal.
Usually, the project will create that symlink for you.
Mounting as read-only prevents accidental modifications. Note, in a course it’s automatically mounted as “read-only” for all student projects!
For read-write mounted ones, modifications will eventually propagate to all mounted instances. Caching on various levels significantly slows down propagating changes, though. So, this won’t work well for collaborative editing files, but it is ok for letting changes show up on other projects after a brief period of time.
Warning
An active “Internet access” quota is required, because otherwise the project can’t access the remote services.
Remote files with SSH
You can make files accessible via an OpenSSH server. This configuration allows you to access files on a remote Linux server.
The authentication requires a pair of public/private keys. The public key must be shared with with the remote OpenSSH server, while the private key – the hidden secret – must be shared with CoCalc in order to authenticate with the server.
In order to access files stored on a remote server, you must have a password-less private-key based ssh login.
It’s a good idea to generate a fresh pair of keys, for better control overall. Run this command to generate the pair:
ssh-keygen -t ed25519 -f mykey -N ''
which generates mykey (private key) and mykey.pub (public key).
Instead of mykey you can choose any name you like.
Warning
The -N '' flag generates a key without a password, therefore anyone who has
access to this key will then be able to access your remote server. This is
generally not recommended for security reasons, but is needed for CoCalc’s
remote file system store to work. See below for ways to mitigate any associated risk.
To get the content of the private key, run:
cat mykey
and copy/paste the whole output into the private key textarea. It should look like:
-----BEGIN OPENSSH PRIVATE KEY-----
........  random characters ........
........  random characters ........
........  random characters ........
........
-----END OPENSSH PRIVATE KEY-----
The public key can be accessed via cat mykey.pub.
It’s one line of text and it must be in the remote server’s ~/.ssh/authorized_keys file.
Note, the permissions of that file must be such that others cannot read it.
I.e. maybe you have to run chmod go-rwx ~/.ssh/authorized_keys!
Note
It’s possible to share files from one CoCalc project via that mechanism. There are a couple of important details to take care of, though!
The project hosting the files has to run all the time. To make sure of that, create a new project and get an “always running” license upgrade for one project. Deselect “member hosting” to allow for cheaper hosting with occasional restarts – which should be fine, because it will attempt to reconnect. Then apply that license to this new project.
Generate the key pair as above. Open that project’s settings and add that public key as an SSH keys.
The username must be the project ID without dashes, as shown in the SSH keys dialog.
The host must be ssh – yes, those 3 characters are enough to connect internally within the cluster!
The path must be /home/user/[dirname], where
[dirname]is the name of the sub-directory in the project’s “files” home directory. Set it to /home/user to share all files of the entire project!
Warning
A common problem of SSH are subtle configuration errors.
Please test the connection first, i.e. for a private key file mykey, do this:
ssh -vv -i mykey [user]@[host]
to attempt a remote login to the username and the given host. If you see a prompt, everything is fine. Exit via “exit” or Ctrl-D. Otherwise, you see a verbose log of messages, where some of these messages will explain why it wasn’t able to connect.
Note
If you are connecting to CoCalc via SSH, make sure you do not use
ForwardAgent (command-line option ssh -A) while testing this, otherwise you
might be able to connect to your server using your forwarded agent rather than
authenticating with mykey. The cloud storage & remote file system mechanism
will not have access to any forwarded agent, however, and thus may still fail.
One subtle issue is that some older servers may not accept ed25519 keys:
in this case you might try with an RSA key ssh-keygen -t rsa -f mykey -N ''
instead.
As mentioned above, using password-less keys (-N '' above) is generally regarded as
a security risk, but is needed for the CoCalc to work.
The key is entered via the user-interface and stored in the database.
It stays private and hidden,
because neither you nor any collaborator of the project can access it again (only replace it later on).
Still, any who has access to the previously generated mykey file will be able to authenticate to your server.
To mitigate any potential risks:
Once you get your ssh remote filesystem store is working, generate a new key somewhere private (your own computer, not CoCalc), enter it in the cloud storage & remote file systems dialog, then delete the file.
On your server, create a dedicated user (e.g.
cocalc_datashare) with limited access for which you only grant permission to access the files needed by your project.
AWS S3
Amazon’s S3 storage buckets can be accessed via their bucket id, access key and a secret id. Together with a name of your choice, which will be the name of the mount point, enter those pieces of information into the dialog and restart the project.
More info:
Google GCS
Google’s Cloud Storage is very similar to S3 – <https://cloud.google.com/storage>. You need to have at least one project at GCP and a storage bucket at GCS. Start with the quick start guide if you’re new to this.
You also have to enable to “Storage API” for the project – see enabling APIs.
The authentication works by creating a “service account”, which gives access to a well-defined aspect of your project. Read about GCS Authentication and its links for creating a service account to learn more.
On CoCalc’s side, the storage bucket name and the content of the authentication file (formatted in JSON) must be entered in the corresponding fields.
For optimal performance, the storage bucket should be in the same region as CoCalc’s cluster.
As of writing this, this would be us-east1.