Upgrading Student Projects (legacy version)
This section describes adding upgrades to student projects if you are using an upgrade package. These products are being phased out in favor of the much more flexible Cocalc licenses. Please see Upgrading Student Projects (institution pays) if you need to upgrade student projects with a CoCalc license.
The Configuration tab of a .course file allows you to upgrade students’ course projects in two ways, indicated by the checkboxes in the image below:
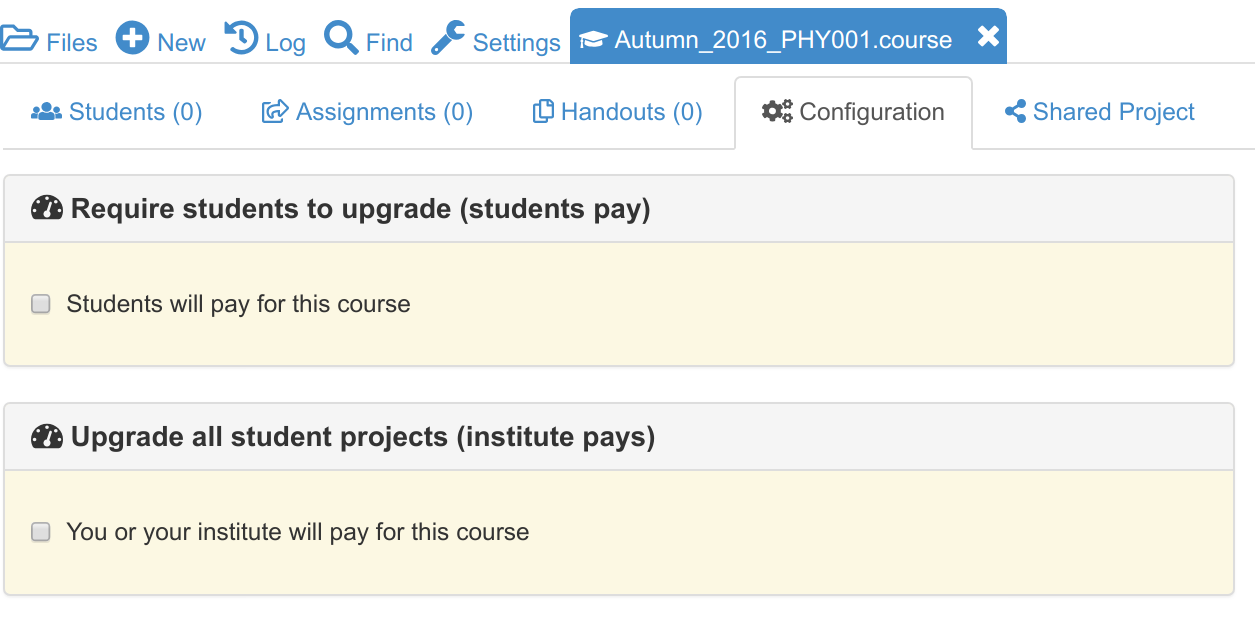
Teacher or institution pays for upgrades
Assuming you are an instructor and want to setup everything for a course, here are the rough steps to pay for upgrading your students’ projects with a legacy upgrade package.
Background: The course purchase option provides you with upgrades for your account, but you then distribute these upgrades to all student projects in your course (these projects are automatically created for the course). The students then fully benefit from using these upgraded projects.
In your account settings there are two methods to upgrade your course:
The tab “Licenses” lets you order “license keys”. They allow you to specify exactly the number of student projects and upgrades. This is the newer and preferred method. Read more in here.
Next to the “upgrades” page, there is a tab Purchases. In that tab, enter your payment information and purchase one or more course packages. We can help you if you are not sure which one to buy (it depends on the size of the class, your needs, etc) or if you need us to process a format purchase order (PO), etc.
Once you purchase the course upgrades, go to the project where you created the course and open the .course file. In that interface, where you can add the students, etc. there is also a tab called “Configurations” (next to “Students”, “Assignments”, etc.).
Current pricing is available at https://cocalc.com/pricing/courses which at the time of writing was about $20 per student for a 4 month course. The price per student varies according to the size of the student cohort.
… and after selecting that “you/your institution pays”, you can proceed to distribute the upgrades of the course package here:
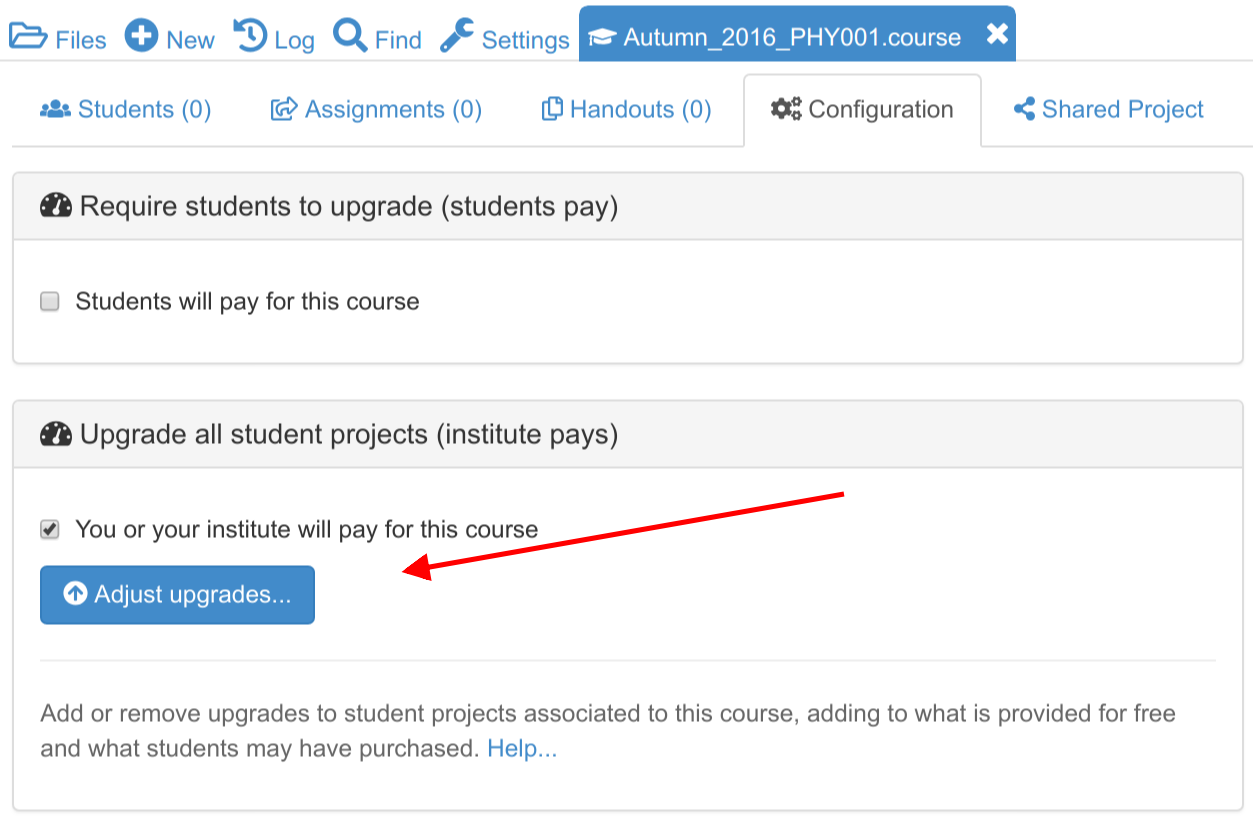
Clicking “Adjust upgrades…” lets you allocate any available upgrades in your account.
Entering initial student upgrades
The following screenshots assume the instructor has purchased a One Week Standard Extra Small subscription, with upgrades for 10 projects, and applied upgrades to the TEACHING project, leaving upgrades for 9 student projects. Two students have been added to the “MATH 101” .course file.
After clicking Adjust upgrades… as shown above, this is what the instructor sees:
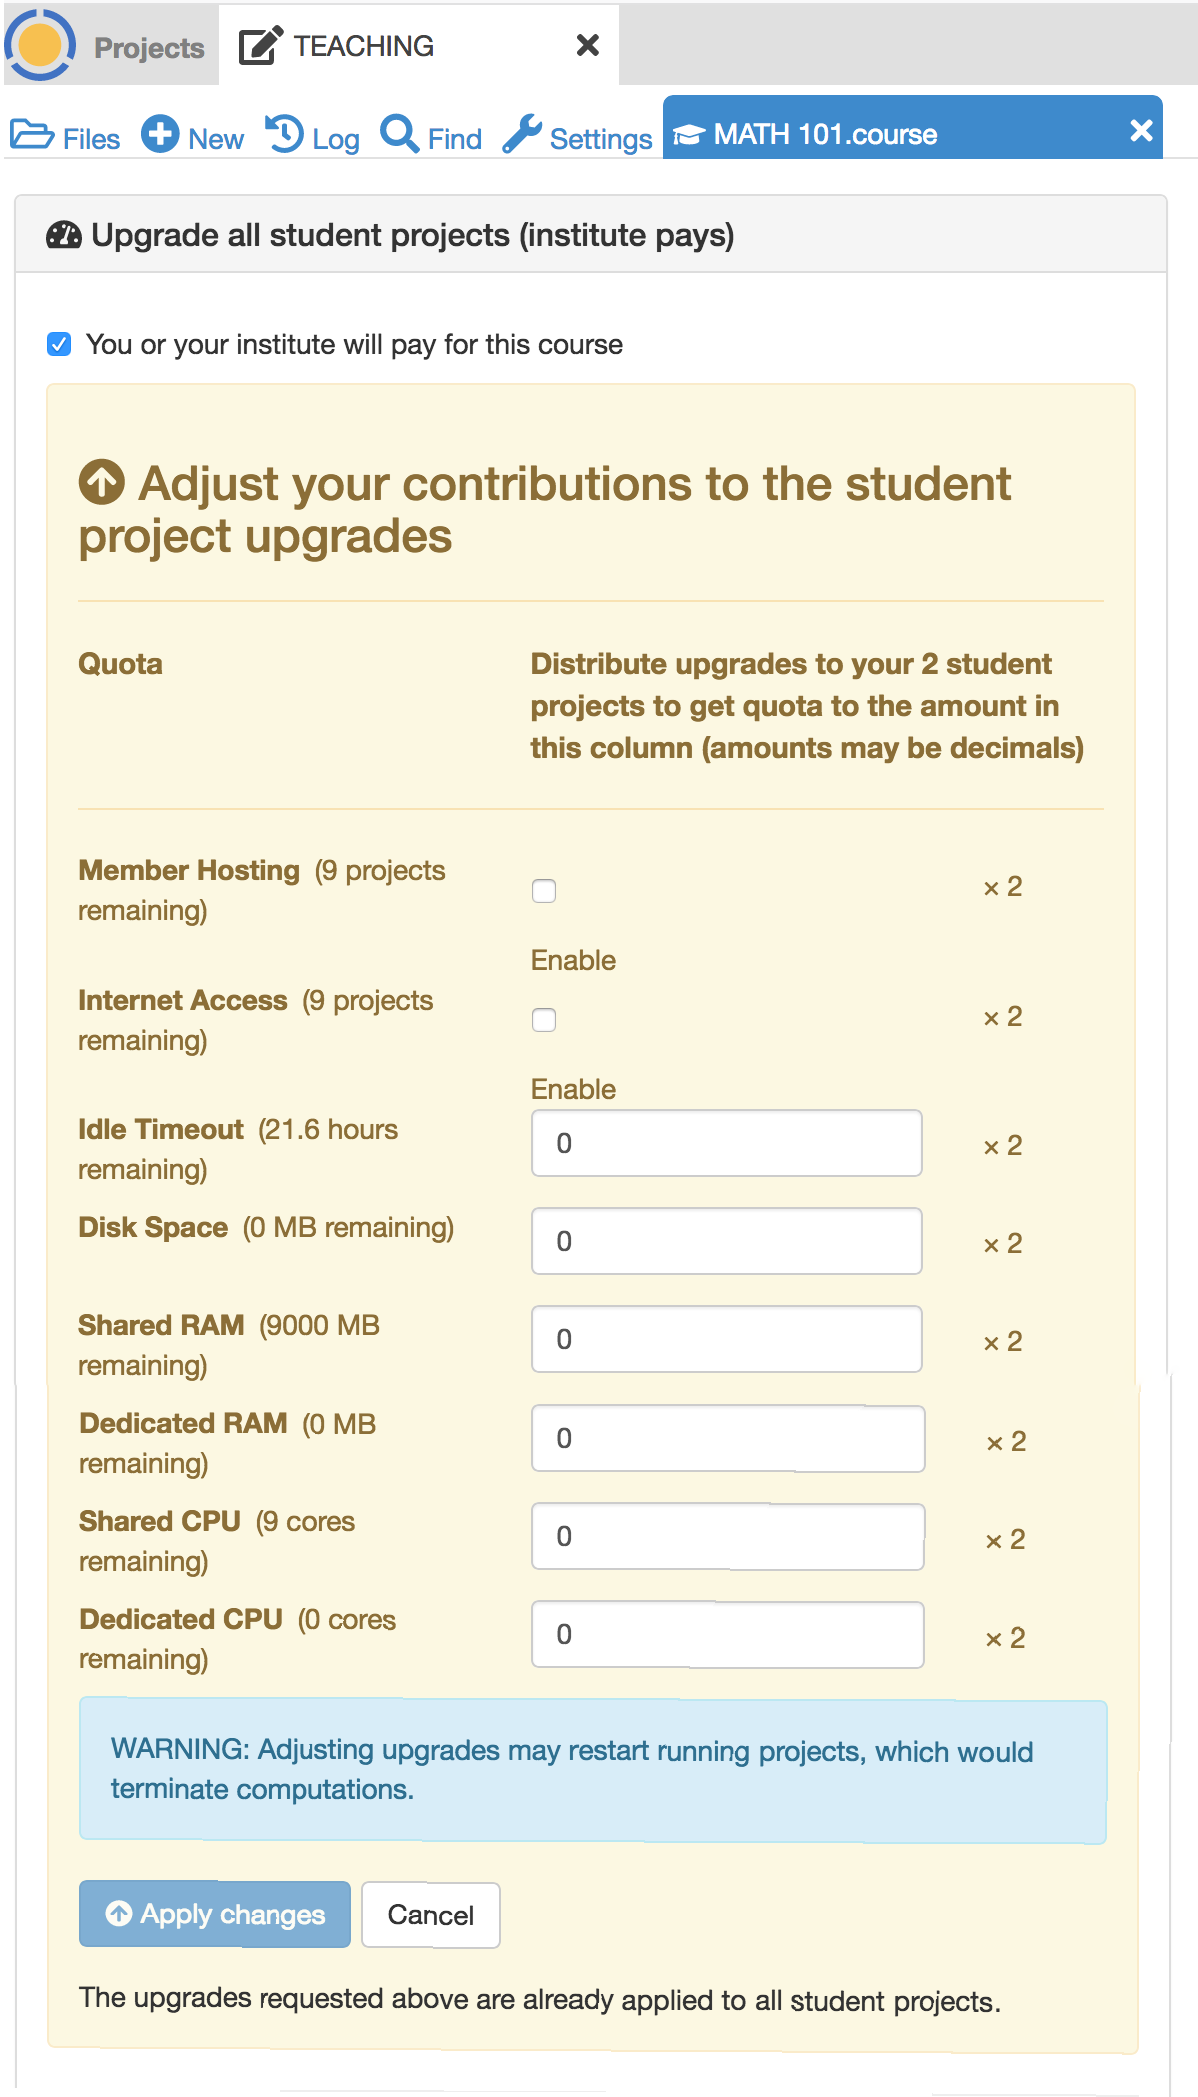
The instructor enters the usual upgrades per student for Standard subscriptions:
Member Hosting: ✓
Internet Access: ✓
Idle Timeout: 2.4 hours
Shared RAM: 1000 MB
Shared CPU: 1 core
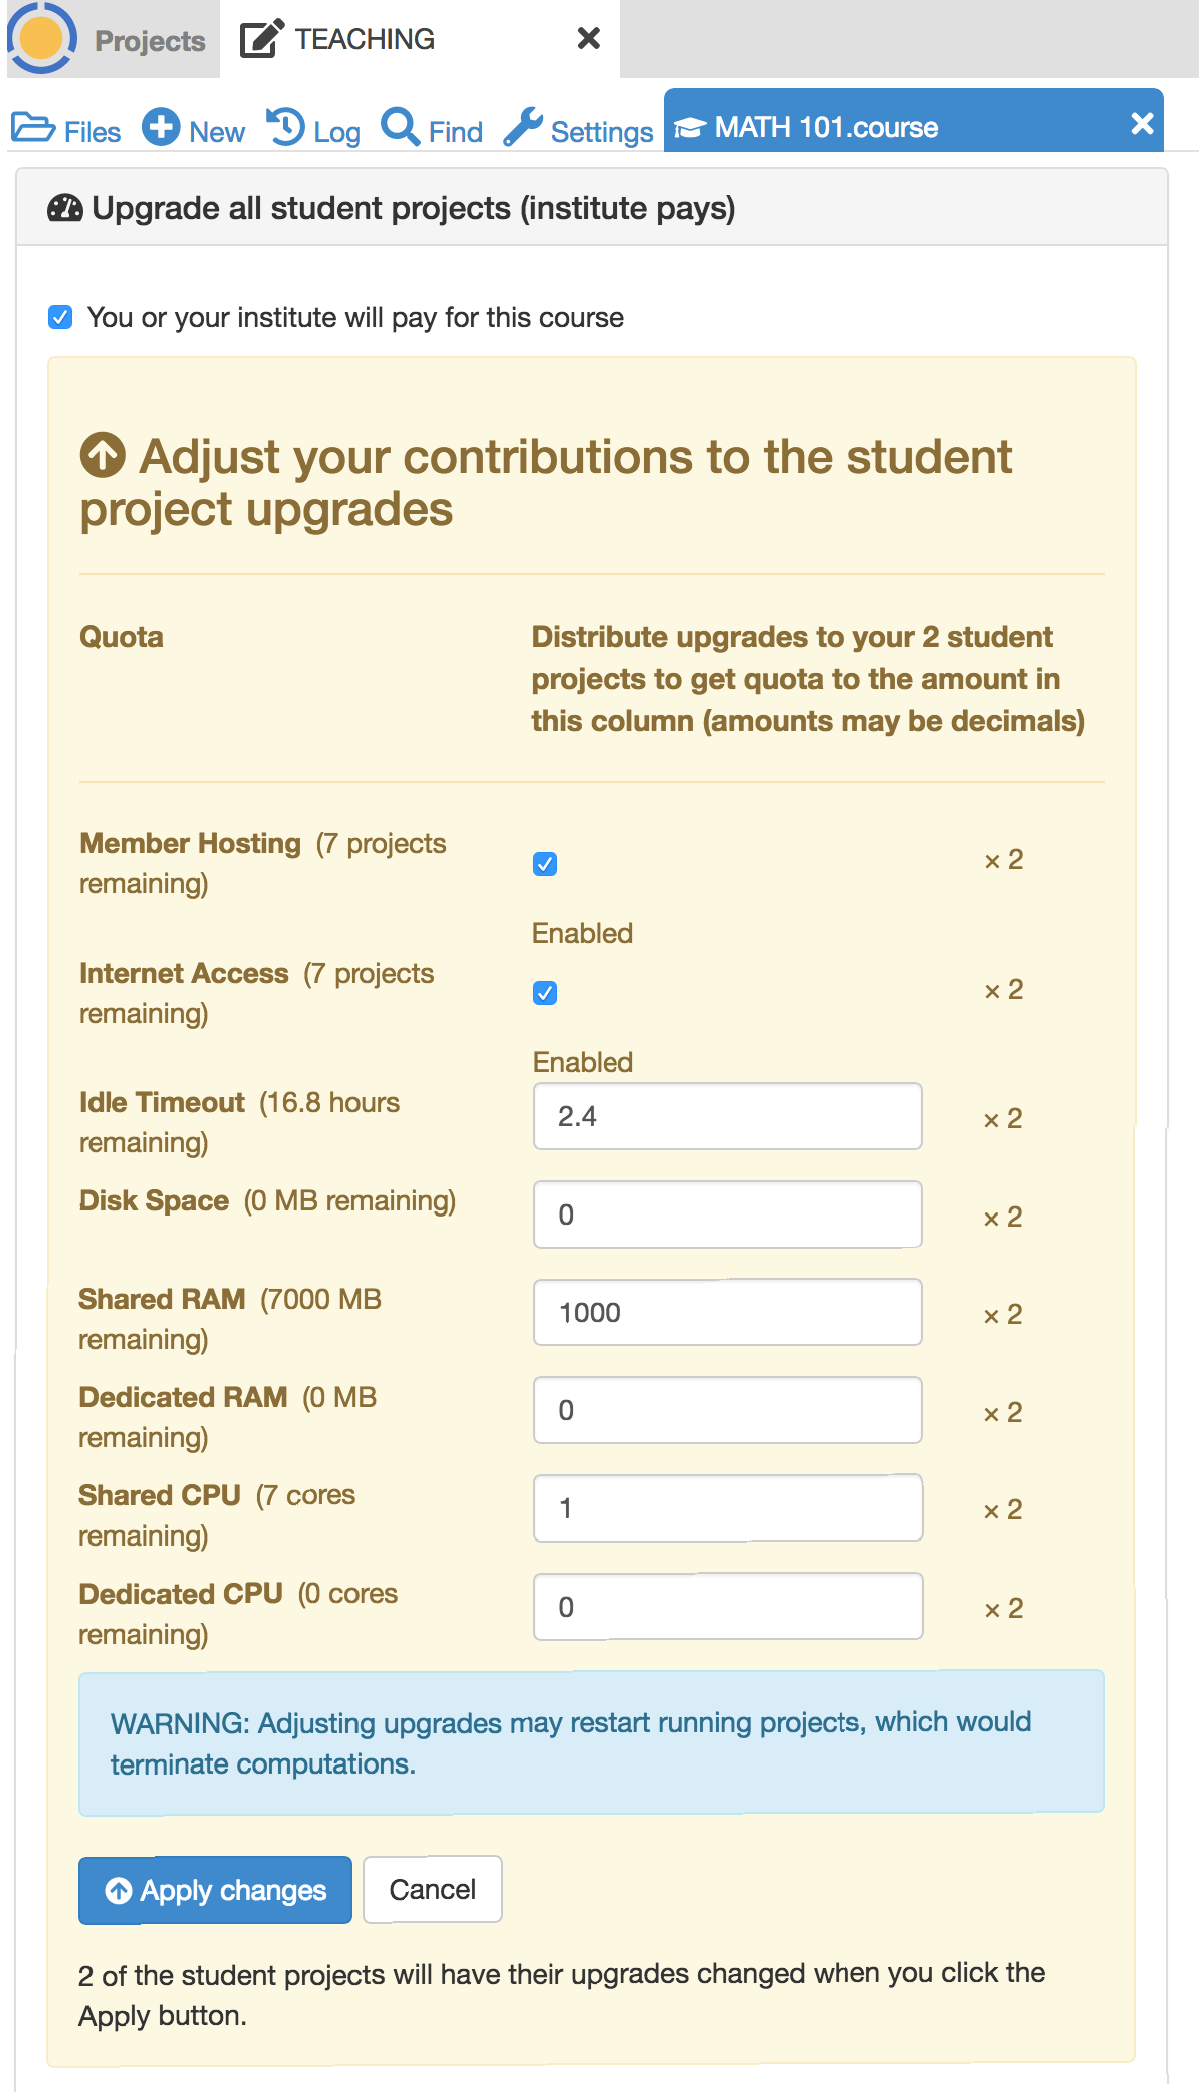
After checking that everything looks right, the instructor clicks Apply changes.
Adding more student upgrades
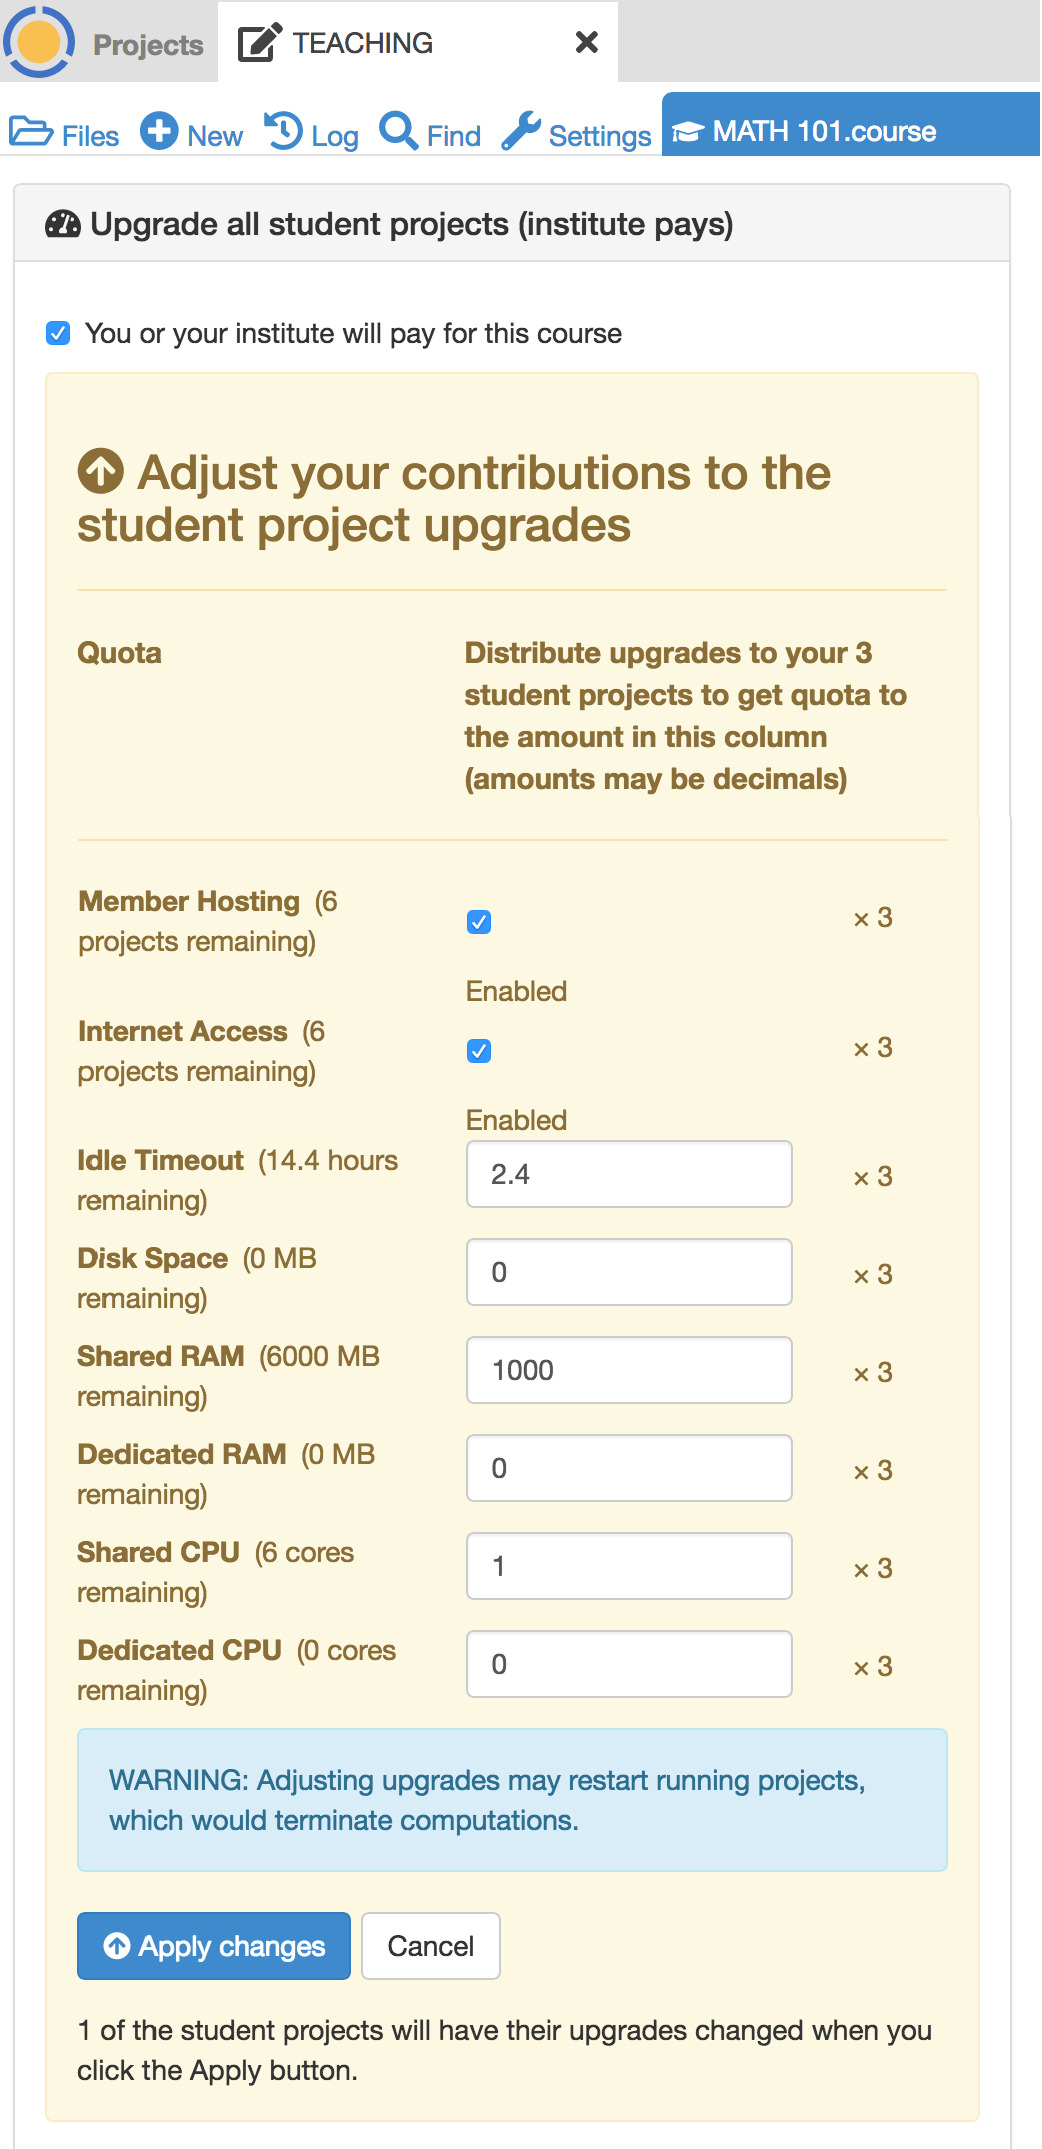
Now suppose a third student arrives after the previous upgrades have been applied. The instructor again opens the .course file, selects Configuration, and clicks Adjust upgrades…. Note the message at the bottom of the dialog that only one of the student projects will be upgraded.
Without making any changes to the numbers entered, the instructor again clicks Apply changes. The third student project is now upgraded.
What the student sees
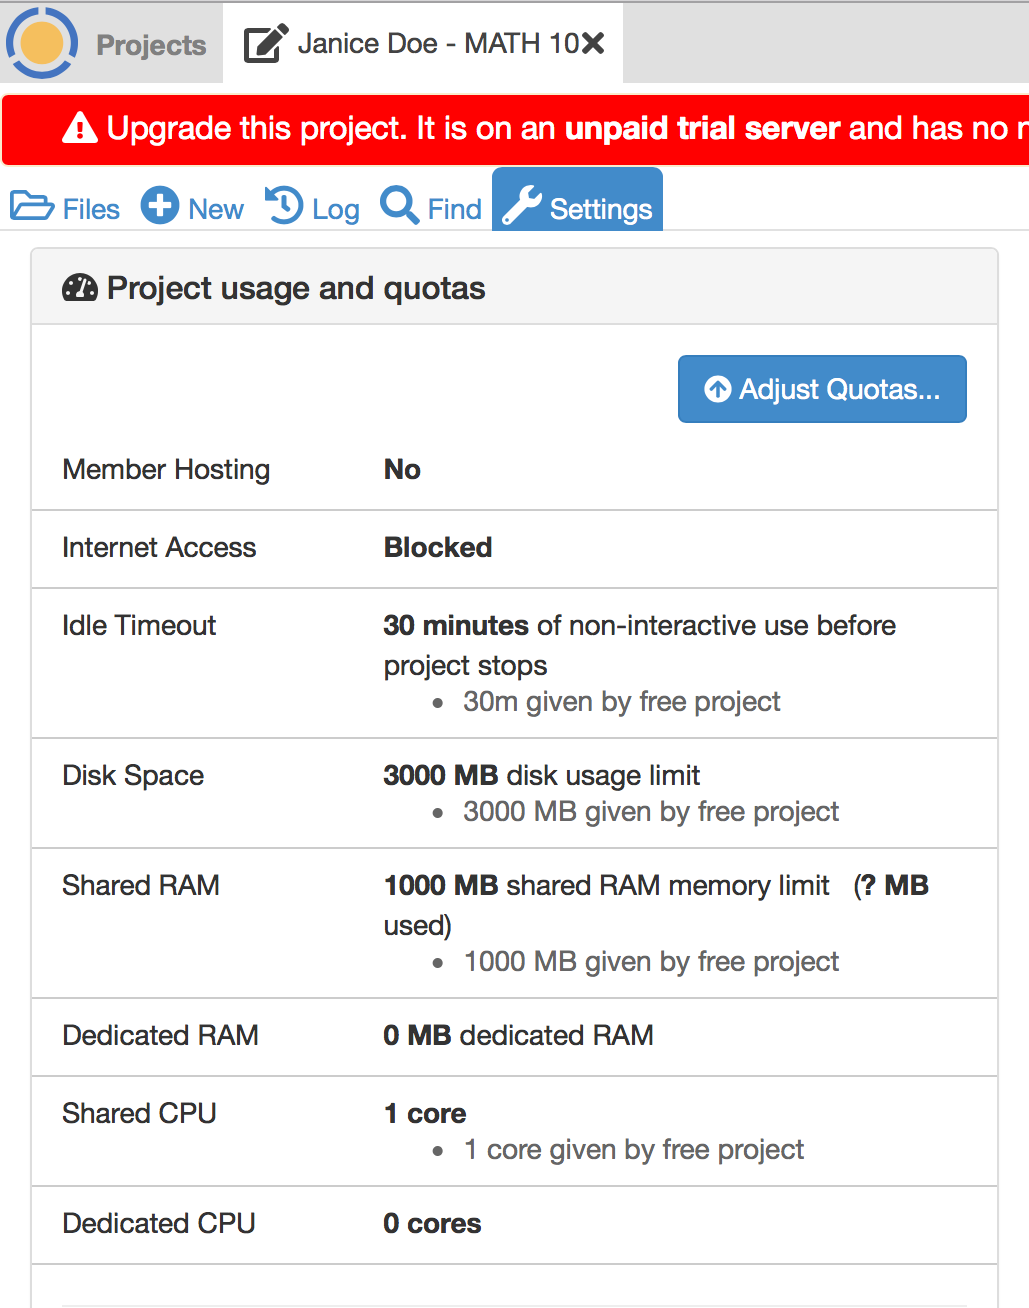
Here is what a student will see upon opening his/her student project for the course.
First, this is what is seen if the instructor has not yet applied upgrades for the student project. Note the red banner warning that the project is not upgraded.
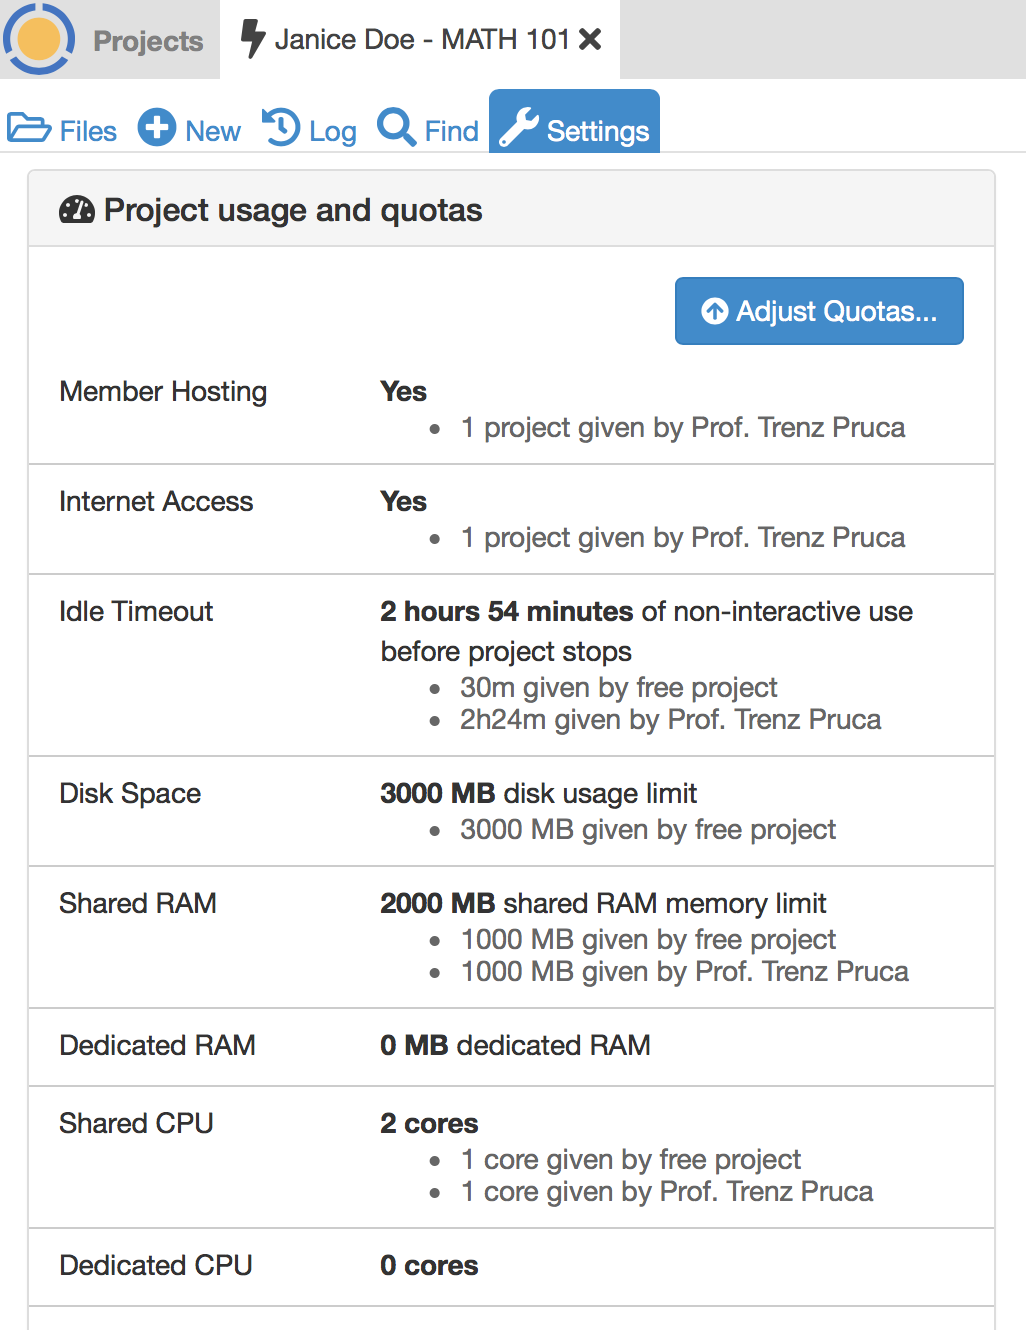
Second, this is what is seen if the instructor has added typical upgrades for a Standard course. The exact amounts added will vary for different plans. For example, Basic courses include upgrades for Member Hosting and Internet Access, but not for other resources. Note in the Projects toolbar at very top, that the project is restarting. That is because upgrades were applied by the instructor moments ago.
