
Collaboration
In principle, collaboration for the instructor project and all student projects is “the same” as for all other CoCalc projects. Here we will highlight some features and ways of using them that you might find useful specifically when managing a course.
Look at Students Work
As described in the handling of Assignments and Handouts, you can always open the files that each student is working on: before collecting them, during grading, or after. There can be several reasons for this:
you may wonder how students are doing on a newly developed assignment that may need some tweaking to become more clear or more challenging
you may wonder if particular students need some extra help
unfortunately, sometimes you may wonder if some students are cheating…
Not only you can open each file at its current state, but you can also use TimeTravel to get a sense of its evolution and see what approaches have students tried to solve a problem or deal with code errors. If you see big chunks of text/code appearing in a single revision, they were likely copy-pasted from somewhere else.
Edit Students Files
You do have write access to students projects and can make edits in their files and notebooks, even while students are actively editing these files as well. TimeTravel will keep track of who has done which change. If you are editing or looking at sections that are close to each other, you will see each other moving cursors with name tags:

Instructor’s Cursor in Student’s View
Side Chats and Mentions
Of course, it may be difficult to notice if you edit a file of a student, and it may be unexpected. Instead of editing the file directly or in addition to it, you can leave comments in a Side Chat of any file and attract student’s attention using @-mentions. The student will get a notification, can reply to you, and then you will get a notification as well:
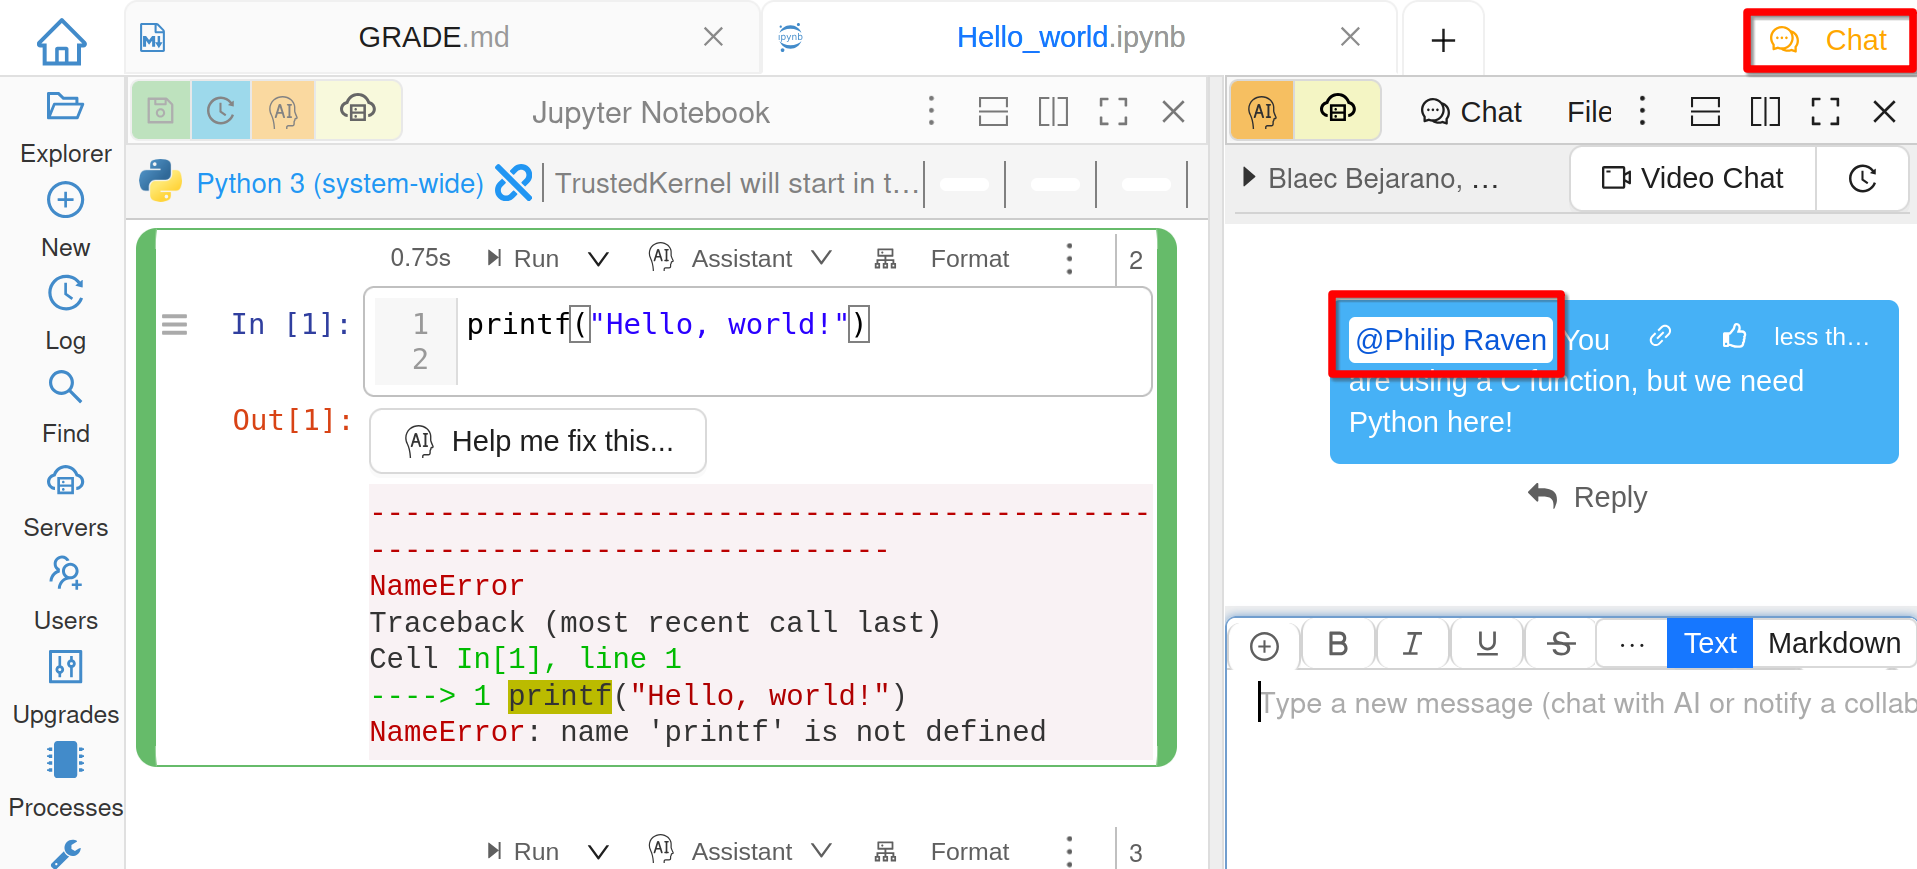
Mentioning Student in a Side Chat
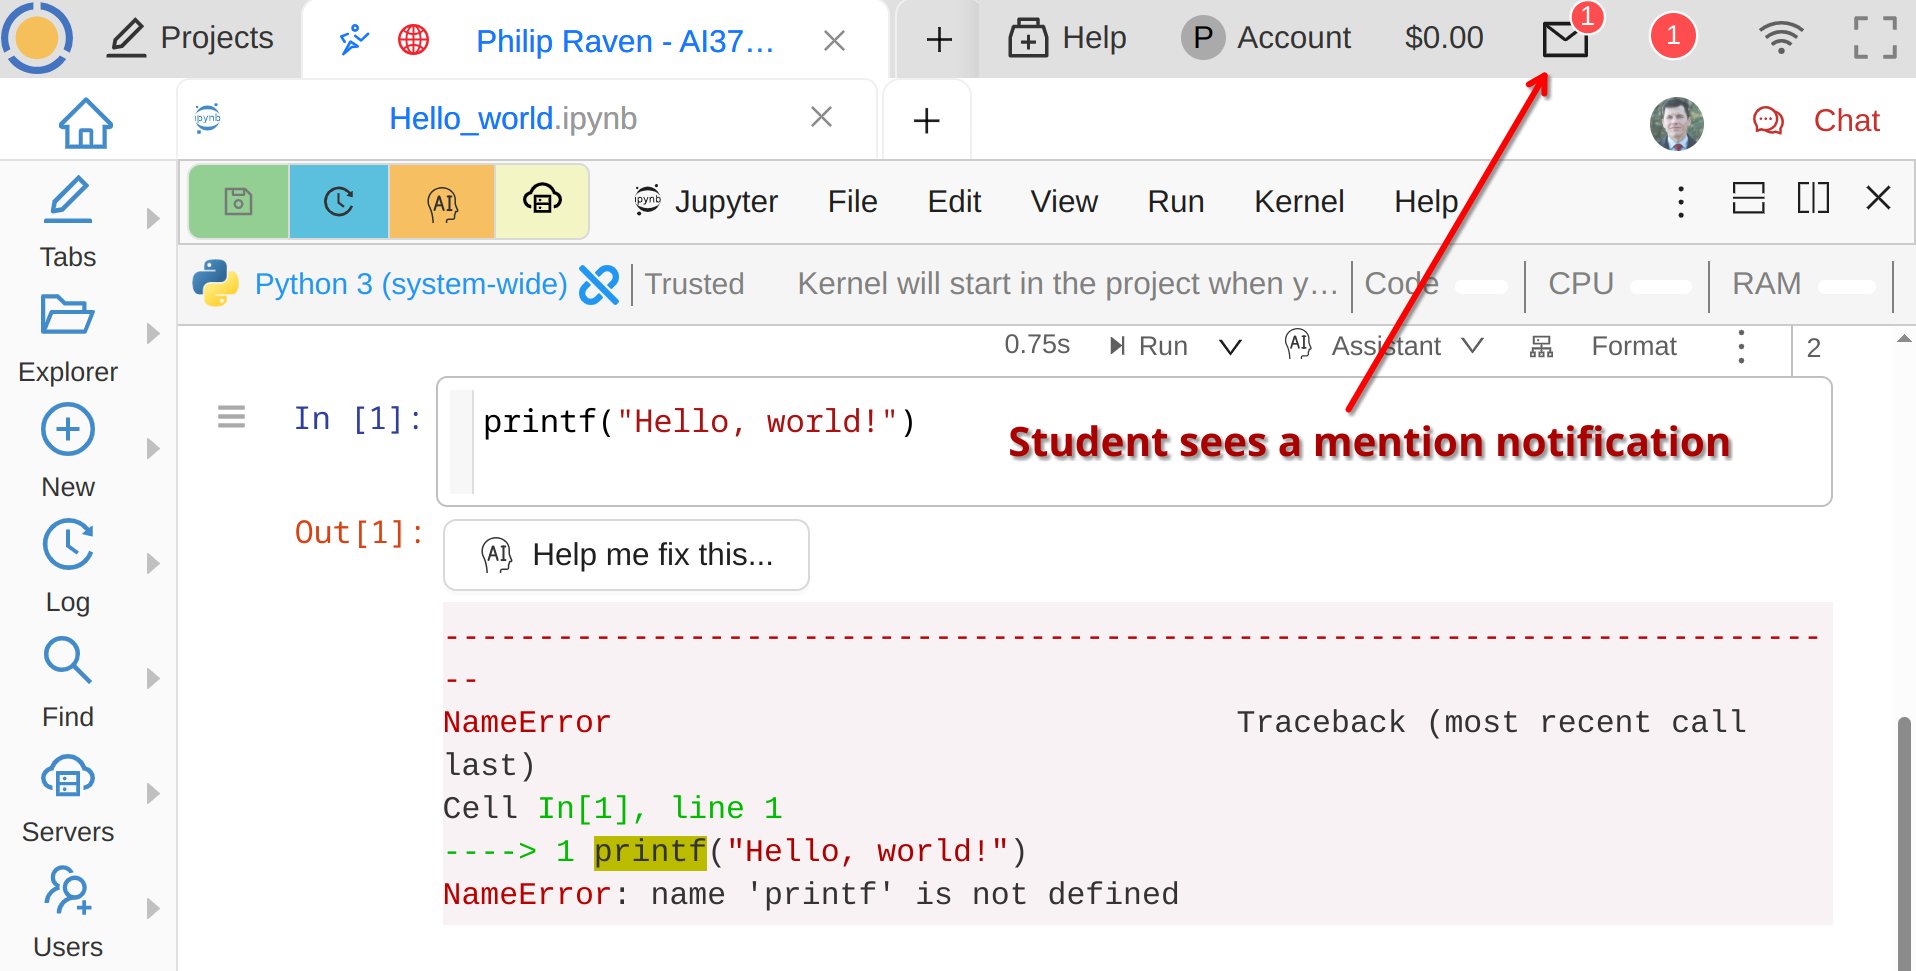
Student Sees a Mention Notification

Student Replies to the Instructor
This may be even more useful in the other direction - any student can ask an instructor or a TA for help! They may also ask our AI Assistant for help, if you have not disabled this functionality.
Group Projects
When individual and shared projects are too extreme, you can also create projects for smaller groups.
At the moment we do not provide a completely hassle free way of creating projects for groups, but it is on our road map and a possible workaround meanwhile is to create another course file where only some of the students are “enrolled” - these are “group leaders” designated by you. Once their projects are created, you or these leaders may add other members of each group as collaborators.
Hint
It is possible to edit student names in the course file. Such edits are local to that file, i.e. it does not affect student accounts. In the context of group projects you may change your leaders names to either group titles or names of all students in the group.