
Using nbgrader
As the main page of the nbgrader project states, “nbgrader is a tool that facilitates creating and grading assignments in the Jupyter notebook. It allows instructors to easily create notebook-based assignments that include both coding exercises and written free-responses. nbgrader then also provides a streamlined interface for quickly grading completed assignments.”
CoCalc has its own independent implementation of nbgrader
in order to fully support realtime collaboration,
course management, and other functionality of CoCalc.
The Jupyter metadata format of CoCalc’s nbgrader is the same as that of the
official one, and the user experience is similar. Some changes are:
No need to install special modules, extensions, or configure anything.
Students see an annotation next to answer cells, so they know that evaluating these cells without errors gives a certain number of points.
Instructors have a toolbar that inserts a template with example input or automated tests.
Integration with CoCalc’s course management tools for distributing and collecting assignments.
Automated grading safely runs code in the student’s project, not in the instructor’s project.
Below we assume that you are already familiar with CoCalc’s course management system, especially with Assignments and Handouts, so we focus only on the extra steps needed to use nbgrader.
Show nbgrader UI
Once you have created a Jupyter Notebook for which you want to use nbgrader, go to View > Cell Toolbar > Create Assignment Using nbgrader: 📺 video
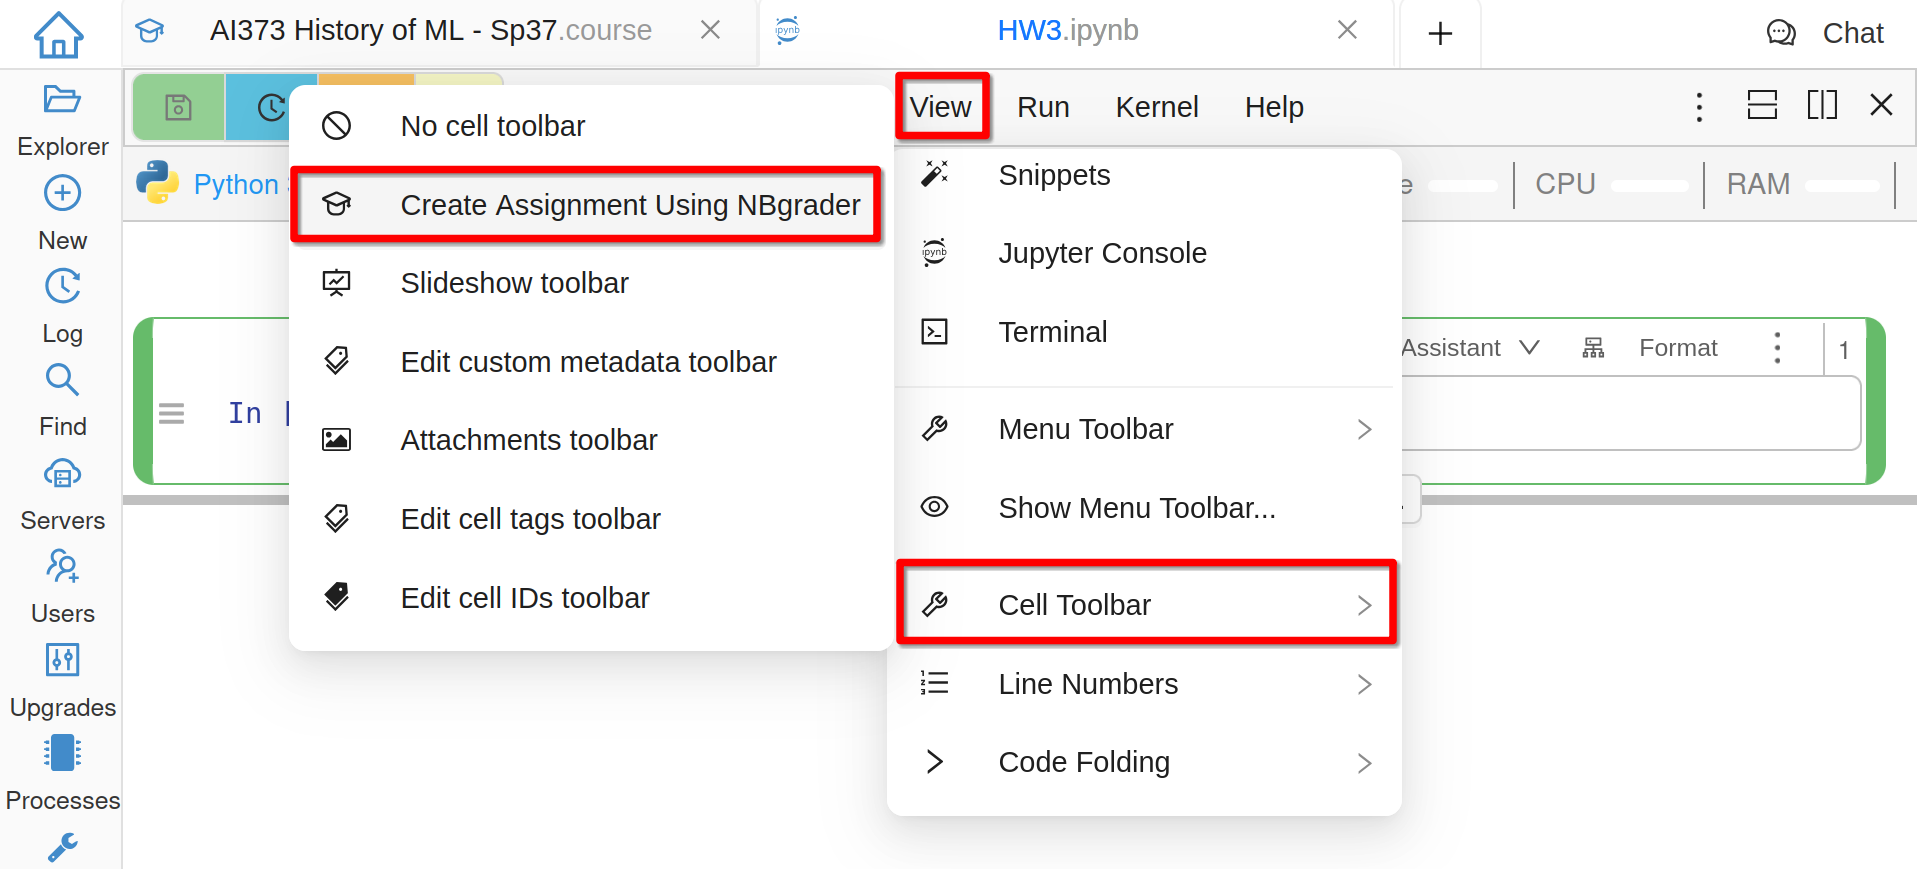
Show nbgrader UI
You will get a button to generate the student version at the top and each cell will have a dropdown for its type in nbgrader workflow:
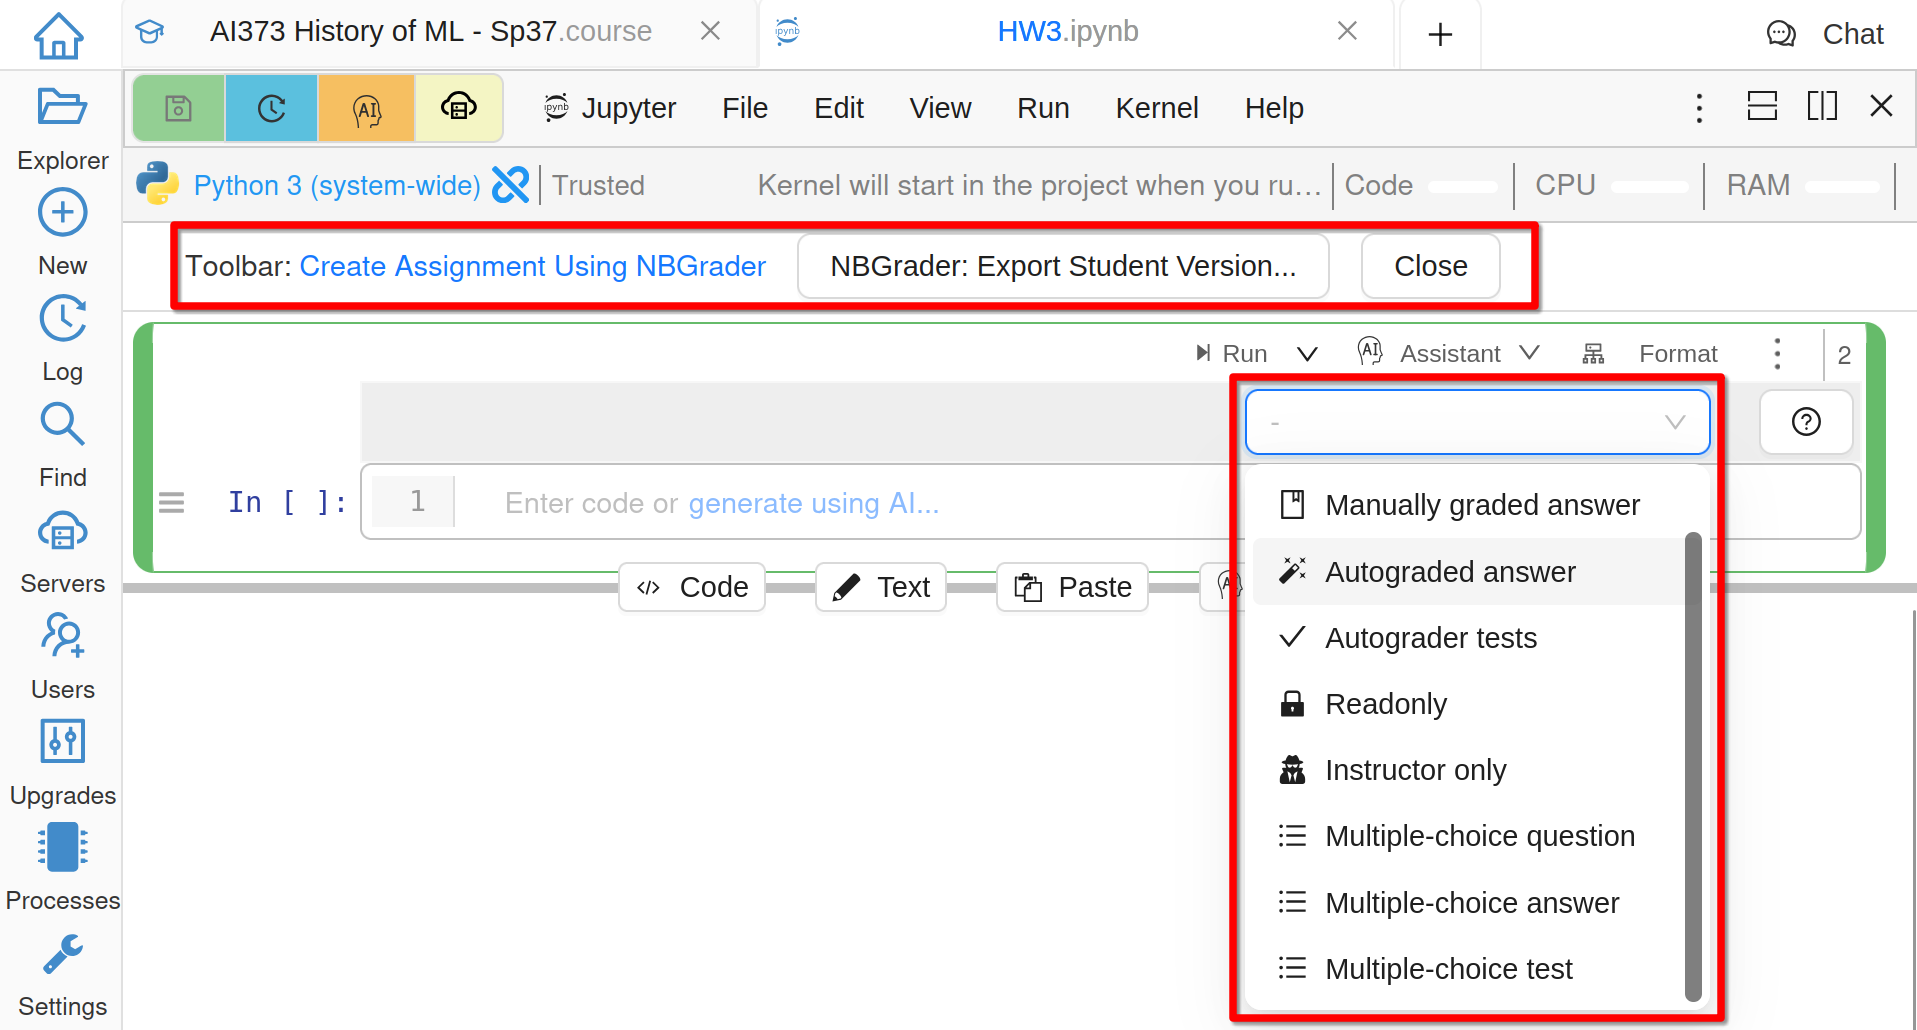
nbgrader Cell Types
Create Questions
When you select a cell type from the dropdown, you will get a sample working snippet that you need to modify for your problem:

Code Snippets For Creating Problems
Student Version
Once your assignment is ready, generate the student version (without solutions and hidden tests) using that button at the top of the notebook. The student version is placed into student subfolder of the assignment folder. It automatically opens in another tab so you can preview it:
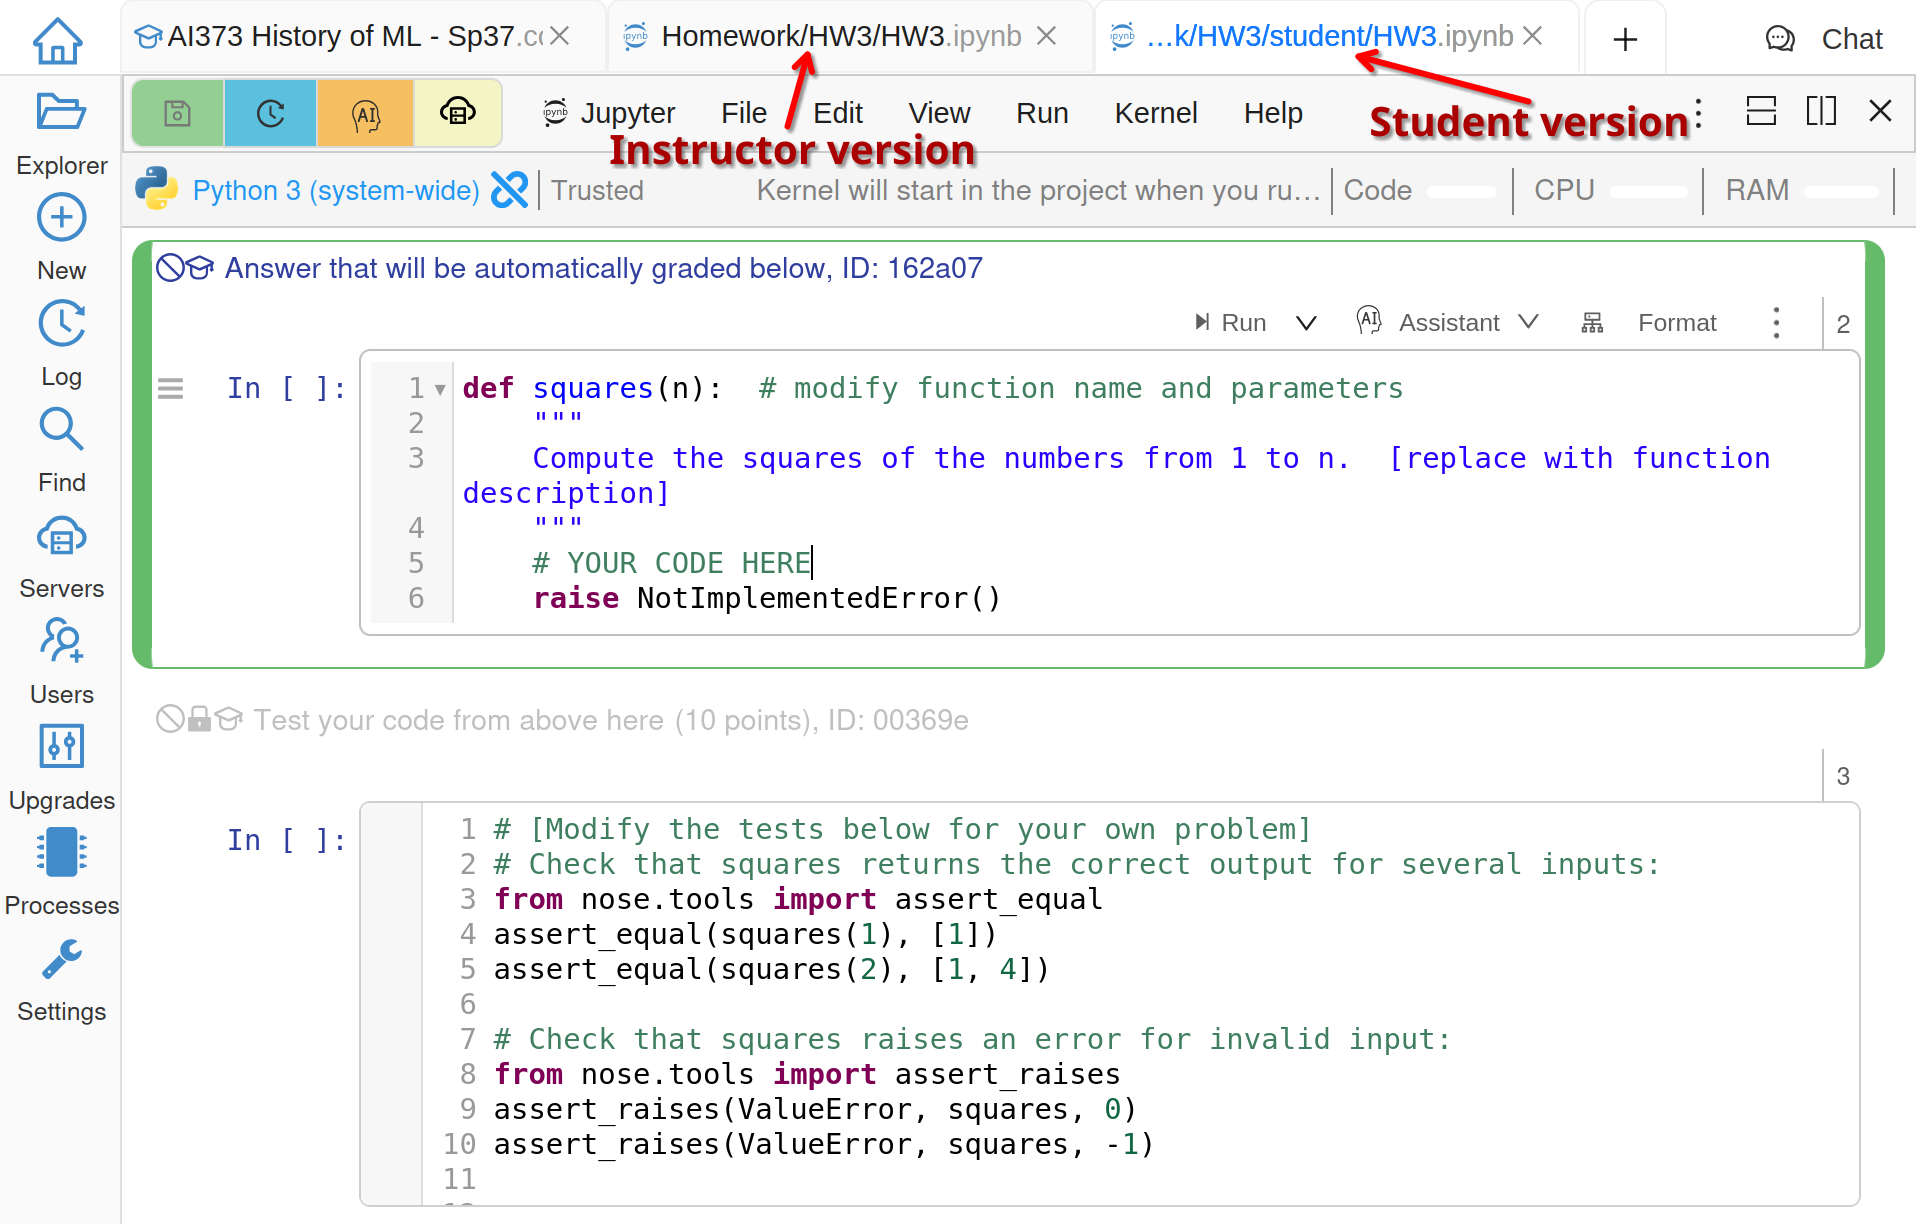
Student Version
Warning
If you are using a previously created assignment for nbgrader, make sure that you add the folder with the instructor version as an assignment in the course file, NOT just the student subfolder.
When you distribute an nbgrader assignment, i.e. one that has student subfolder, only this subfolder will be copied to students:
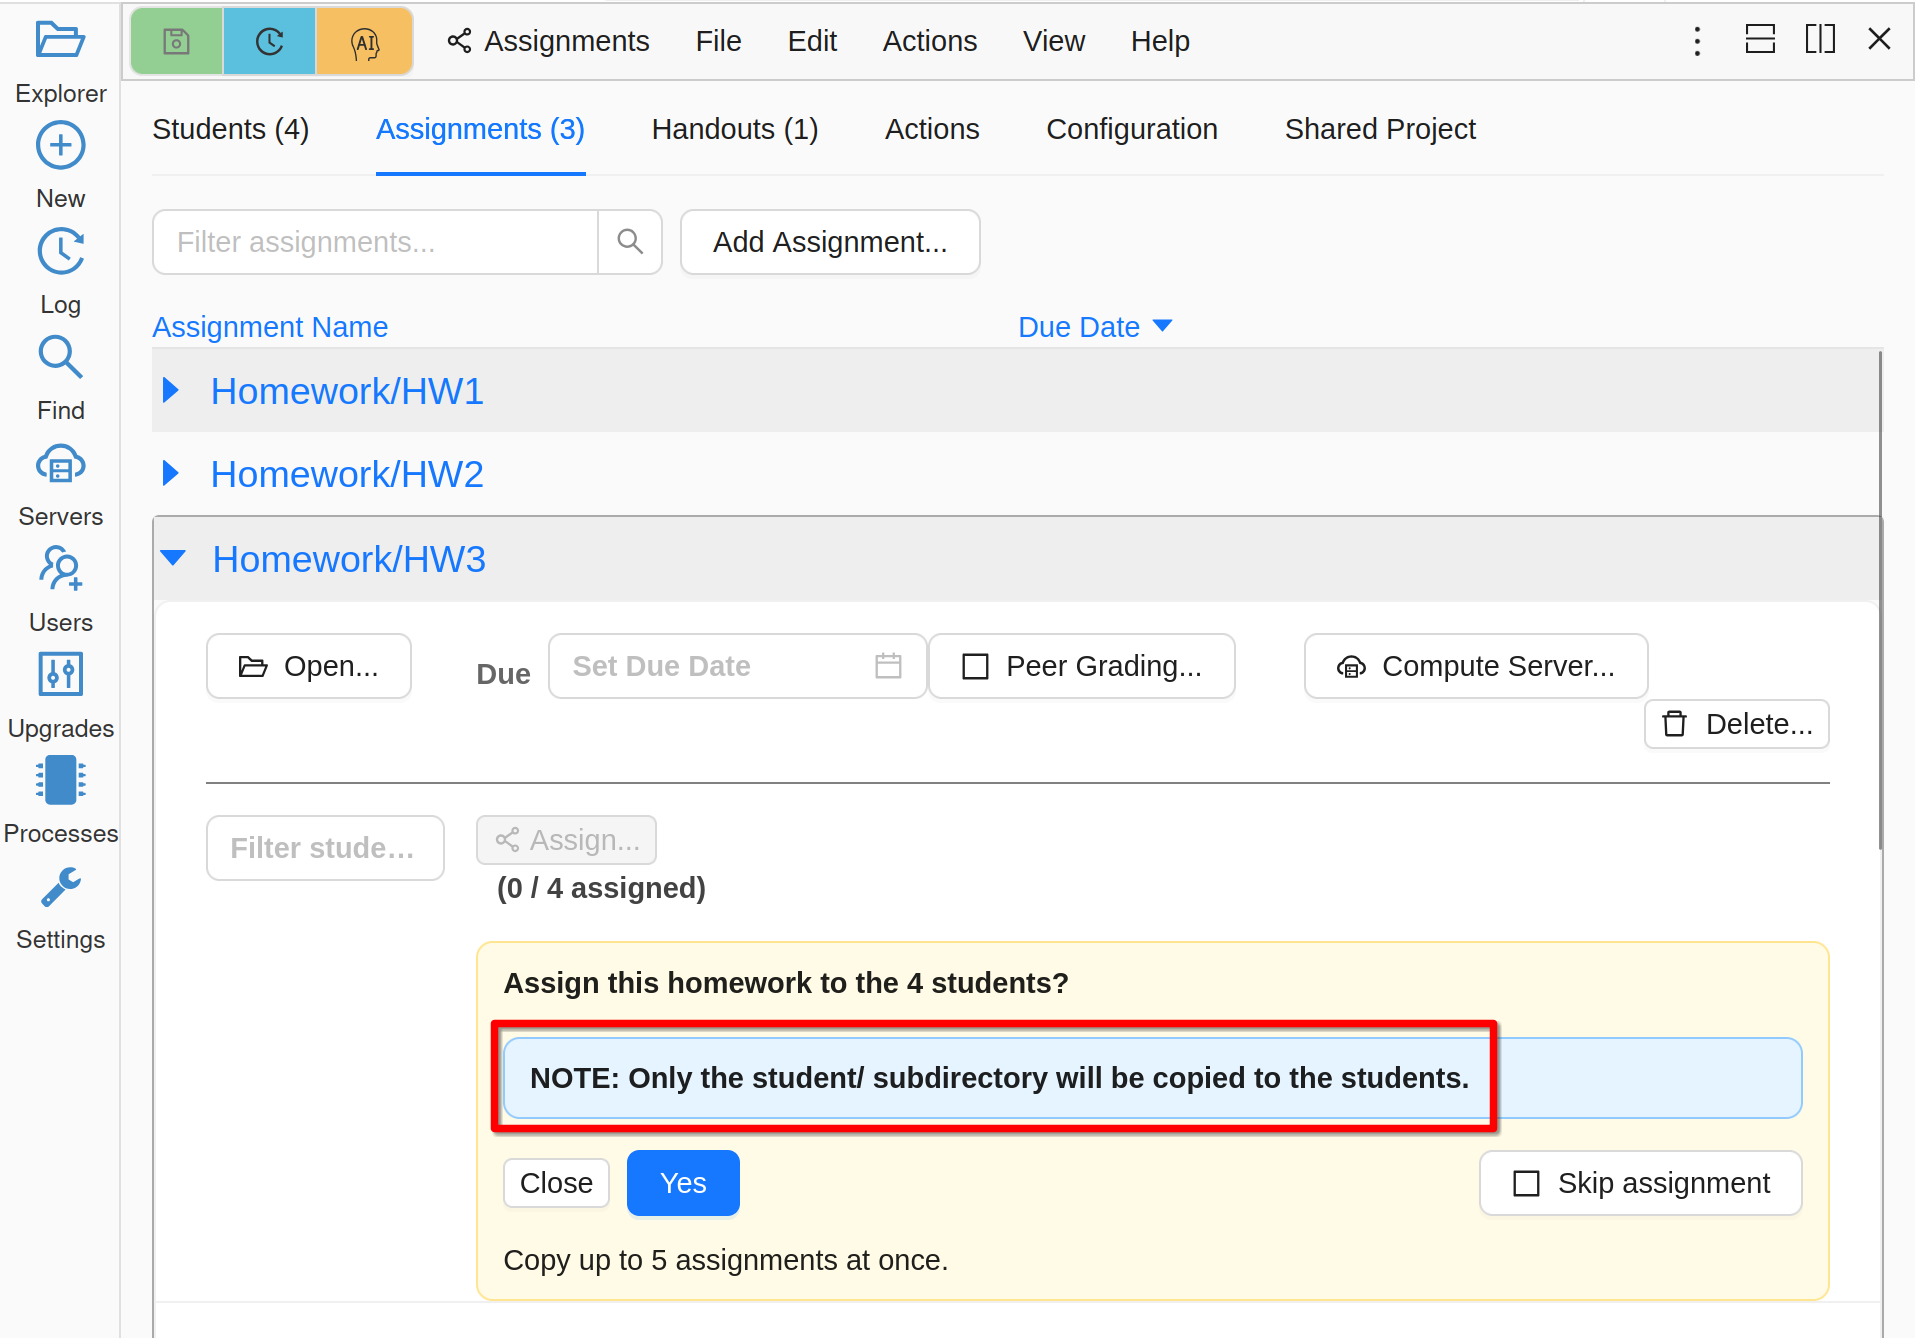
Distribute nbgrader assignment
While students work on the assignment, they can use Run > Validate to check that all open tests pass.
Grading Process
After collecting your assignment from students, you will be able to run nbgrader on them. This grading is done in memory in the student projects (for security) and the results are saved in the course project. Once automatic grading is done, you have to grade manual questions and record their grades:
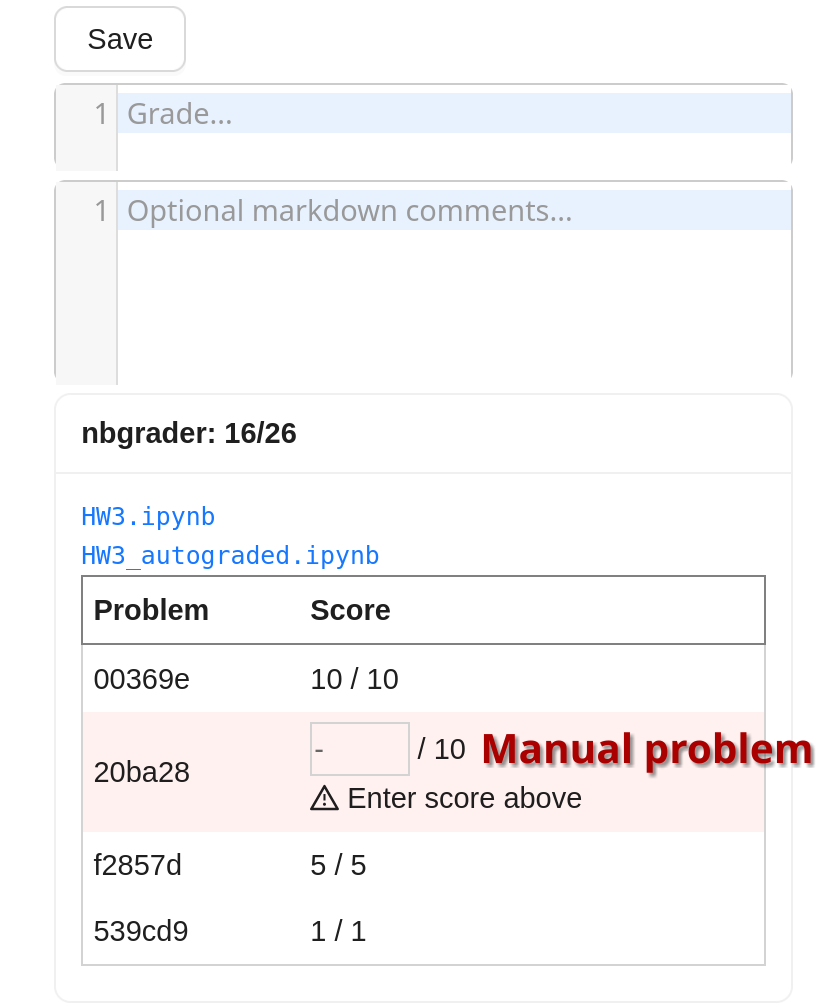
Manual Problems Without Grades
When all manual scores are entered, the overall score is automatically updated:
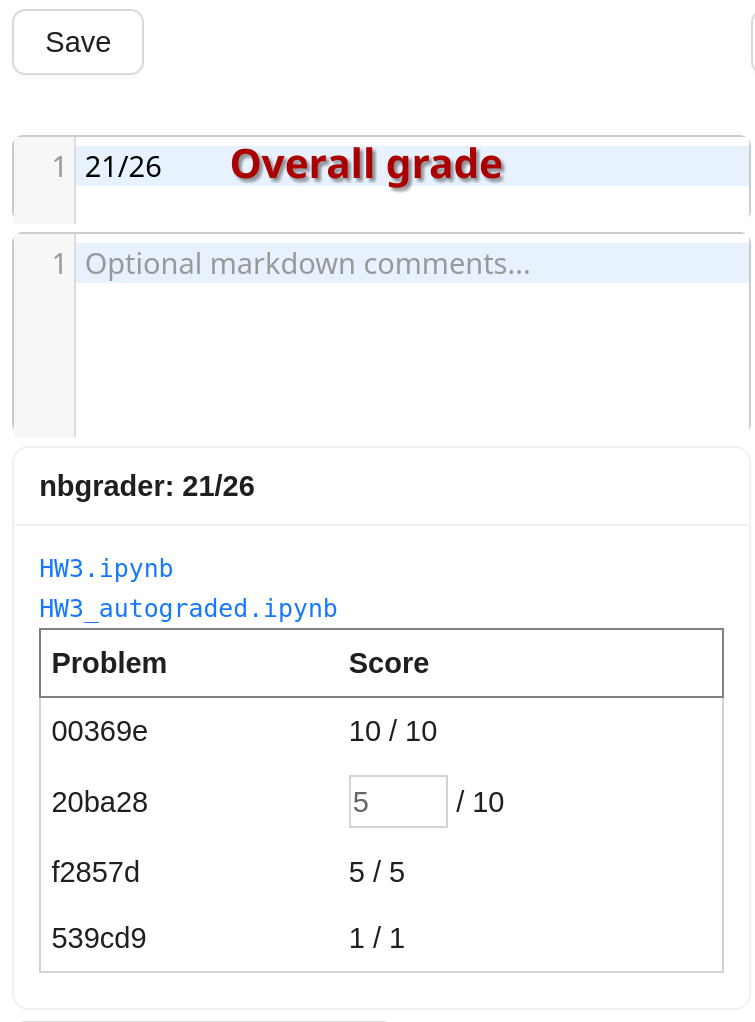
Fully Graded Assignment
The file GRADE.md that each student gets when the assignment is returned shows a table of scores of problems from nbgrader:
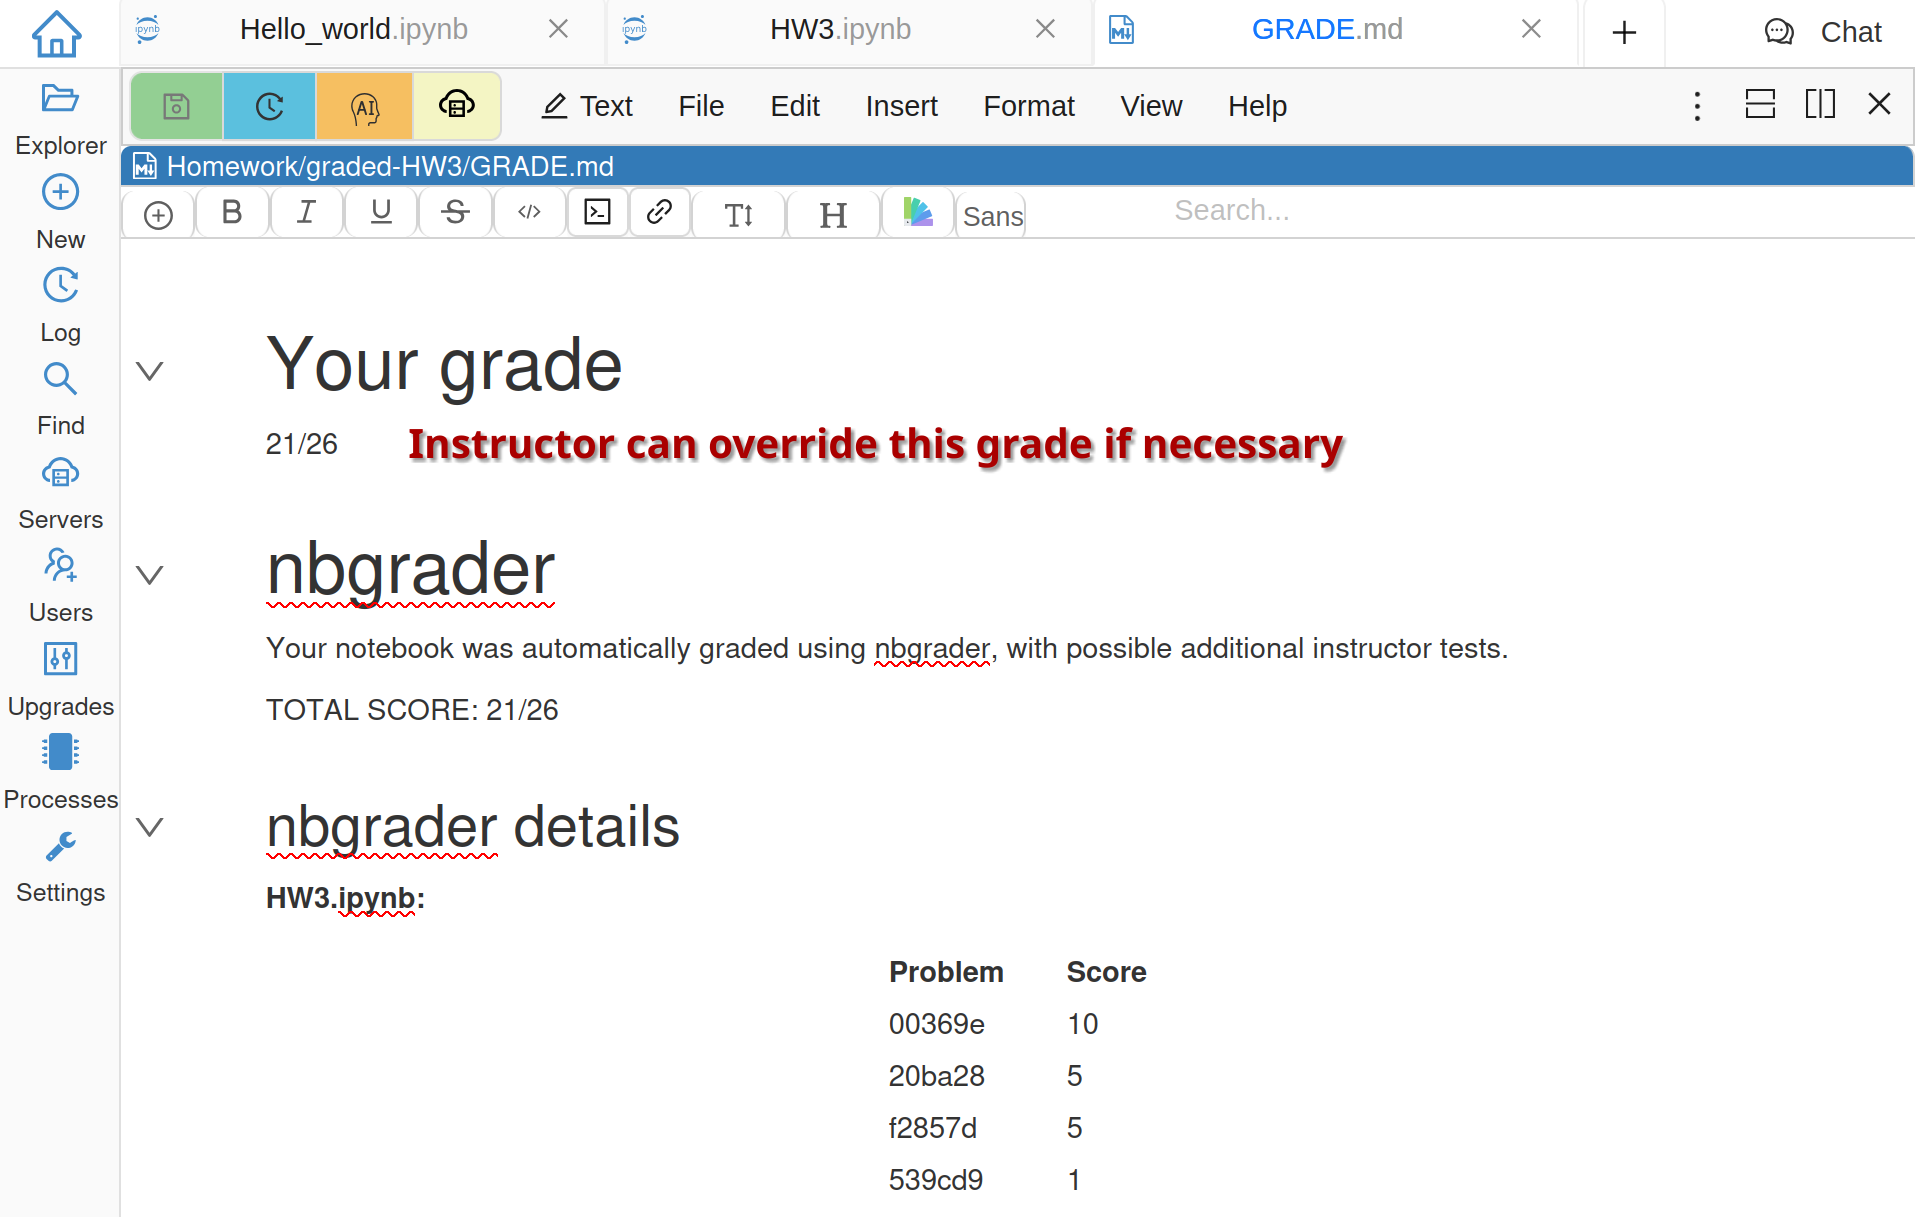
GRADE.md File