Getting Started with Jupyter Notebooks
If you prefer to watch rather than read, this is how to create a Jupyter Notebook in CoCalc:
You can even engage AI Assistant right away!
What’s a Jupyter Notebook?
A Jupyter notebook is a specific filetype with the ending .ipynb, which records an interactive session with a Kernel.
It is made up of cells, which can either store one or more lines of code or formatted text.
When you run a cell – which evaluates the piece of code in the cell via the active kernel session – you can see its output after the calculation is done.
This combination of communicating back and forth with a kernel and adding descriptive text makes this form of document very attractive.
Jupyter Kernels
You can choose the programming language and environment by selecting a Jupyter kernel for the notebook. Popular choices are Python3, SageMath, and R. There many others. Our page on Jupyter Kernel Selection shows how to set the kernel.
Note
Make sure and double-check that you’re working with a suitable kernel for your calculations!
Basic Features
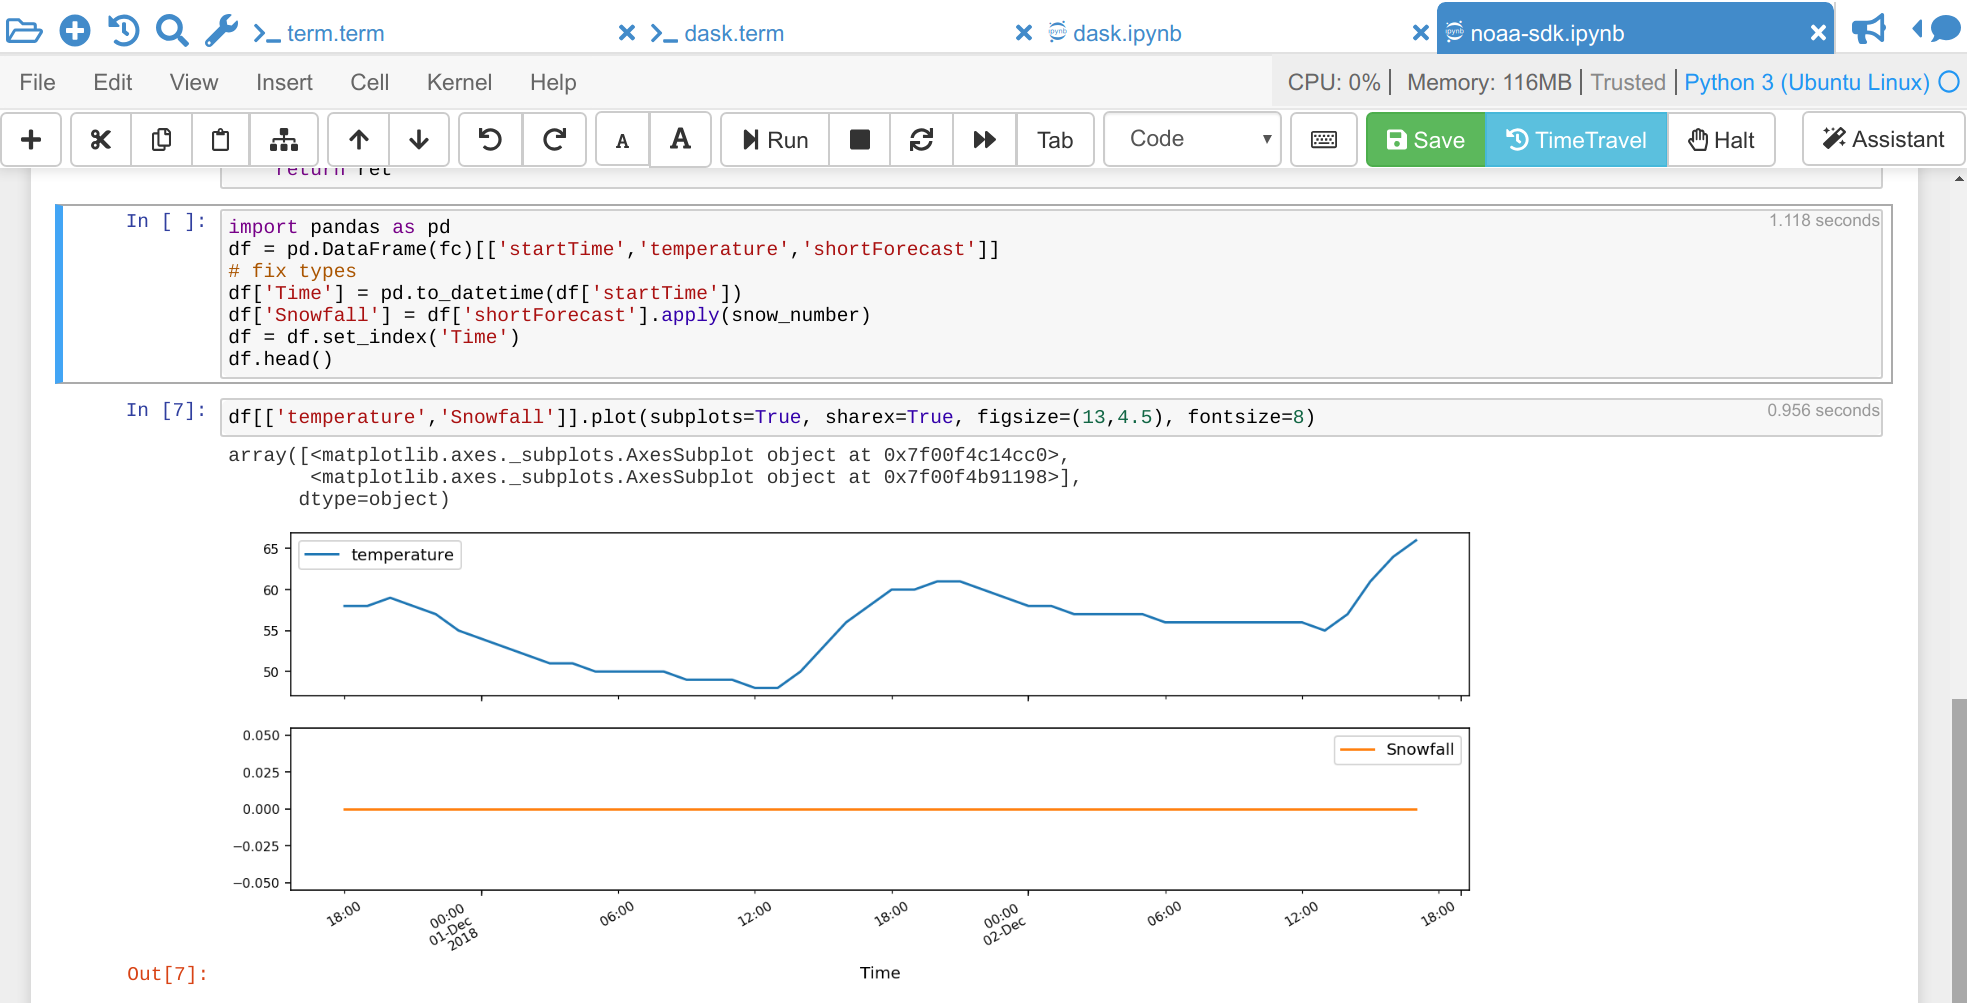
By default, a Jupyter notebook on CoCalc has all CoCalc’s core features, including real-time collaboration, side chat, and TimeTravel. Read more in our blogpost. The basic user interface looks like the following:
menu bar
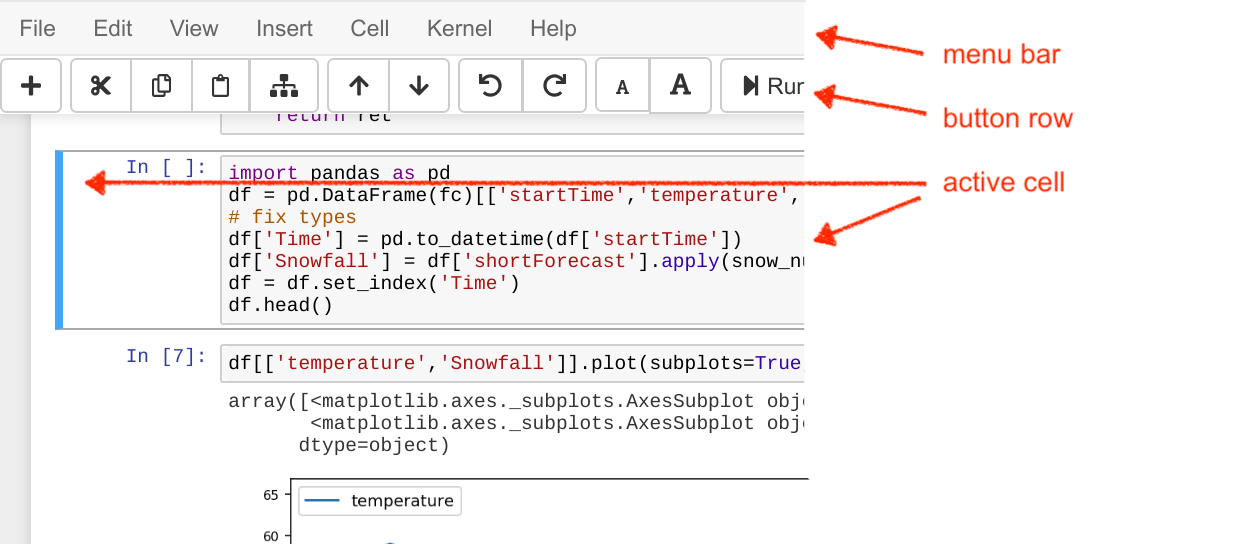
Above the scrollable area for the notebook, there is a menu bar beginning with buttons for “File Edit View …”. The menu bar is contains the button for selecting the kernel, which determines the programming language and version for this notebook.
active cell
In the screenshot above, the blue bar on the left and a blue border indicate that this is the currently active cell. Actions like Run, Delete Cell, etc. operate on the currently selected cell. It is possible to select more than one cell.
execution counter
On the left of each code cell, there is an execution counter In [ x ]. The number x increases each time a cell is being run. After the kernel stopped and restarted, that counter starts again at 1.
code cell output
The output of code cells is below the code. For example, Out [7]: is the output of cell In [7]:. In the right hand corner of the input cell is some information about how long it took to calculate the result.
select multiple cells
Selecting multiple cells in a notebook enables you to copy, move, or delete them in a single operation. It works as you might expect. To select a range of cells, click to select the first, then shift-click to select the last (or vice versa). To select cells that are not in a contiguous range, command- or control-click each one.
Suppose you wanted to delete several cells. To do that, select multiple cells as above, then delete them the same way you would delete a single cell (edit menu or “dd”).
text cells
Text cells are for explanatory text. Select “Text” in the [ Code ] dropdown menu in the button bar to change a code cell to text. You can use Markdown to format the text. Similar to code cells, either Run these text cells to see the processed Markdown code or press Shift+Return. To edit a text cell, either double click it or press your Return key.
saving
One advantage of Jupyter Notebooks is that they save all your input and output in a single file. This means you can download or publish the notebook as it is, and everyone else sees it in exactly the same way.