Jupyter Kernel Selection
Jupyter notebooks support more than a single programming language. The element which instantiates a session and runs the code of a cell is called the kernel.
The currently active kernel’s display name is visible at the top right of the working area. In most cases it also shows a logo, which helps identify it.
When you start a new notebook, the default kernel will generally be whatever kernel you last explicitly selected. You can override this by creating your own default notebook template.
Note
Kernels of existing notebooks are only identified by their name. The actual meaning of it can change between environments, because kernels with the same name could be configured differently. There is no common scheme.
Therefore, after uploading any of your notebooks to CoCalc, you have to double-check which kernel it uses.
CoCalc’s Jupyter Notebook
To select the kernel in a CoCalc Jupyter notebook, click the “Kernel” button (usually in the middle toolbar, depending on your configuration). In the menu that opens, scroll down past interrupt and restart commands to see the choices for available kernels.
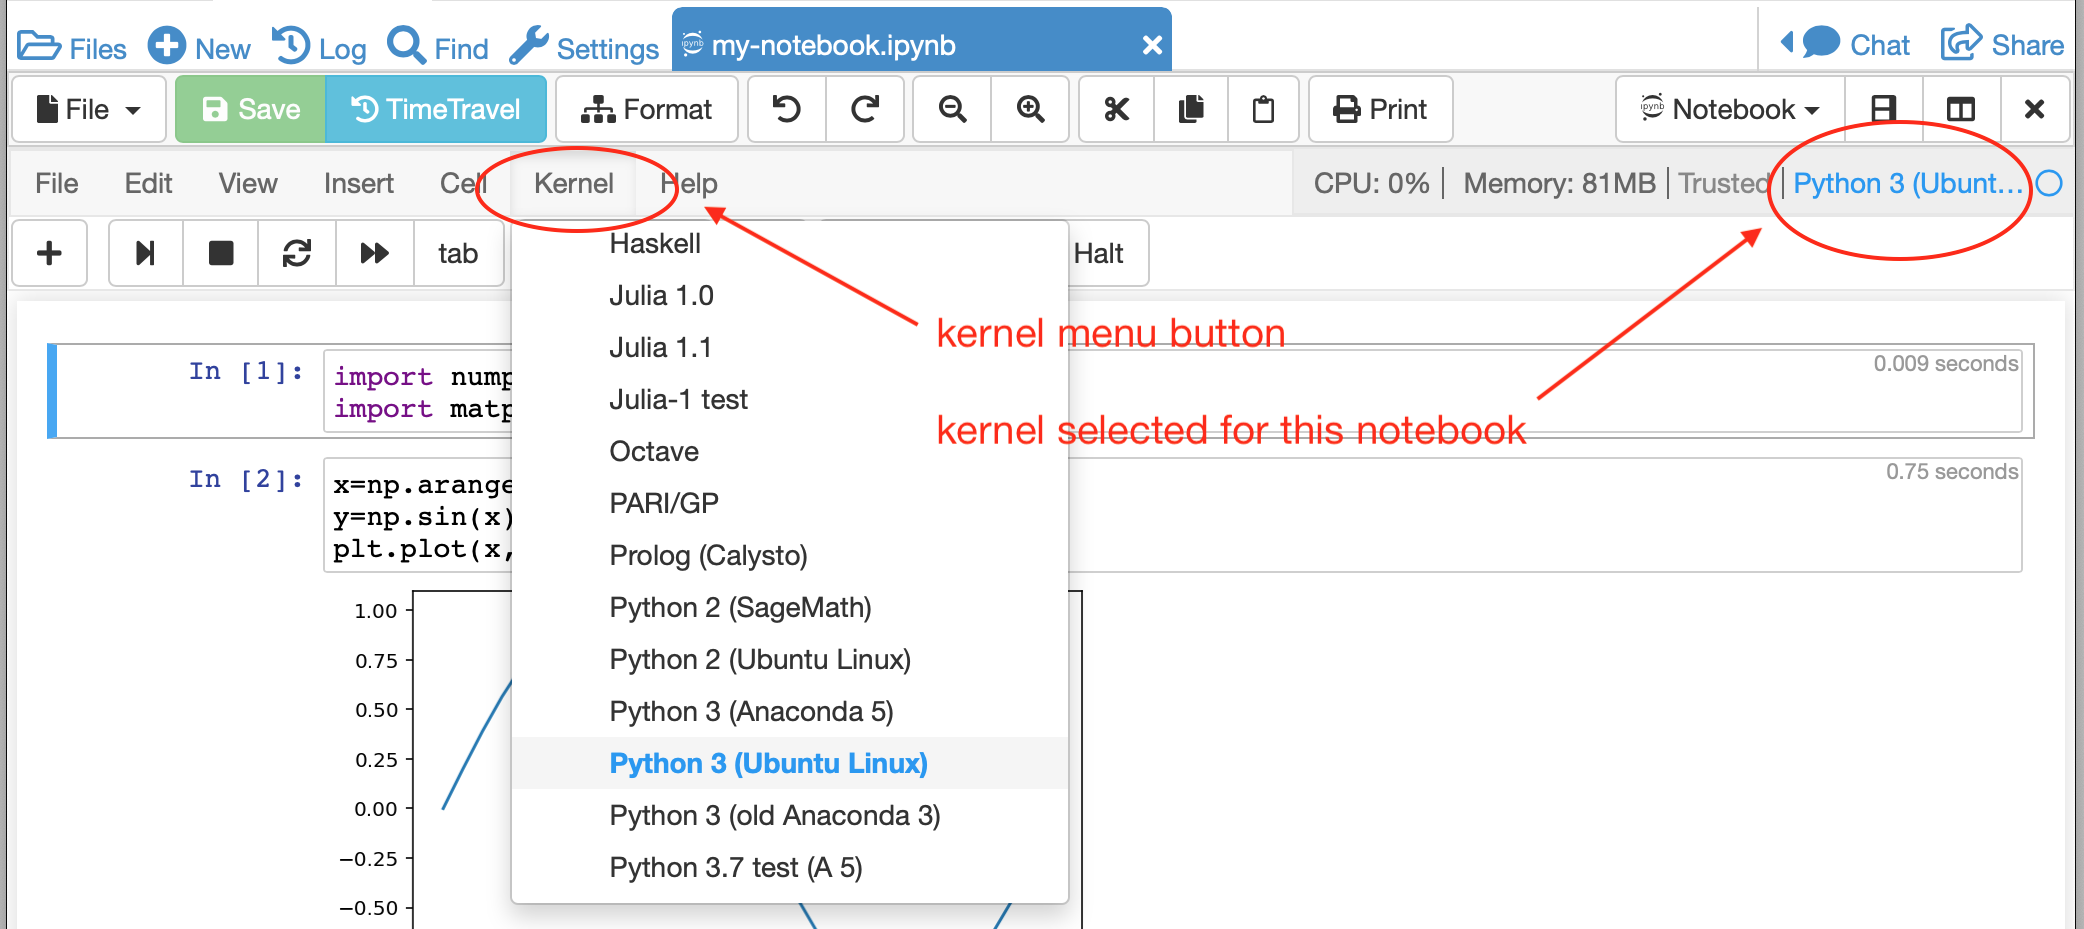
selecting the kernel with the kernel menu
You can view an expanded kernel selection dialog after opening a jupyter notebook by clicking the kernel at upper right.
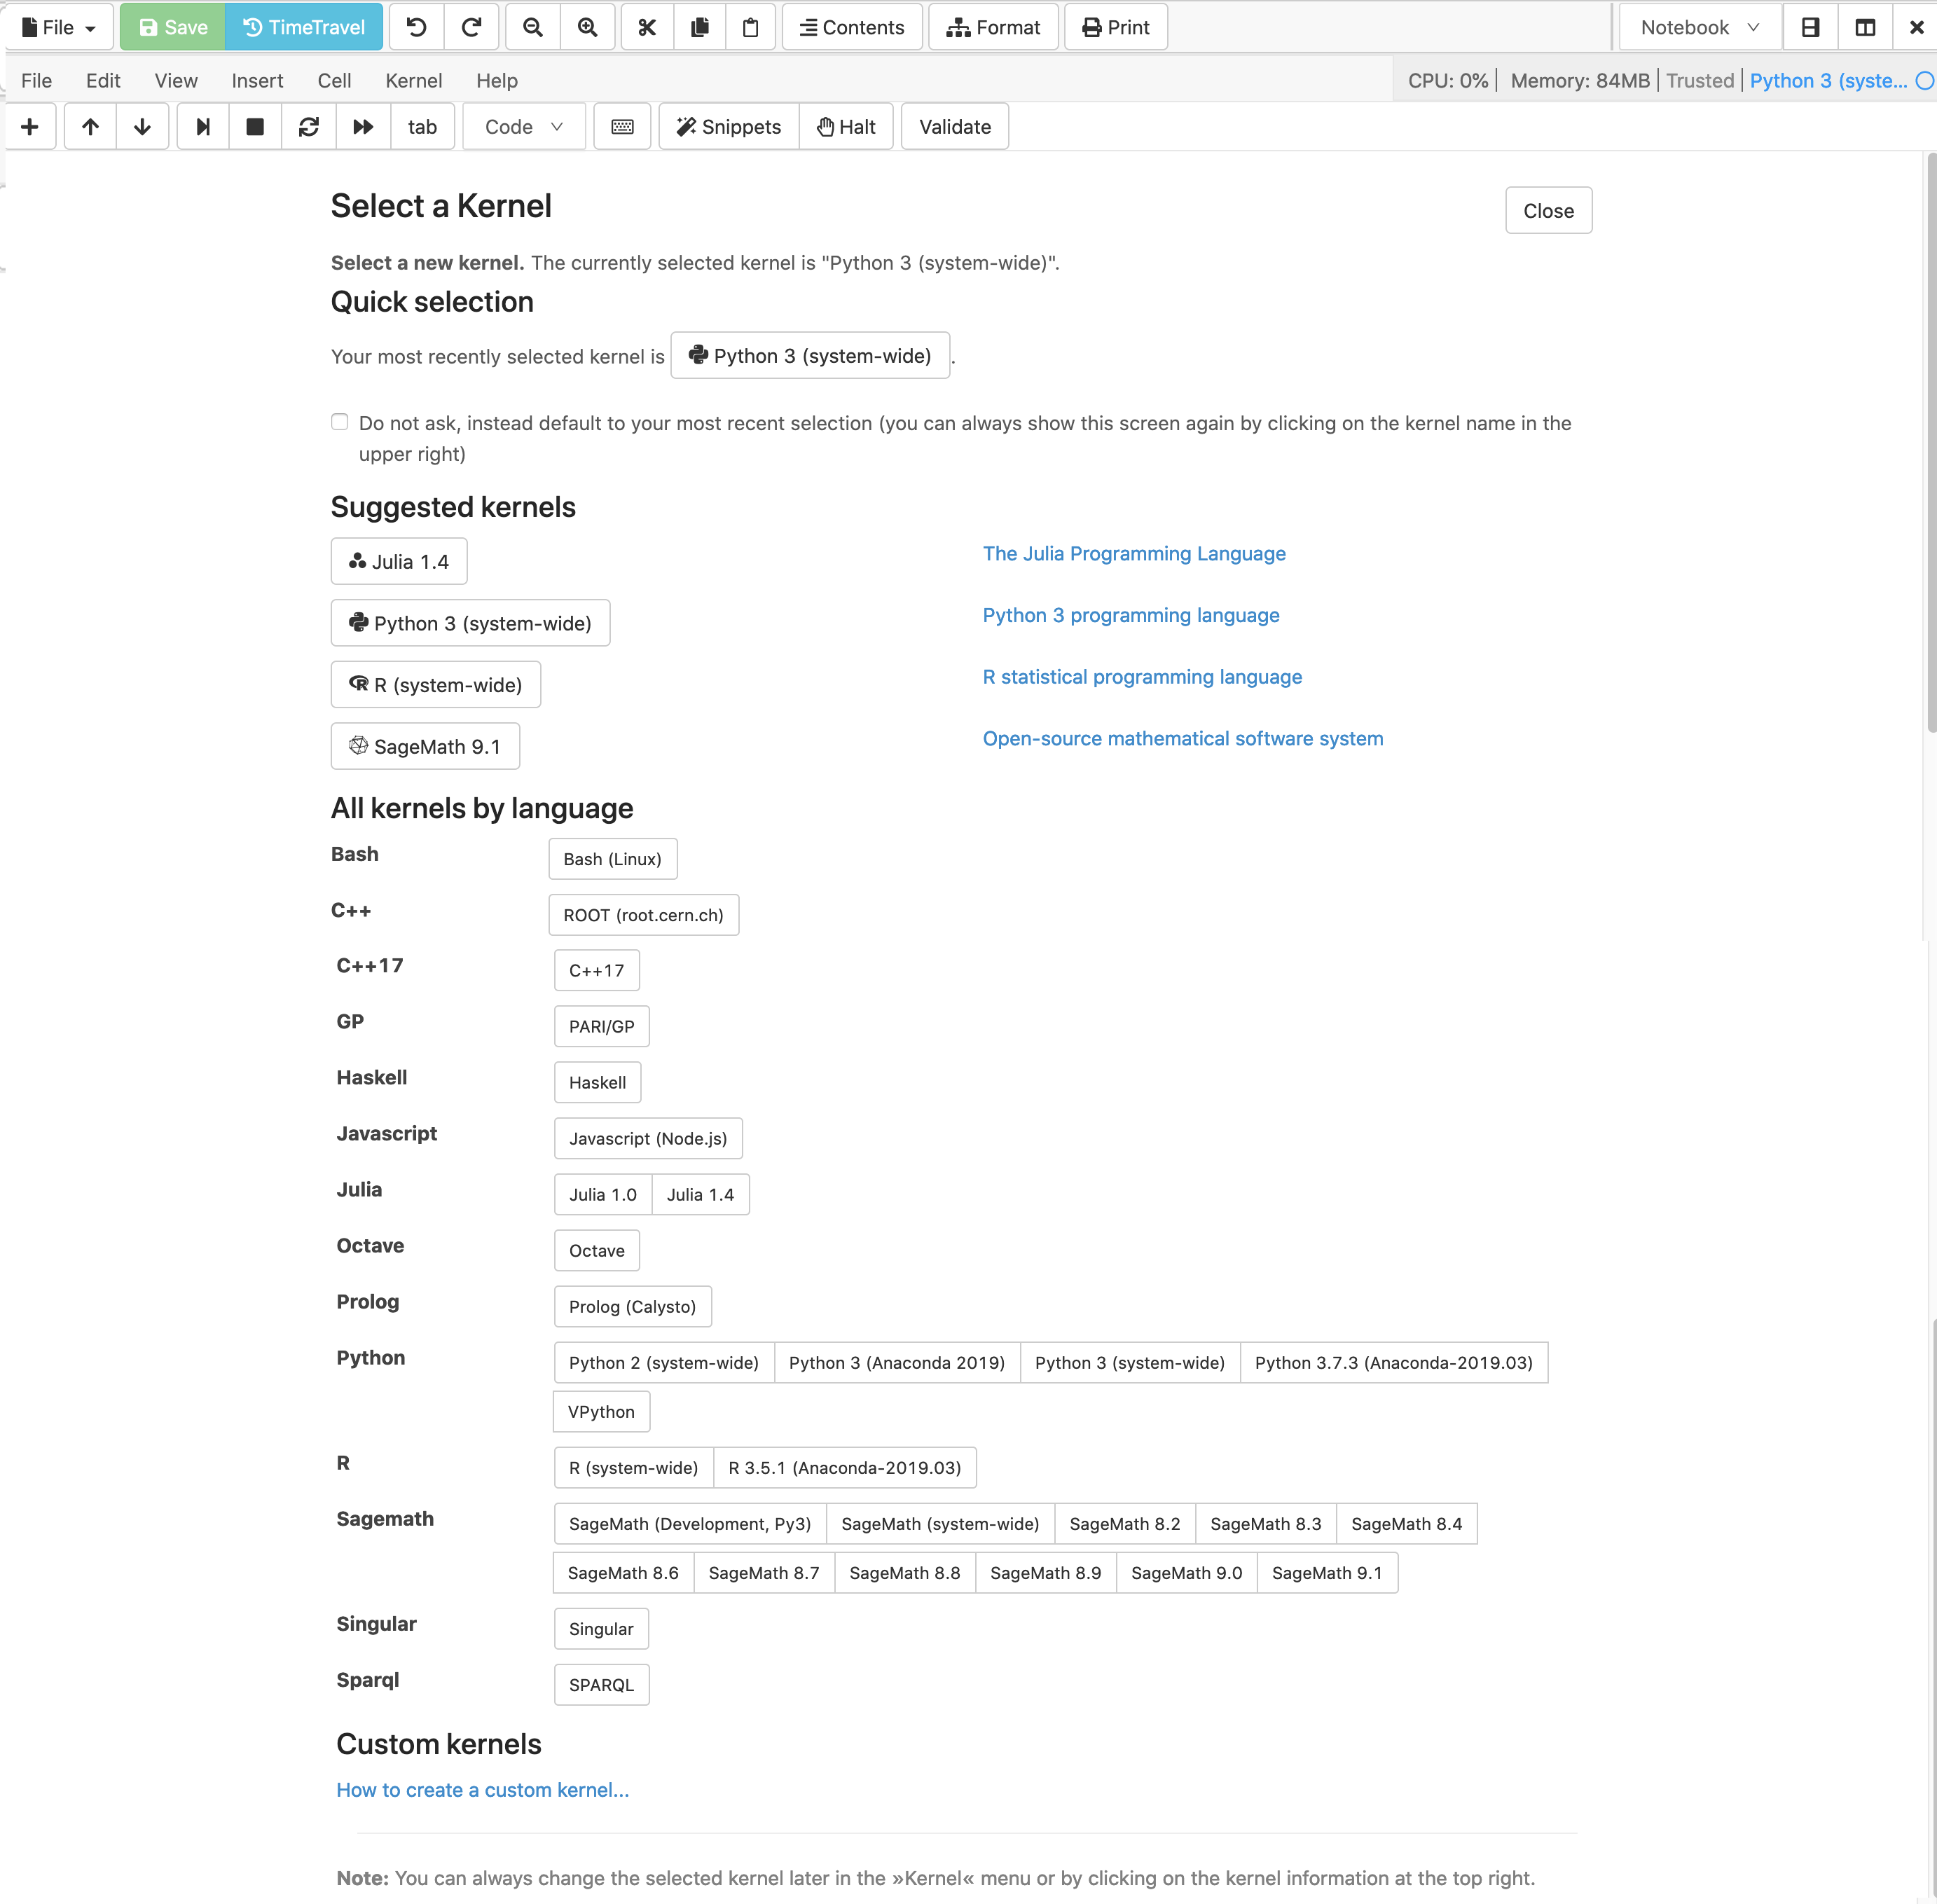
expanded kernel selection after clicking selected kernel at upper right
You can also create a custom kernel if needed. See Custom Jupyter Kernel.
Jupyter Classic
Here is a sequence of steps depicted about how to change the Kernel in a notebook. The current selection is “SageMath”, and it is about to be changed to “Python 3 (Ubuntu Linux)”.
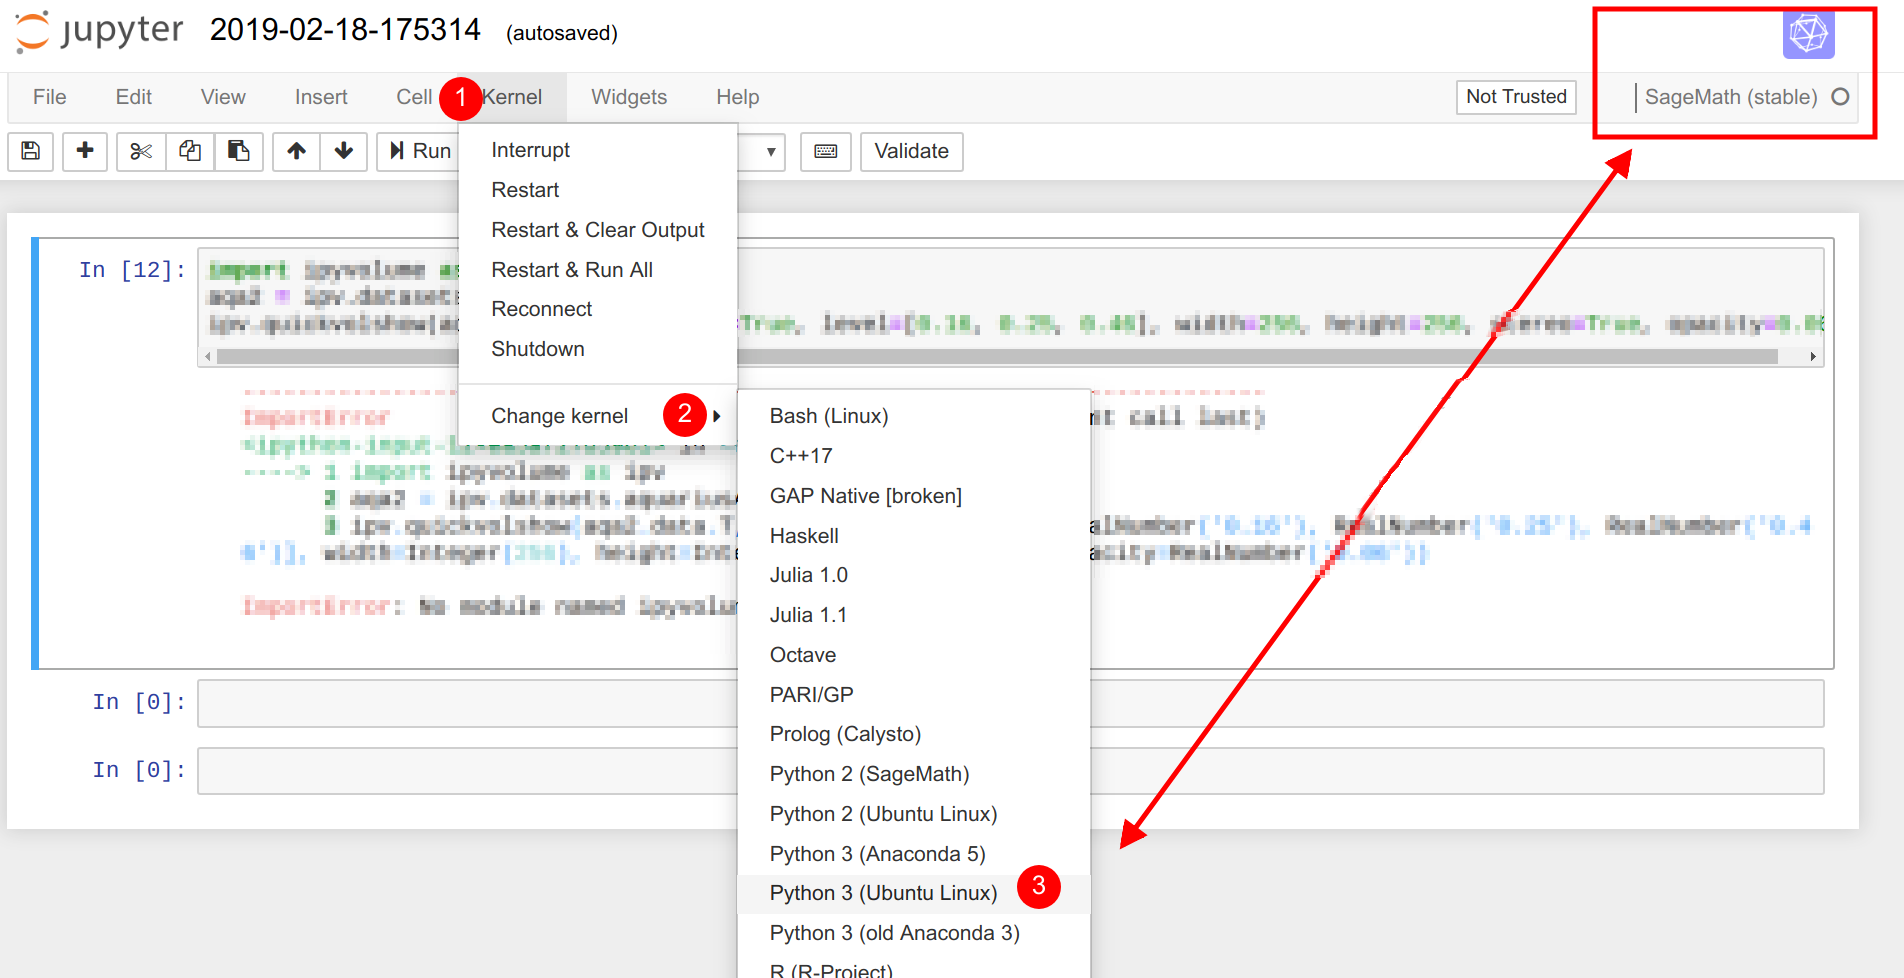
selecting the kernel in a Classical Jupyter notebook
Jupyter Lab
When creating a new notebook in JupyterLab, the Launcher displays icons for the available kernels.
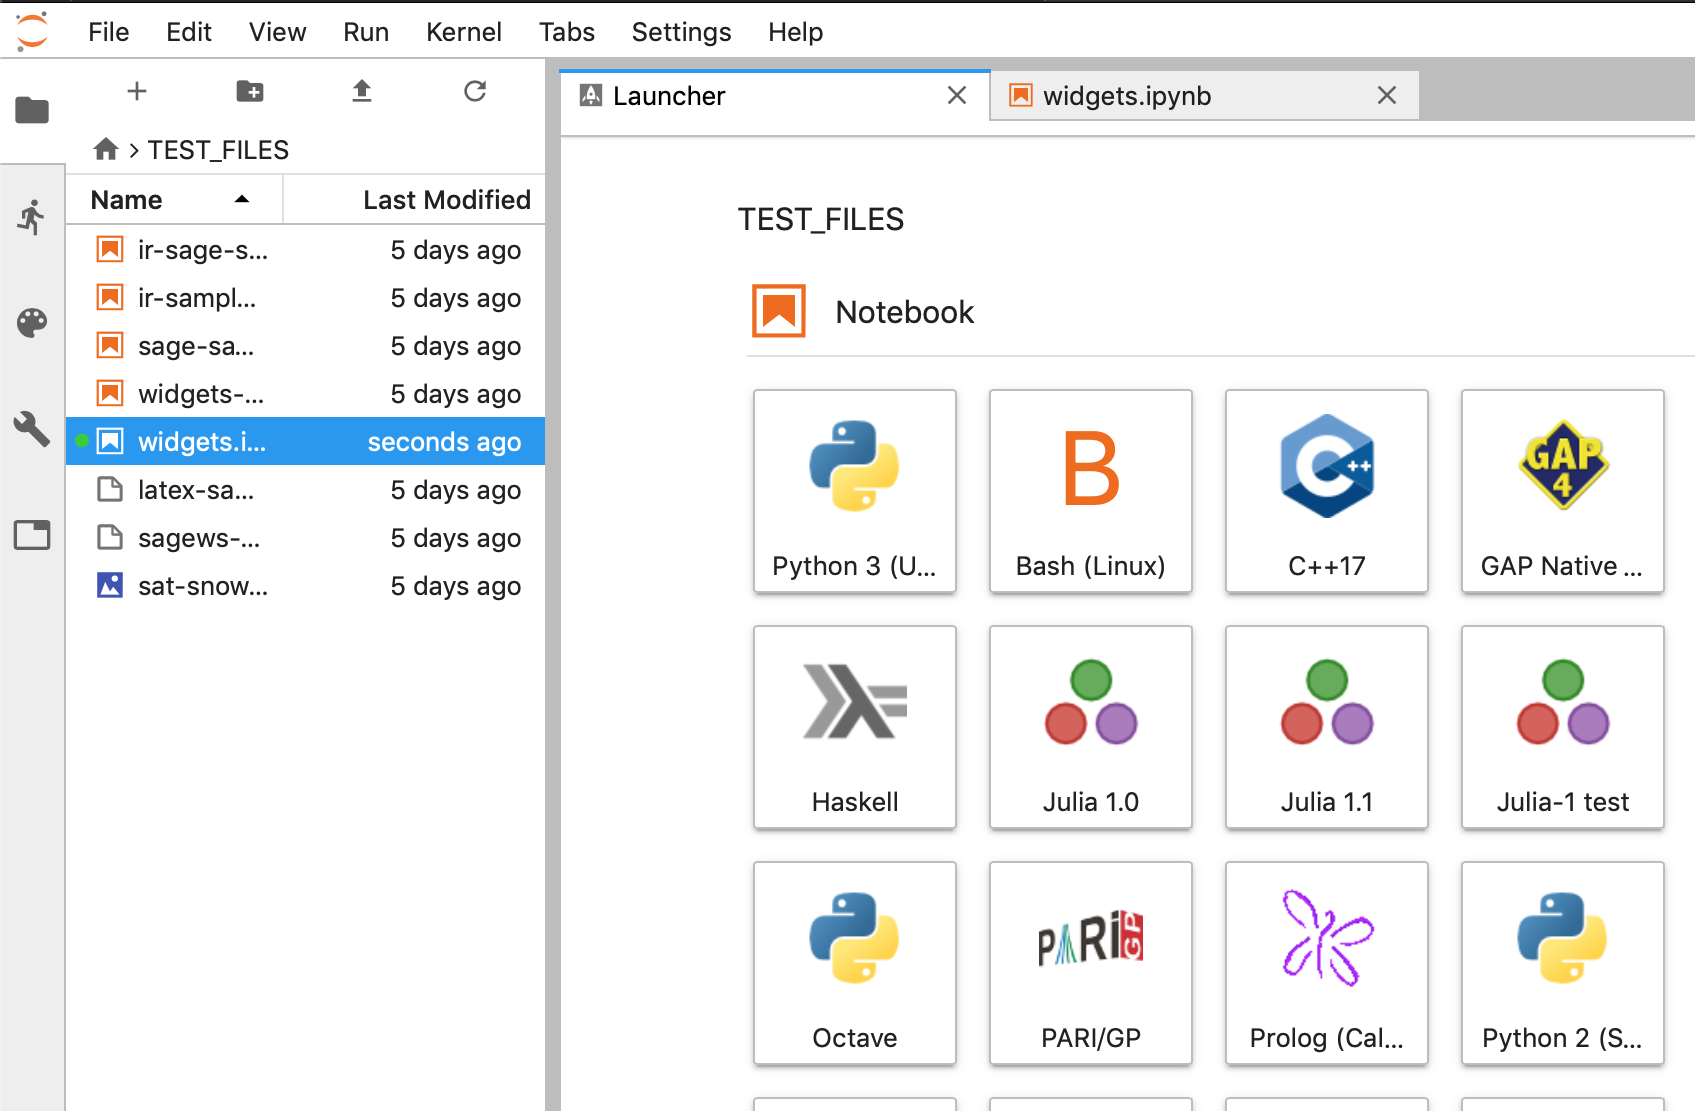
kernel choices when creating a notebook with JupyterLab
Once you have opened a notebook in JupyterLab, you can change the kernel using the “kernel” button in the top row.
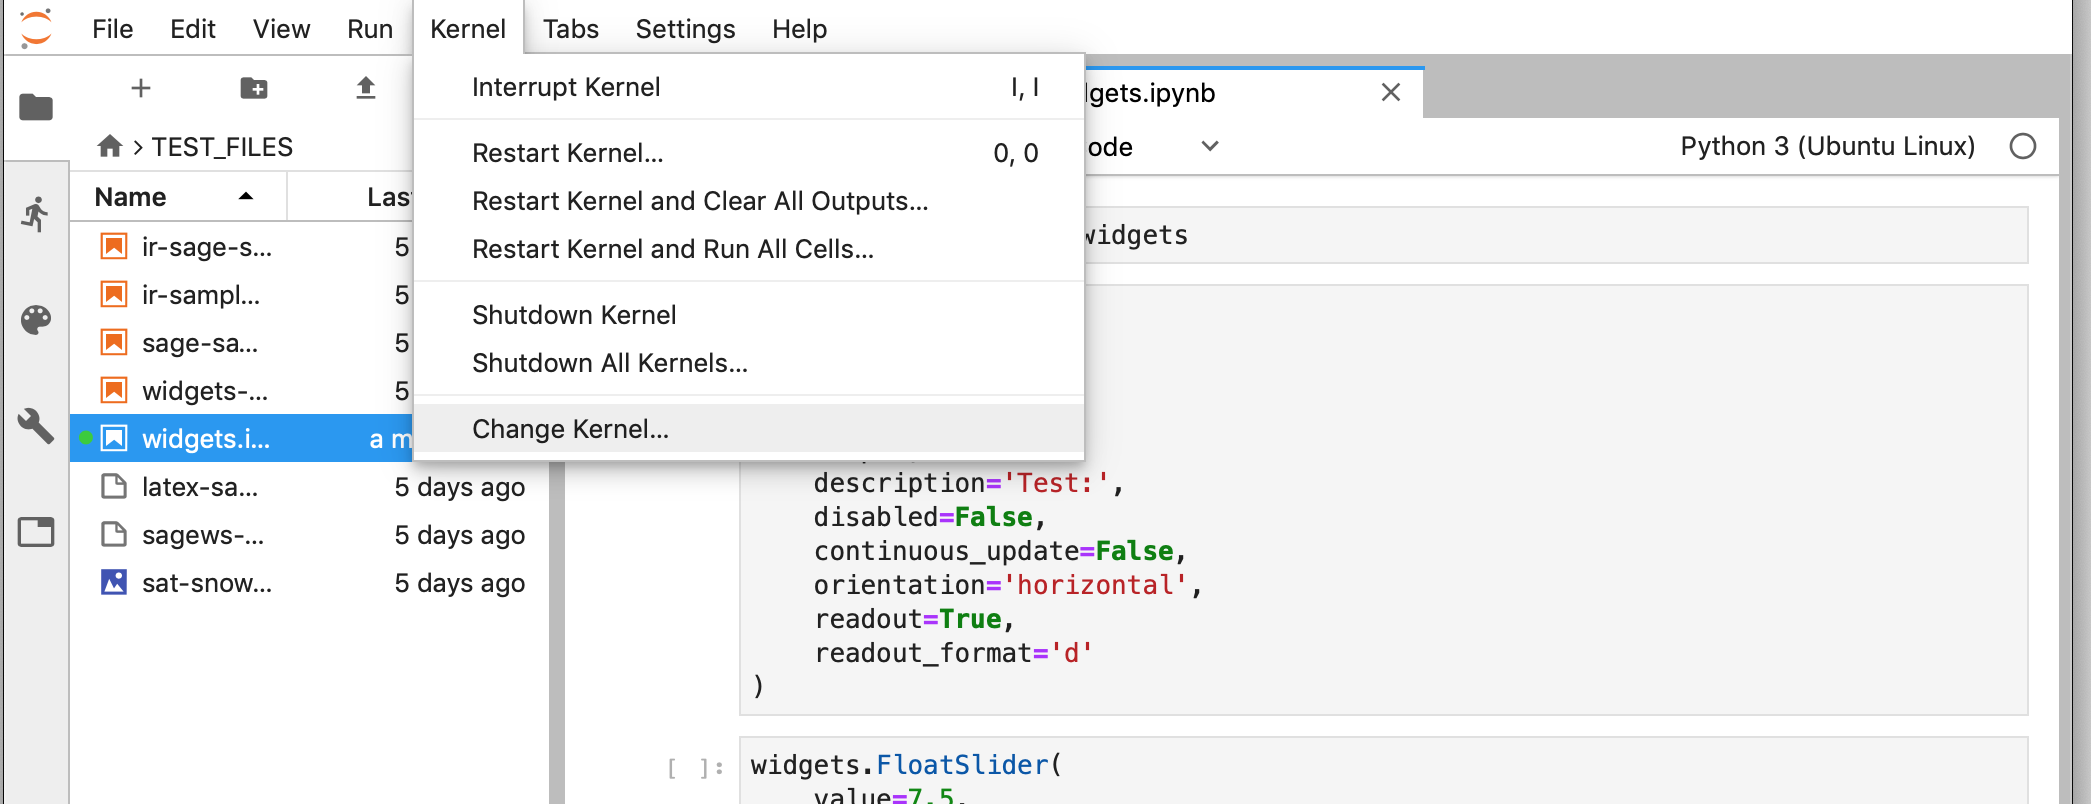
changing kernel of existing notebook with JupyterLab
